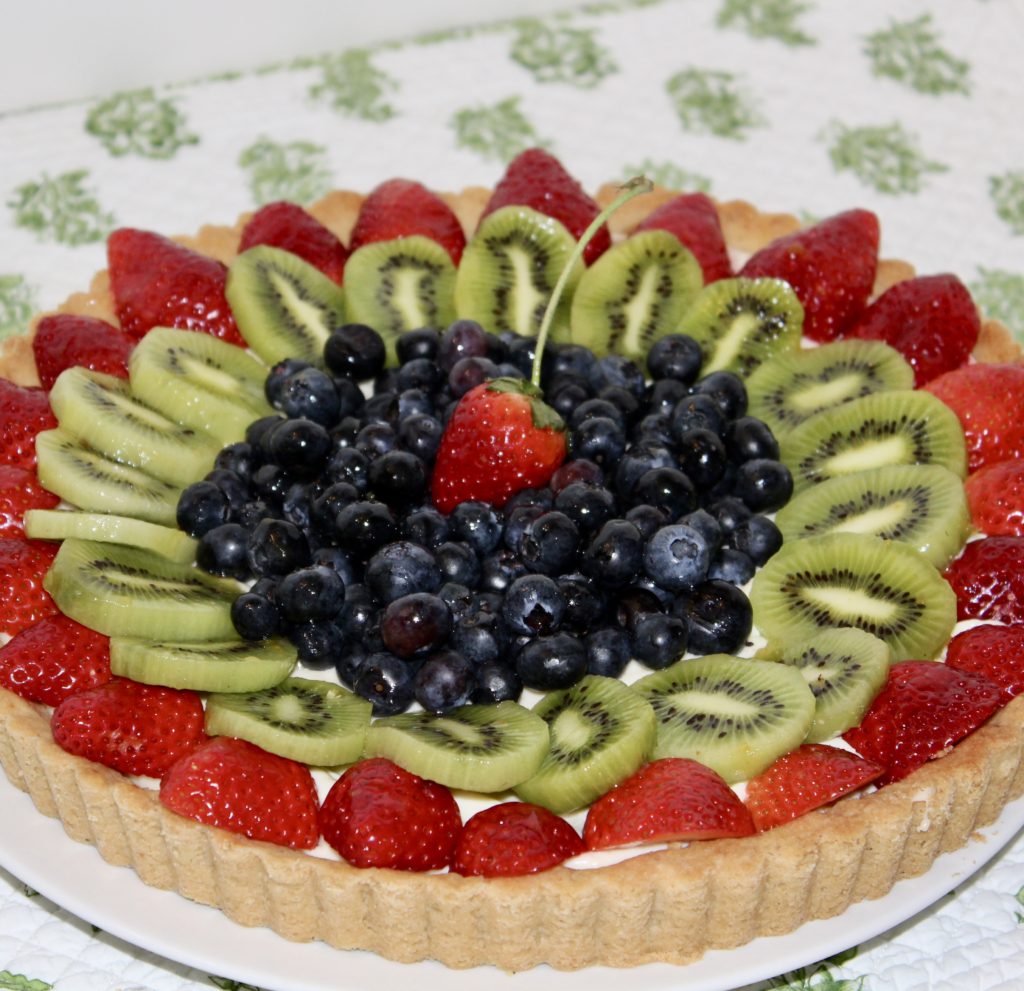
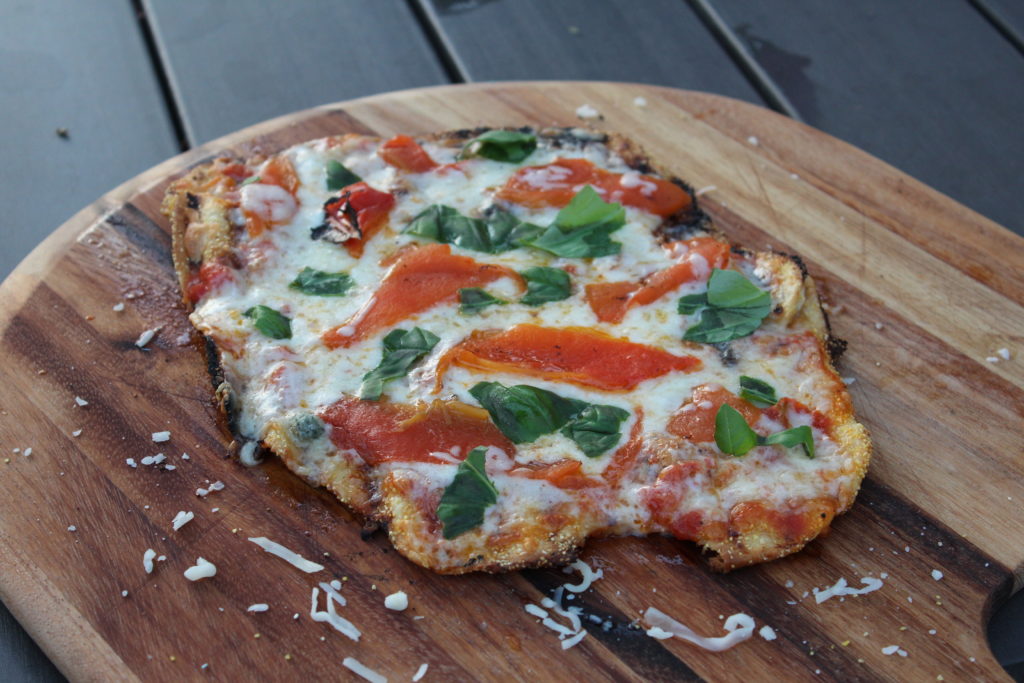
Grilled Pizza

Okay, this just might be the best grilled pizza ever! This recipe is adapted from the best-selling cookbook  Pizza on the Grill, by Elizabeth Karmel. There are 100+ recipes in the book that will fill every pizza craving you’ve ever had and many you’ve never thought of.

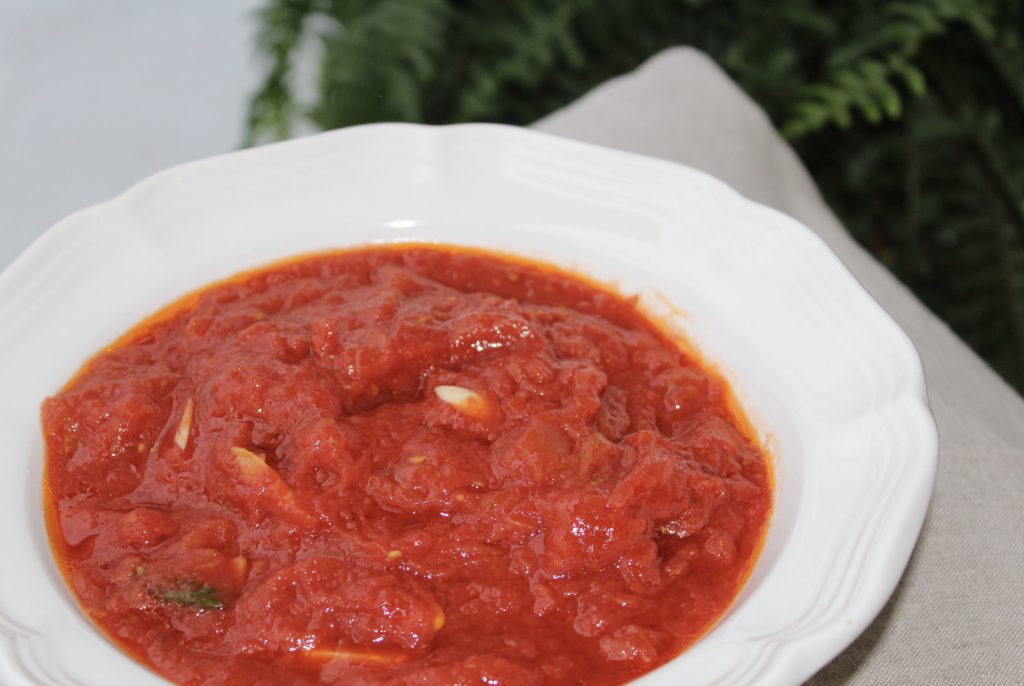
To start, any good marinara would work, but for very little effort you can make a top-notch Marinara Sauce, (this is my favorite) in minutes. If using, make the sauce first and let simmer while you make the dough.

You could purchase the dough, but I find that it is an iffy venture. However, if you have a good pizza parlor close by that will sell you their dough, that is a good option. I would stay clear of most supermarket doughs. Too often, they are  not fresh, they don’t  rise much, look and feel a bit heavy and dense. That is pretty frustrating when you just want to get the pizza going and the dough won’t rise!

This is  a foolproof recipe for Pizza Dough. It comes together and is ready for rolling out in short order.

I cut the dough into 4 or 5 pieces to make it easier to handle and this way, everyone gets their own pizza! If not using all the pieces, wrap the remaining rounds in plastic wrap and put in a freezer bag. This makes it much easier, the next time you want to make it.

Preheat your grill to high, give it a good 10+ minutes to reach very high heat.

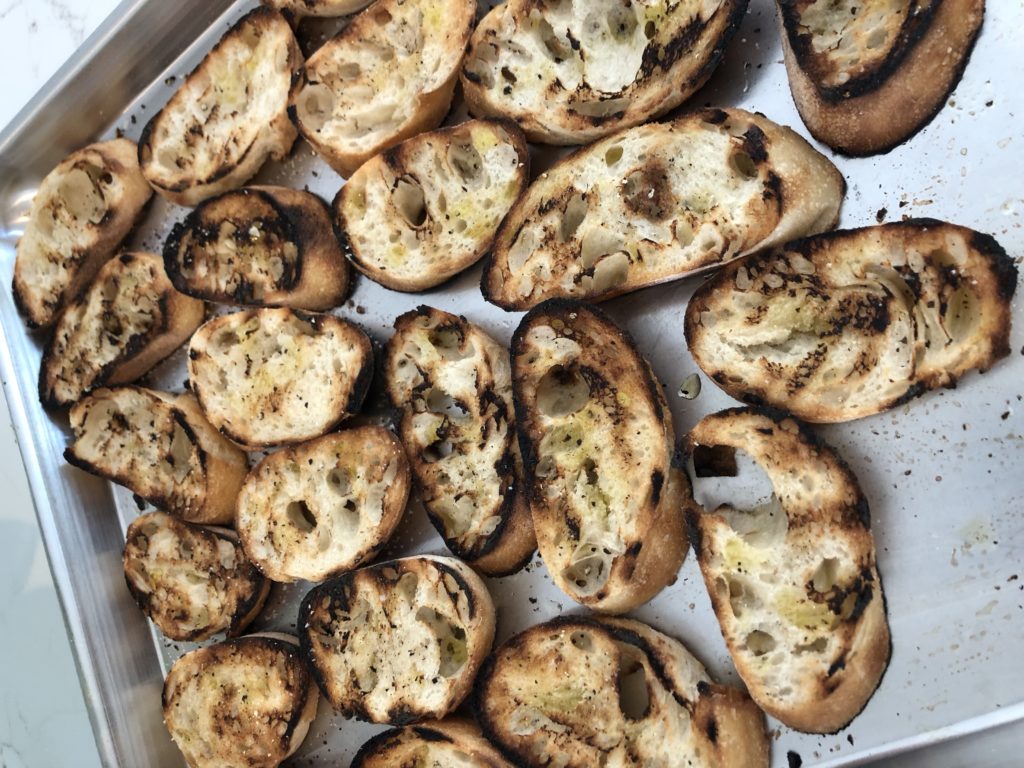
While the grill is preheating, roll out the dough in coarse corn meal…no flour! This is a very thin, crunchy pizza and the corn meal makes a huge difference. Sprinkle and spread a little bit of olive oil on the rolled dough, add a little kosher salt and fresh ground pepper and place on a pizza peel or a sheet pan, oiled side up.

Transport your rolled out dough, tongs and a large spatula out to the grill. With two hands lift one side of the dough, lay the free end onto the grill, away from you. The oiled side should go onto the grill.  Close the cover and stay close because this only takes about 2-3 minutes. Check after 2 minutes, if the dough bubbles a bit (and it should if the yeast is fresh), just deflate the large bubbles with the edge of the tongs or spatula. You will know it is done when you see the edges browning and when you lift the edge with the tongs, it should be stiff, like a plank. I prefer mine with a bit of char, so I leave it until it has a bit of burn on the crust. Remove the crust when it is to your liking.

With a pair of tongs and the spatula underneath to support it, remove the crust and put the uncooked side on your sheet pan or pizza peel, when transporting into the kitchen. This allows the cooked side to cool a bit and not steam and get soggy. If I am doing this for company, I will often prepare the crusts up to this stage, before anyone arrives.

When ready for the final cooking, sprinkle and spread a little oil on the raw side of the dough. Flip the dough over and  to the cooked side, add a small amount of sauce and spread it around. Do not overdo it,  a little goes a long way. Add your cheeses and toppings to your liking. The combinations, as you know are endless!

Turn your grill down to medium and with your tongs, slide the dough off of your sheet pan and onto the grill. This is where you will be pleased that it is not a really large, cumbersome pizza! Let it cook for about 5-7 minutes. It really depends on how hot your grill is, but again, stay close and with your tongs, lift and keep checking for doneness. When it is to your liking, lift the edge with your tongs and slide the spatula under the pizza, for support and transfer it to your sheet pan. You are now ready for the yummiest pizza you will ever make!

I know this sounds daunting, but believe me it is pretty simple. Try starting with only one or two pizzas, don’t overwhelm yourself with more than that until you’ve tried it and are comfortable. This will very quickly become a family favorite.

VARIATIONS
The simplest is Margherita, with the marinara, mozzarella and add fresh basil leaves when it comes off the grill. Adding pesto and roasted peppers, is another wonderful combination.

Try an all white pizza, with goat cheese, ricotta, and mozzarella. Hot off the grill, top with arugula, lightly dressed with olive oil, lemon juice, salt and pepper.

Shrimp Scampi pizza is also a winner, definitely one of my favorites.


Pizza Dough

This comes together quicker than the time it takes to run to the store and buy some! Give it a try and I promise you will not be disappointed.

1 cup lukewarm water
1/4 cup olive oil
1 1/2 teaspoons sugar or honey
1 package rapid-rise yeast (2 1/2 tsp)
3 cups all-purpose flour
1 1/2 teaspoons kosher salt

If your kitchen is cool, preheat the oven to 150º or the lowest setting. If it is a warm day, you could leave it outside, covered and in a protected area.

Pour the water into the work bowl of a large food processor or stand mixer. Sprinkle the oil, sugar and yeast over the water and pulse several times until mixed. Let sit for a minute or two. Add the flour and salt,  process until the mixture comes together in a ball. The dough should be soft and slightly sticky. If it is very sticky add flour, 1 tablespoon at a time and pulse until smooth. If it is too stiff, add water 1 tablespoon at a time and pulse until smooth.

Turn the dough onto a lightly floured surface; knead by hand to form a smooth, round ball. Put the dough in an oiled bowl, turn it over several times to coat it with oil, drizzle a little oil over the top and cover tightly with plastic wrap. Place in a warm spot (outside in sun, if possible) or turn off the preheated oven and put it in the oven, until the dough  has doubled in size, about 15 minutes.

Once the dough has risen, punch it down and knead on a lightly floured surface for 1 to 2 minutes until smooth, Divide into 3, 4 or 5 pieces, depending on the size pizza you want. Smaller is easier to handle and then they are a more personal size and everyone gets their own. When you roll it out, use coarse corn meal instead of flour for a very tasty, and crunchy crust. The difference is amazing.

The dough may be made ahead, wrapped individually, put in a freezer bag and frozen for up to a month. Thaw to room temperature before using and roll out in coarse corn meal, no flour!


Marinara Pizza Sauce

Use for the topping on grilled pizza, as a simple sauce over pasta or as the sauce for chicken parmesan. This freezes quite well, with no loss in texture or flavor.

INGREDIENTS
3 cloves garlic, sliced, not chopped
1/4 cup extra virgin olive oil
pinch crushed red pepper
28 oz. can San Marzano whole tomatoes
fresh basil branches, 4-6

DIRECTIONS
First, sauté garlic briefly, at medium heat in the olive oil. Then, add the crushed red pepper (more if you really like a kick) to the garlic oil and simmer for a minute or two.

Next, break the tomatoes up with a wooden spoon or by squeezing with clean hands. Alternatively, if you have an immersion blender, that works quite well also. Add the crushed tomatoes to the garlic oil and then add the basil branches as well. The basil will infuse the sauce and then, when finished simmering, take the branches out.

Simmer for about 10-15 minutes or longer if you have the time.


Tomato, Basil and White Bean Salad

Super quick, incredibly tasty, versatile (use as an appetizer with crostini or a side dish) and eye catching as well. Definitely a winning combination, that never disappoints!

INGREDIENTS
1 can navy beans or other small beans, drained, rinsed
1/2 lb. plum or cherry tomatoes, cut into small dice
1/2 tsp. kosher salt
freshly ground pepper
1/4 cup extra virgin olive oil
2 small cloves garlic, minced
generous portion of basil, julienned

DIRECTIONS
First, combine the beans and the tomatoes in a bowl. Then, season them with kosher salt, fresh ground pepper and set aside.

Next, heat the oil in a skillet, over medium heat. Add the garlic and stir until fragrant, but not browned, for about 1-2 minutes. You are just looking to infuse the oil with the garlic flavor.

Pour the warm garlic oil over the bean, tomato mixture and let stand for about 30 minutes. This will allow the flavors to meld. Finally, add the basil, toss to combine and serve with homemade crostini or crackers and serve as an appetizer. However, this can be served as a yummy side dish. It pairs quite well with any grilled meat or poultry dish. In addition, this can be kept at room temperature for several hours.

At first glance, this seems too simple to be so good. However, trust me, this really is amazingly tasty and it will soon become a favorite.


Crostini

Homemade crostini is so simple to make and elevates any appetizer. Two of my favorites to serve it with are Tomato, Basil, White Bean Salad and Marinated Goat Cheese. They are also a nice addition to any cheese platter, along with an assortment of crackers.

INGREDIENTS
1 baguette, sliced 1/4″ thick, on diagonal
extra virgin olive oil
kosher salt
fresh ground pepper

DIRECTIONS
Place bread slices on sheet pan drizzle with olive oil, salt and pepper. Bake at 400° for about 7-10 minutes. Stay close and check early, these can burn rather quickly. Alternatively, if you’re out at the grill, cooking them there, is an added bonus in the flavor department. Just make sure you stay close, because they can crossover to the burnt side very quickly. Depending on the heat of your grill, they shouldn’t take more than 2-3 minutes per side. Additionally, I find that most grills have some definite “hot spots”, so beware of those and watch the crostini carefully. However, don’t worry if there is a bit of char on them, that adds a wonderful dimension to the taste.


Molten Chocolate Cake

A definite crowd pleaser and this couldn’t be easier. You get great return on your efforts with this one and all the preparation is done ahead of time. Pop these in the oven as you serve dinner and they are done 20 minutes later to rave reviews!

INGREDIENTS
2 tablespoons unsweetened cocoa powder
1/4 cup sugar
2 ounces bittersweet (not unsweetened) or semisweet chocolate, chopped
1/4 cup (1/2 stick) butter, cut into small pieces
2 large egg yolks
1 large egg
2 teaspoons all purpose flour
confectionery  sugar, for garnishing
fresh mint

DIRECTIONS
Butter two 3/4-cup ramekins or custard cups. Whisk cocoa and sugar in small bowl to blend. Stir chocolate and butter in heavy, small saucepan over low heat until chocolate melts and mixture is smooth. Remove from heat; whisk in cocoa mixture. Whisk in egg yolks, then whole egg and flour. Divide batter between prepared ramekins. (Can be made 1 day ahead.) Cover separately and chill.

Preheat oven to 350°F. Bake cakes uncovered until edges are set but center is still shiny and tester inserted into the center comes out with some wet batter attached, about 20 minutes. DO NOT overcook, you are definitely better off erring on the under-done side. You want these to be oozing chocolate when you take that first bite.

Run a knife around cake edges to loosen, turn out onto plates. Sift confectionery sugar over, add a scoop of vanilla ice cream on the side and garnish with mint.


Quinoa Tabbouleh

This is a wonderful, high protein, vegetarian salad. It works great as a stand-alone lunch or as a tasty and healthy side dish. No worries if it doesn’t all disappear at first serving, because it tastes even better the next day!

INGREDIENTS
1 cup quinoa
zest of 1 lemon
juice of 2 lemons (about 14 cup)
4-5 scallions, thinly sliced, using both white and green parts
fresh mint, chopped, about a cup
flat leaf parsley, chopped, about a cup
1 english cucumber, seeded, quartered and diced
1 pint cherry tomatoes, halved or quartered, depending on their size
1/4 cup extra virgin olive oil
kosher salt and fresh ground pepper
6-8 oz. good feta, diced or crumbled

DIRECTIONS
Pour generous 2 cups of water into a medium saucepan and bring to a boil. Add the quinoa and a teaspoon of salt, cover, lower the heat and simmer for 15 minutes, until the grains are tender. Drain, place in a bowl and immediately add the lemon juice and let cool.

In a large bowl, combine the scallions, mint, parsley, cucumber, tomatoes, olive oil, salt and pepper, to taste. Add the quinoa and mix well. Carefully fold in the feta and taste for seasonings. Serve at room temperature or refrigerate and serve cold.


Herb Roasted Almonds

Easy, delicious and addictive! Great as a snack with cocktails or just grab a handful to nibble on.

INGREDIENTS
1 lb. raw almonds
extra virgin olive oil
fresh ground sea salt
fresh rosemary
fresh thyme

DIRECTIONS
Spread  the almonds on a sheet pan, lightly drizzle with the extra virgin olive oil, sprinkle with a bit of fresh ground sea salt or kosher salt.

Add a few sprigs each of thyme and rosemary. Mix with hands to coat the almonds and herbs with the oil.
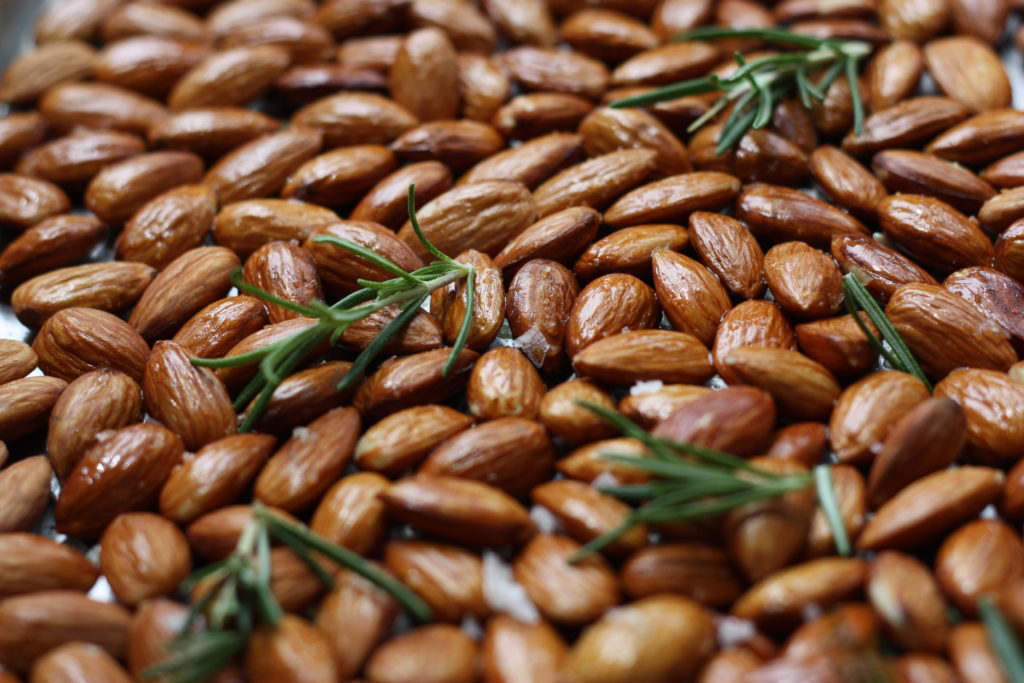
Roast in a 400º oven for about 10 to 12 minutes. Just make sure you stay close by because they can burn quickly. Let cool, transfer to a bowl, add an additional sprinkle of fleur de sal and garnish with a fresh sprig of rosemary or thyme..


Greek Chicken Orzo Soup

Fabulous, light soup that is incredibly quick to make and good for any time of year. Wonderful and comforting, when feeling sick or recovering from a bug, it’s light on the stomach, yet filled with flavor.

INGREDIENTS
8 cups chicken stock
3/4 cup orzo
1 boneless, skinless chicken breast
2 eggs
1/4 cup fresh lemon juice
1 Tbs. lemon zest
salt & white pepper to taste
fresh parsley, chopped for garnish

DIRECTIONS
In a large saucepan, bring the stock to a boil. Reduce heat to medium-low, add the orzo and cook uncovered for about 10 minutes. Add the chicken after about five minutes and poach for about 5-7 minutes, until done. Remove chicken breasts, shred with two forks and return to pot.

Place the eggs in a mixing bowl. Whisk continuously while adding the lemon juice. Stir in the zest. Whisking continuously, slowly pour a ladleful of the hot stock into the eggs, this tempers the mixture so you don’t end up with scrambled eggs in your soup!

Turn the heat off and while whisking the soup in the pan, slowly pour in the egg mixture. The soup will thicken slightly. Don’t worry if the mixture separates, it still tastes delicious. I do find if I take the soup off the heat and let it sit for 5 minutes or so, that it is much less likely to separate.

Season to taste with salt and white pepper. Remove from the heat, ladle into bowls and garnish with the chopped parsley.


Fresh Fruit Tart

If you want a show-stopping dessert and one that is also delicious, this is the one. Not only is it relatively easy to make, but no one will believe that you made it yourself! Also, feel free to use whatever fruits are your favorite or whatever you have on-hand. You can’t go wrong.

TART PASTRY
1 1/2 cups flour (do not use self-rising)
1/4 cup walnuts or pecans, toasted & finely ground
1/4 cup, packed light or dark brown sugar
2/3 cup butter, softened
1 egg

PASTRY DIRECTIONS
Preheat oven to 400º
Combine all ingredients in a food processor, until a ball forms. Although I use a food processor for this, you could just as easily use a mixer. Press the dough firmly and evenly against the bottom and sides of a 9″ or 10″ tart pan, with removable bottom. Then poke it all over, with a fork; this prevents it from puffing up while cooking. Bake for 10-12 minutes or until light brown. Set aside to cool.

LEMON FILLING & FRUIT
1/2 cup lemon curd, Trader Joe’s is a good one
8 oz. cream cheese, room temperature
pint of strawberries
large handful of blueberries
3-4 kiwis, depending on their size

FILLING DIRECTIONS
While the crust is baking, beat the lemon curd and cream cheese, until very smooth. Then, spread evenly over the cooled crust and chill for about an hour or until firm. Arrange a selection of berries and sliced fruit over the lemon mixture. My favorite combination is strawberries, kiwi, and blueberries, for both flavor and color combination. However, you can certainly try any combination you prefer.

fruit tart

GLAZE
2 Tbs. apricot jam, jelly or preserves
1-2 tsp. water

Heat the jam and water in a microwave for about 10-15 seconds until melted, mix well, and brush over the fruit. You don’t need to go heavy with this, just a light coating will do. The jam glaze gives the fruit a nice, shiny, professional look. Alternatively, you could just use a light dusting of confectioners’ sugar. However, the shine that the glaze imparts really does makes it look professionally done.