Roasted Red Pepper Spread

You have just stumbled upon your next new favorite recipe and it couldn’t be easier. All you need is about 10-15 minutes and you’re ready to go with this one. Honestly, it is addictively tasty and is also pretty darn healthy. Although this is delicious with crackers, crostini or crudité, it also works as an incredibly flavorful condiment. I’ve used it in quesadillas, as a flavor booster in sandwiches and I’ve even been known to just swipe a spoonful, it’s that yummy. A definite bonus with this recipe is that all ingredients are pretty much pantry staples, making for a great last-minute appetizer.

INGREDIENTS
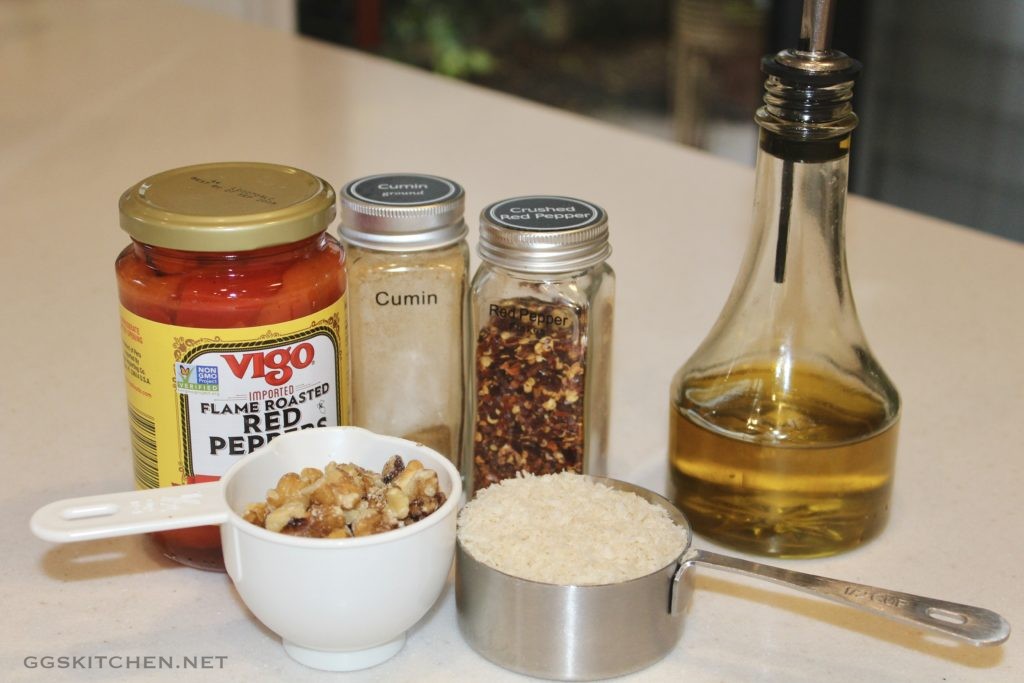
3 Tbs. olive oil
1/2 cup walnuts
1/2 panko bread crumbs
1 garlic clove, minced or grated
12 oz. jar roasted red peppers
1 Tbs. lemon juice
1/2 tsp. kosher salt
1/2 tsp. ground cumin
1/4 tsp. fresh ground black pepper
1/4 tsp. red pepper flakes

DIRECTIONS
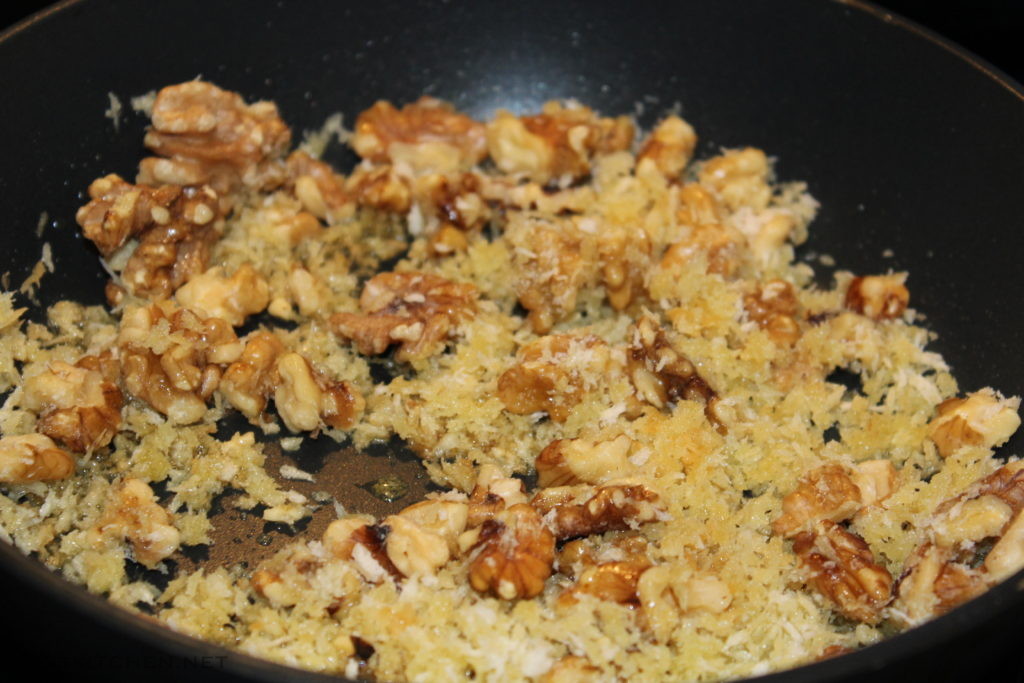
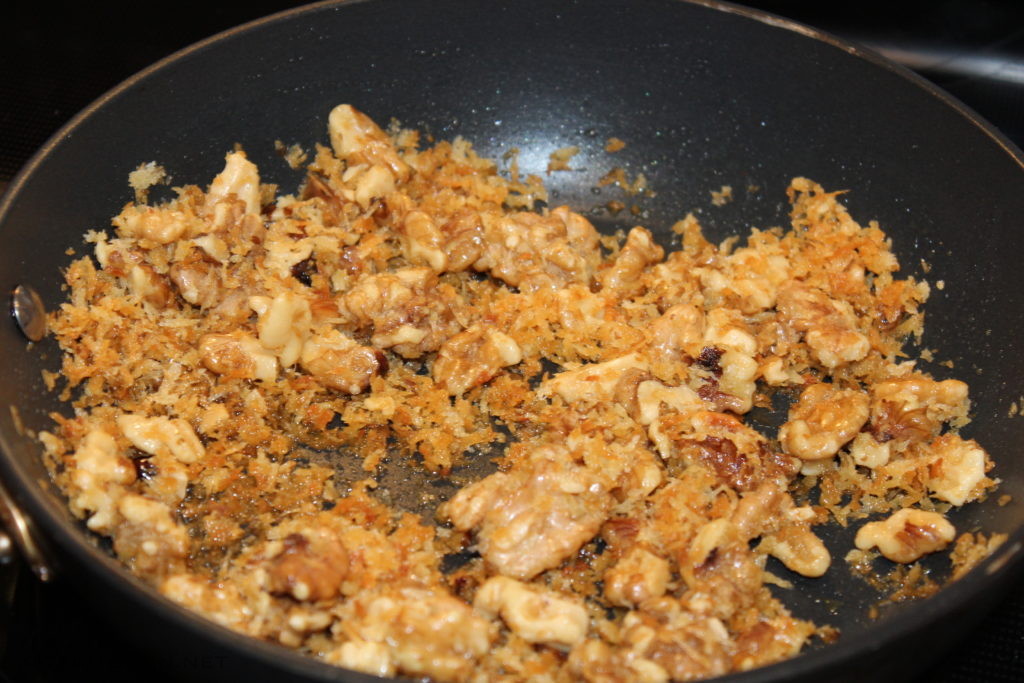
In a small skillet, over medium-low heat, add the first 3 ingredients and toast until the panko is a nice golden brown. Then, take off the heat and immediately add the garlic to the warm ingredients. Stir to combine and set aside to briefly cool.

Next, drain the peppers and add to a food processor. Add the remaining ingredients, including the cooled walnut panko mixture. Finally, pulse the mixture, to your liking. I prefer a little texture with mine, but you may like it super smooth. The decision is yours.


Crispy Brick Chicken

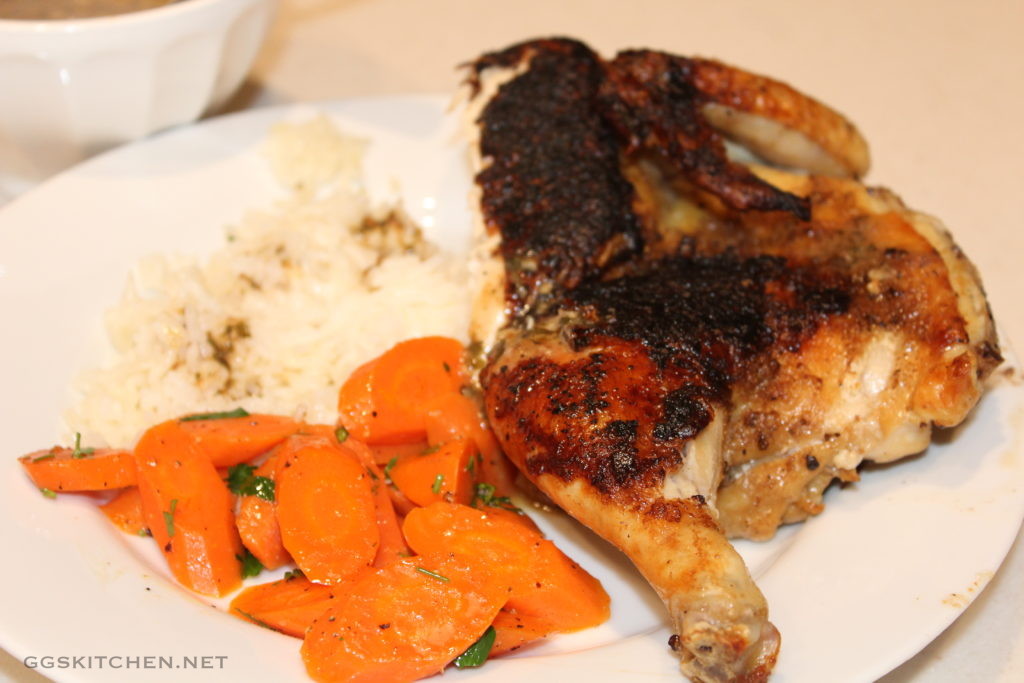
This is a wonderfully flavored dish that I’ve adapted from a Milk Street recipe. Don’t be intimidated by the spatchcock chicken, most supermarkets now carry them, usually in the frozen meat section. However, if you can’t find it there, you can usually just ask the butcher to spatchcock it for you. Alternatively, you certainly could use chicken thighs or chicken pieces and keep it super simple and it is just as delicious. The choice is yours.

INGREDIENTS
1 1/2 tsp. coriander seeds, toasted and ground (see notes below)
1/2 tsp. granulated garlic (or garlic powder)
1 1/2 tsp. kosher salt
1/2 tsp. fresh ground black pepper
3-4 lb. chicken, spatchcocked (see notes below)
1 Tbs. canola or vegetable oil
2 Tbs. butter
2-3 garlic cloves, grated
2 cups low-sodium chicken broth
1/4 tsp. cayenne pepper
2 Tbs. lemon juice
1/4 cup fresh cilantro, chopped

DIRECTIONS
First, toast the coriander seeds in a dry skillet for a few minutes or until lightly golden. Set aside to cool slightly and then put in a small ziplock bag and use a rolling pin to crush the seeds. In a small bowl, combine the crushed coriander, granulated garlic, salt and pepper. Next, pat dry the chicken with a paper towel and then season all over (mainly the top) and rub into the skin. Let sit at room temperature for about 45 minutes.

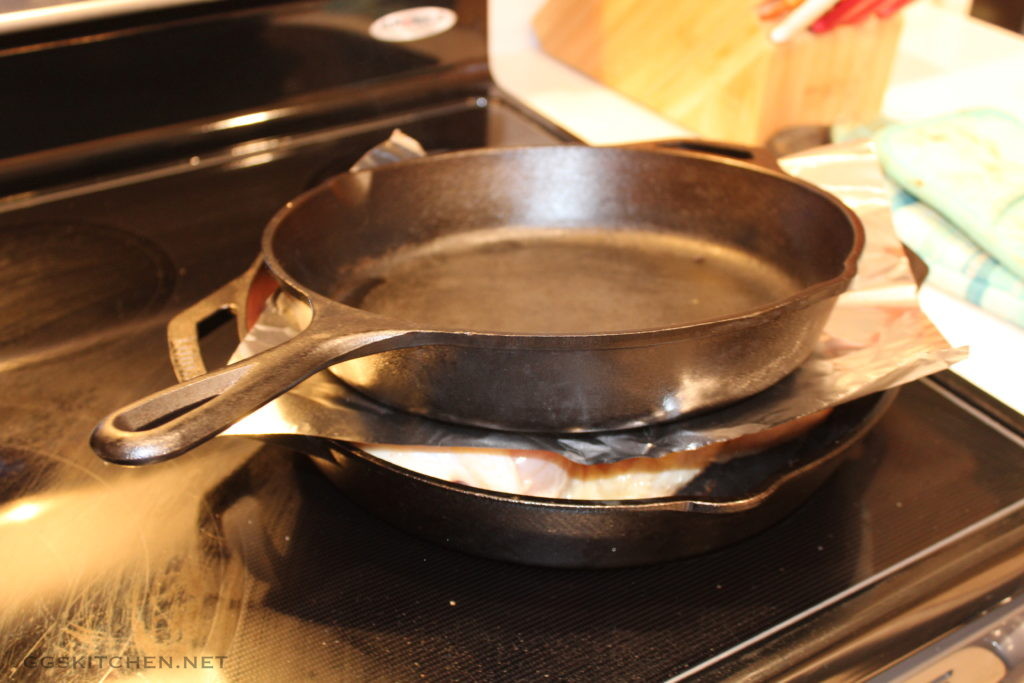
Preheat the oven to 450º, with the rack in the lowest position. Again pat the chicken dry (it will release some liquid after standing with the dry rub) with a paper towel, this ensures a crisper skin. Add the oil to a 12″ oven-proof skillet (cast iron works best) and heat to medium-high, until the oil is glistening and just smoking. Carefully place the chicken in the skillet, skin side down. Then, place a piece of tinfoil over the chicken and place another heavy (slightly smaller cast iron skillet is perfect) skillet on top of the foil. Reduce the heat to medium and cook until the skin is a deep golden color, usually 10-15 minutes. Half way through the searing, check to make sure the chicken is browning evenly.

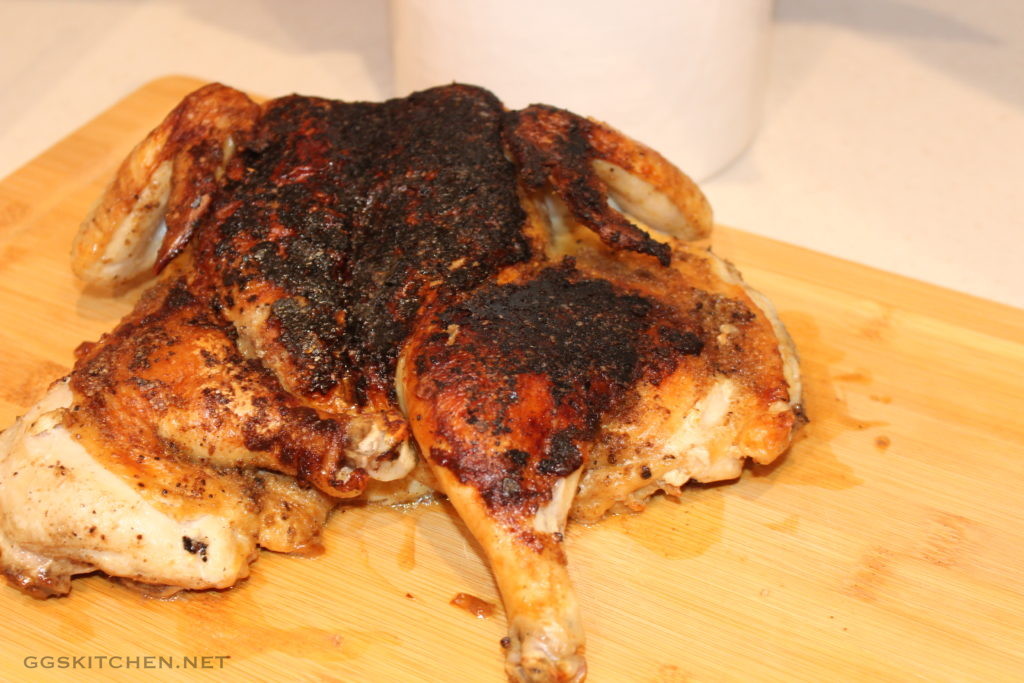
Using tongs, carefully turn the chicken over, so the skin side is up and place in the preheated oven. If, when you turn the chicken, there is an excess of oil, wipe it out with a paper towel, before placing it in the oven. Cook the chicken for about 30-40 minutes or until the breast temperature reaches 160º. Carefully transfer the chicken to a platter (try not to tear the skin) and let it rest while you make the sauce.

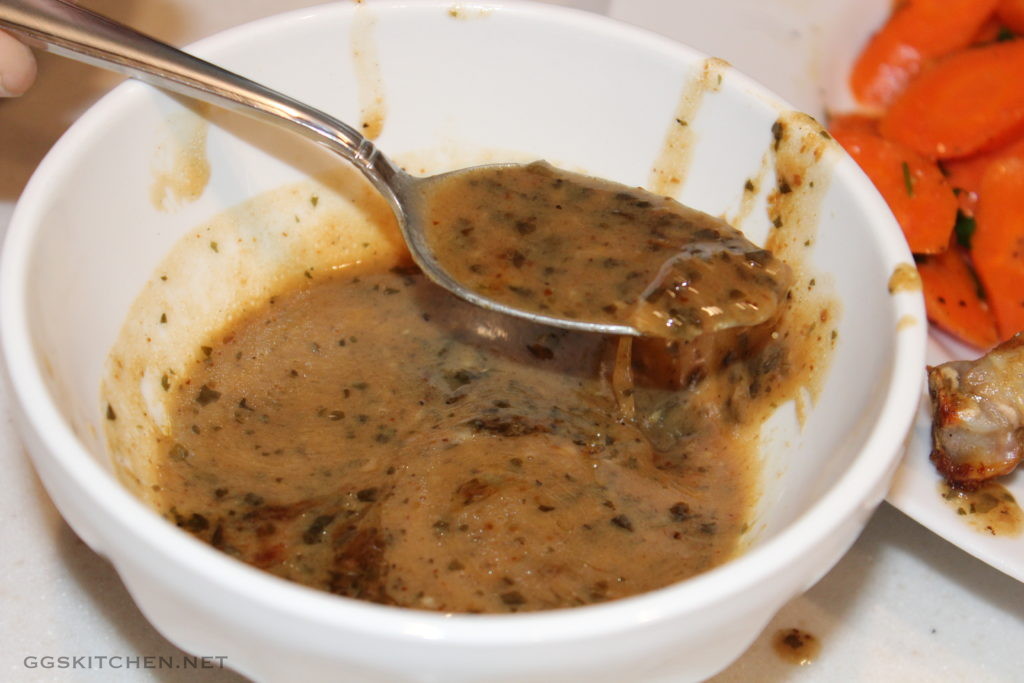
Then, set the skillet (beware, the very hot handle!) over medium-high heat and briefly sauté the butter and garlic. Next, add the broth and simmer to reduce the liquid by about half, 10-15 minutes. Finally, remove from the heat and add the cayenne, lemon juice and cilantro. Transfer the sauce to a serving bowl, cut the chicken into pieces and serve with the sauce.

NOTES
The original recipe called for ground coriander, I only had the seeds and that’s why I toasted and then crushed them. However, feel free to use the ground coriander and keep it simpler. Also, if you only have garlic powder, by all means use it. However, if you have the granulated garlic, it is a bit courser than the powder and works a tad better with the high heat when searing the chicken. Regarding the “brick” versus a heavy cast iron skillet, the original recipes for brick chicken really did use a brick (wrapped in tin foil) and that is still a great alternative in a pinch. It really is just the weight of the object that you need to press the chicken into the pan, to create that wonderfully crispy skin.

My favorite sides, thus far, with this dish are just sautéed carrots and some basmati or jasmine rice. The sauce is a delightful addition to the rice and you really don’t need much more.


Easy, Rustic Tomato Soup

Here is a wonderful update of an historic comfort food for many. Please, do not confuse this with your childhood version of tomato soup in that red and white can. Don’t get me wrong, I have great memories of that, along with a very basic grilled cheese. Growing up, that was a pretty standard Friday night dinner and I always enjoyed it.

This however, is a major step up in flavor and is a snap to make. Although this could be on the table in under an hour, active time to get this going is only about ten minutes,. This makes a great for a nice lunch or you could serve it alongside a simple grilled cheese and make it a dinner. If you are feeling creative, you could really amp things up and try one of my favorite grilled cheeses.

INGREDIENTS
1 Tbs. olive oil
1 Tbs. butter
large sweet onion, chopped
1 small garlic clove, smashed
1/2 cup white wine
3 – 29 oz. cans whole peeled tomatoes
2 cups chicken stock
1/2 cup light cream
handful of fresh basil
1/3 -1/2 cup grated sharp cheddar

DIRECTIONS
First, in a large pot, add the oil, butter, onion and garlic; sauté until the onions are translucent. Next, add the wine and reduce it by about half. No need to be precise here, just let it bubble for about 5-10 minutes. Then, reduce the heat to a simmer, add the tomatoes and chicken stock, and cook for another 30 minutes.

Next, add the cream and basil (reserve some for a garnish), then simmer for an additional ten minutes. Remove from the heat and use an immersion blender to puree the soup. If you don’t have an immersion blender (and you should!), a regular blender would work, it’s just a lot messier.

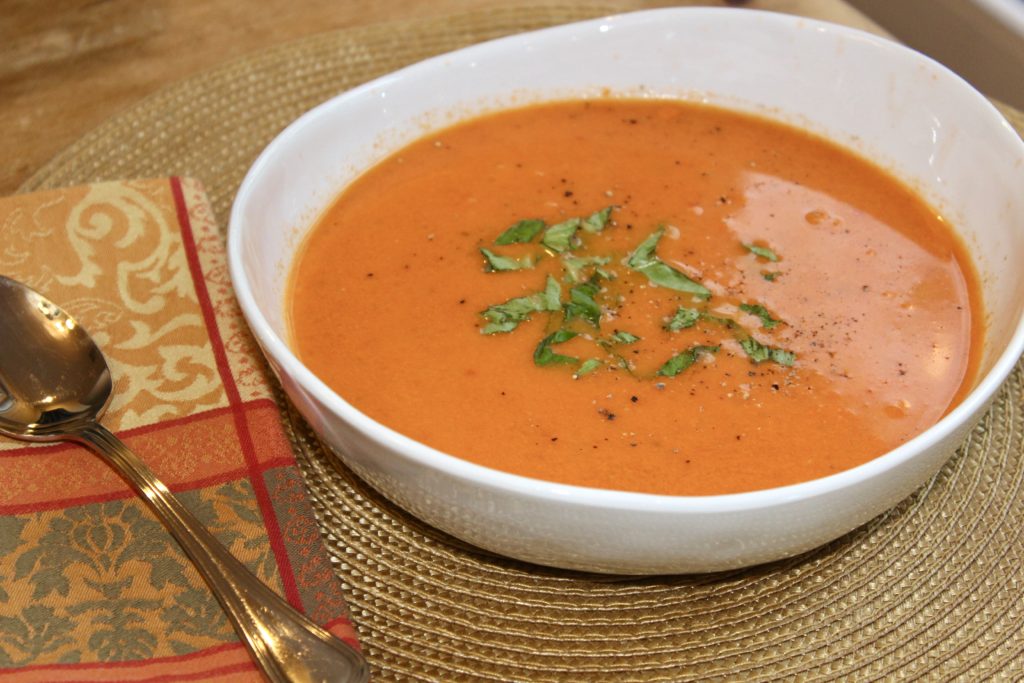
Then, add the cheddar cheese and stir to combine. There should be enough residual heat to melt all of the cheese. It is essential that the heat is off when adding the cheese, otherwise, it will stick to the bottom of the pan. Season to taste with kosher salt and fresh ground pepper. However, be careful with the salt, since the tomatoes have a fair amount of sodium on their own. Finally, serve with a sprinkle of fresh julienned basil and your favorite grilled cheese.

soup and sandwich

Additionally, if you have any good leftover bread, make some croutons to garnish the soup. I promise, you won’t be disappointed. Also, since I like a little bit of a kick, I often add a shake or two of crushed red pepper. However, that is definitely optional.

tomato soup


Simple & Delicious Garlic Knots

Honestly, I just heard about garlic knots within the last year…I know, I must have been living under a rock! I first tried them at a friends house, she had bought them at a local Italian market and reheated them at home. They were quite good, but I thought there was potential for more. Certainly, fresh from my own oven would be fresher and significantly better tasting.

Well, I have played around with a few versions and think these are a “must make” for you. These are nothing more than strips of dough, tied in a knot, then topped with a melted butter, garlic and parsley mixture. Obviously, you can switch up the herbs and spices to your own liking, but this version is a good place to start. Then, if you wish to be more creative, or if you have non-garlic lovers, adapt it to your own tastes. Also, the beauty of these is that you can easily do different flavorings in one batch.

INGREDIENTS
1 bag store bought pizza dough, or try my quick pizza dough
5 Tbs. butter, melted (or 1/3 cup olive oil)
2-3 garlic cloves, minced or 1 tsp. garlic powder
1 tsp. italian seasoning
1 tsp. kosher salt
1/4 cup parsley, finely chopped
grated parmesan

DIRECTIONS
Bring the dough to room temperature. If you are using store bought dough, make sure you give it ample time to come to room temperature. I would advise, err on the side of more time, not less time. The reason for this is, store bought dough is not always the freshest and it needs time to not only come to room temp, but time to rise. Home made dough seems to get there quicker than a store bought dough.
Then, on a lightly floured surface, roll the dough into a long log, and cut that into about 14 to 16 pieces. Roll each of those pieces into about an 8″ rope. No need to be fussy or precise, they will turn out fine.

ropes, ready to tie

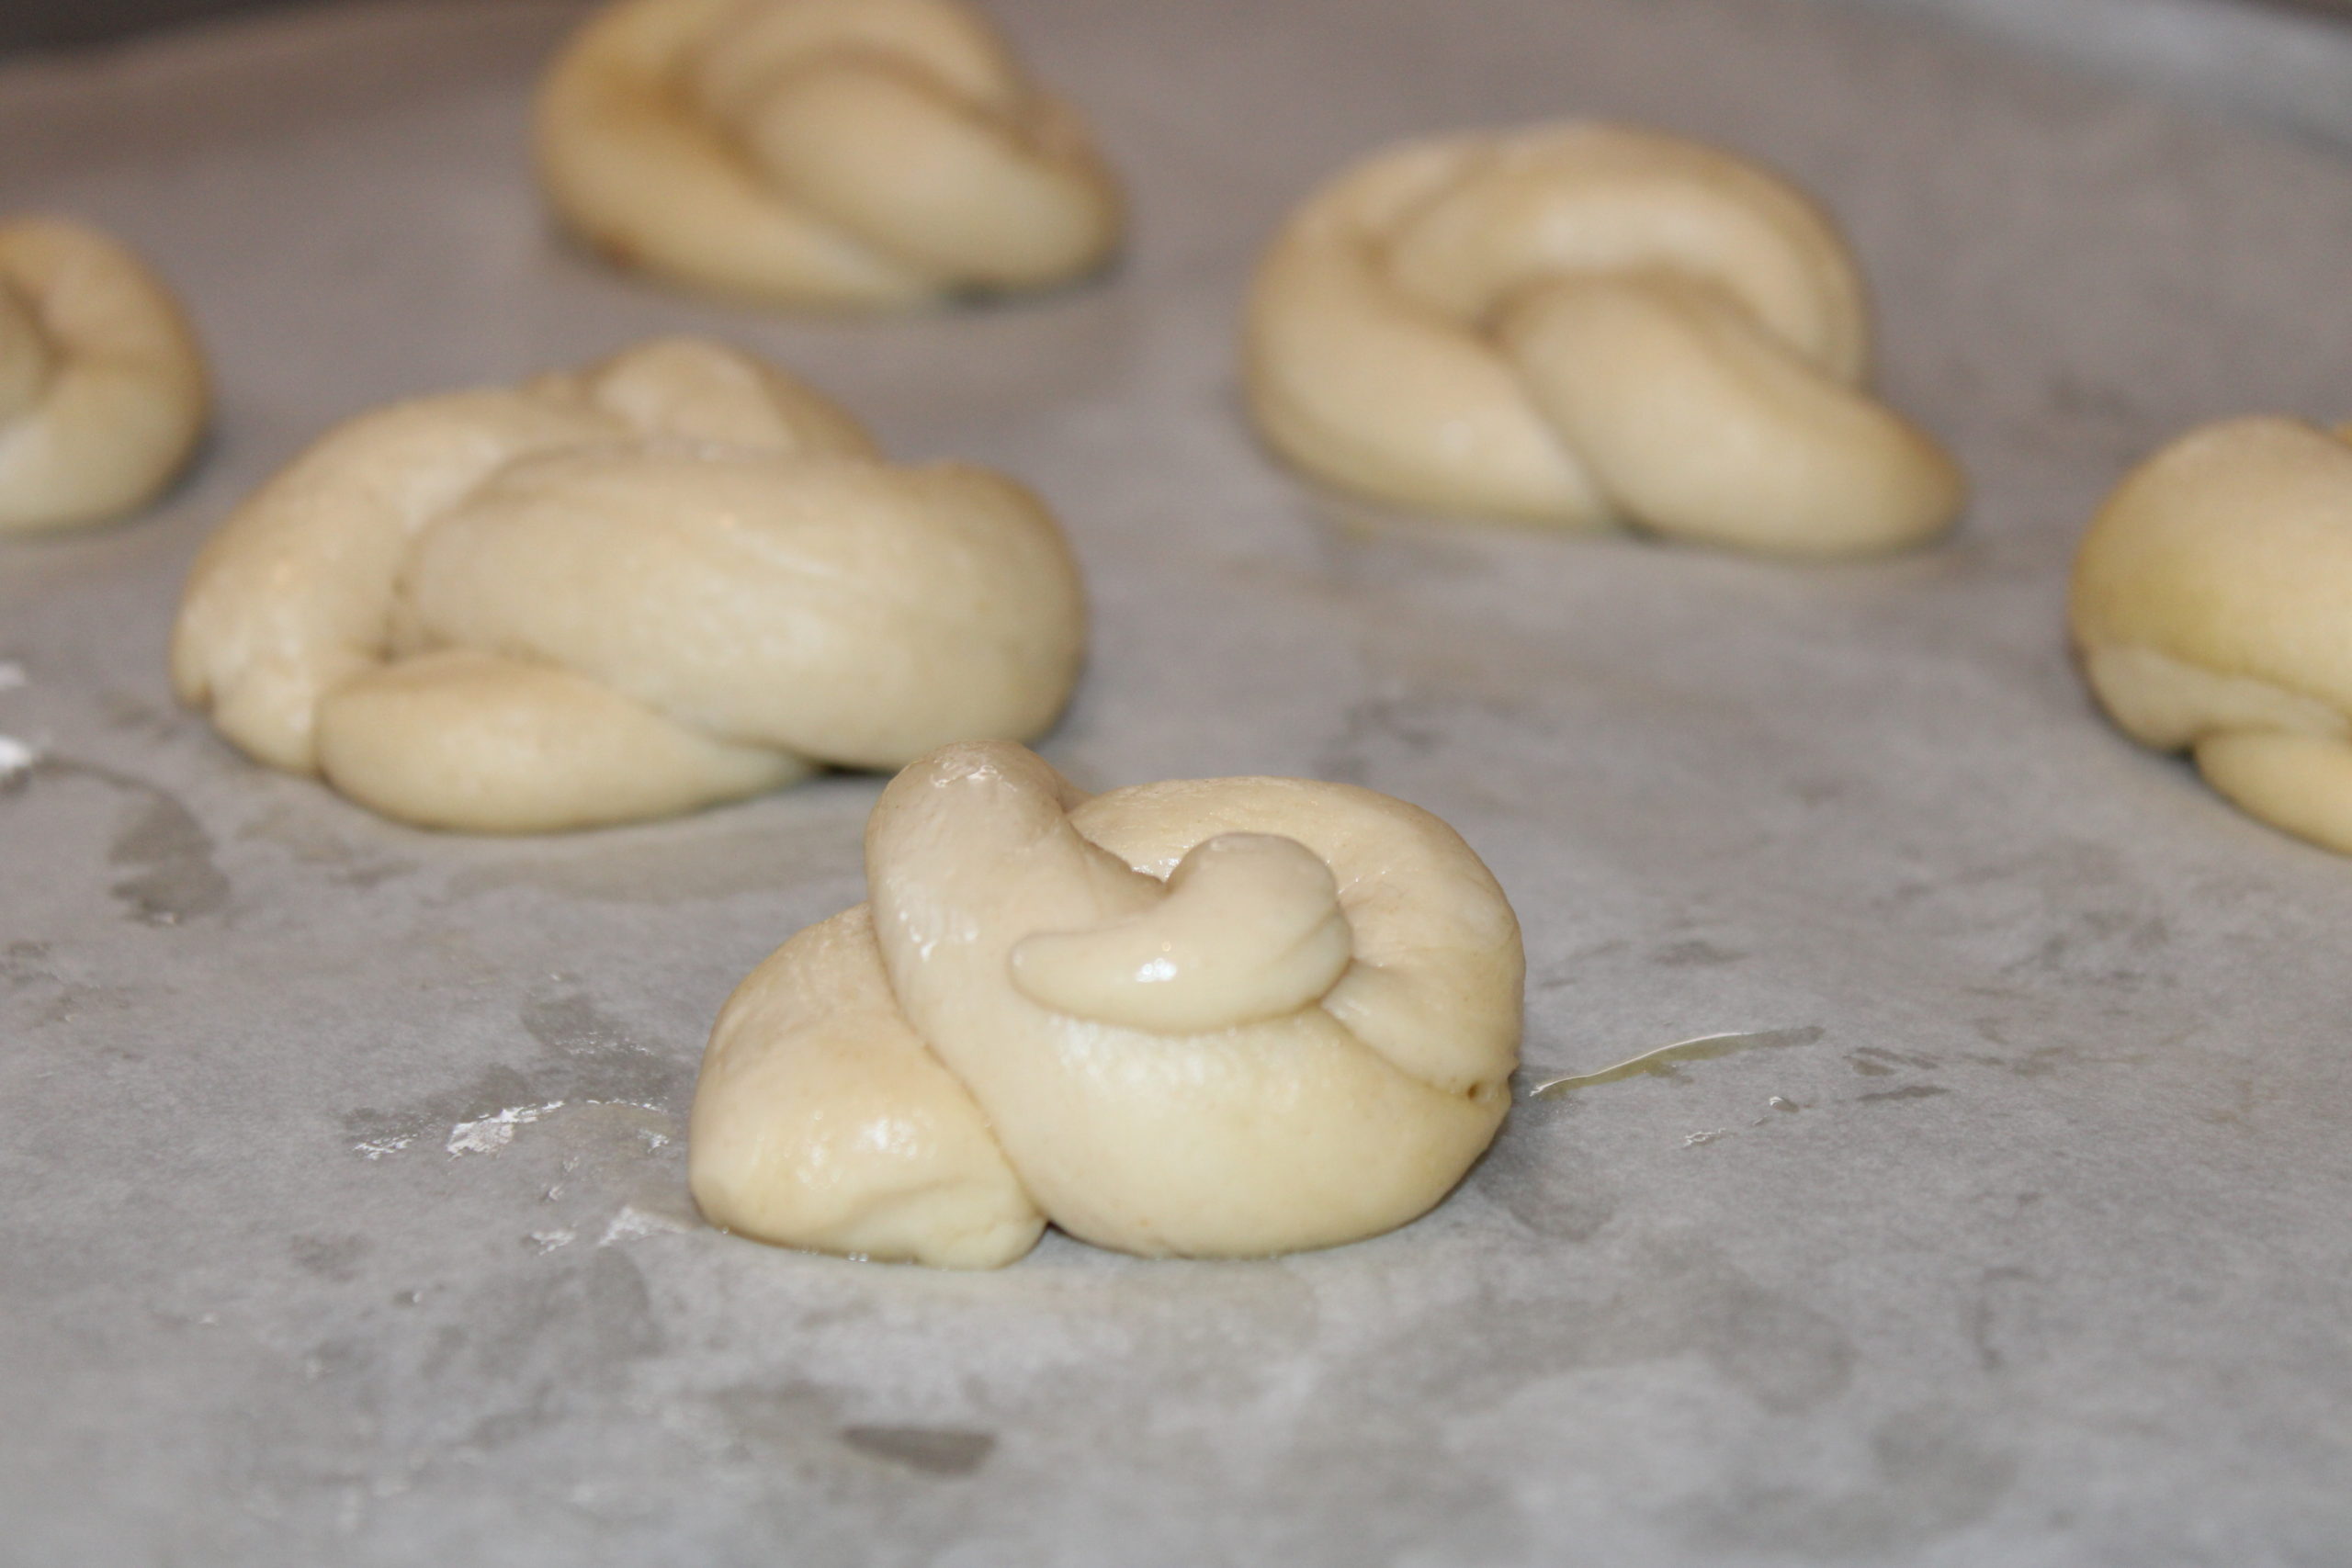
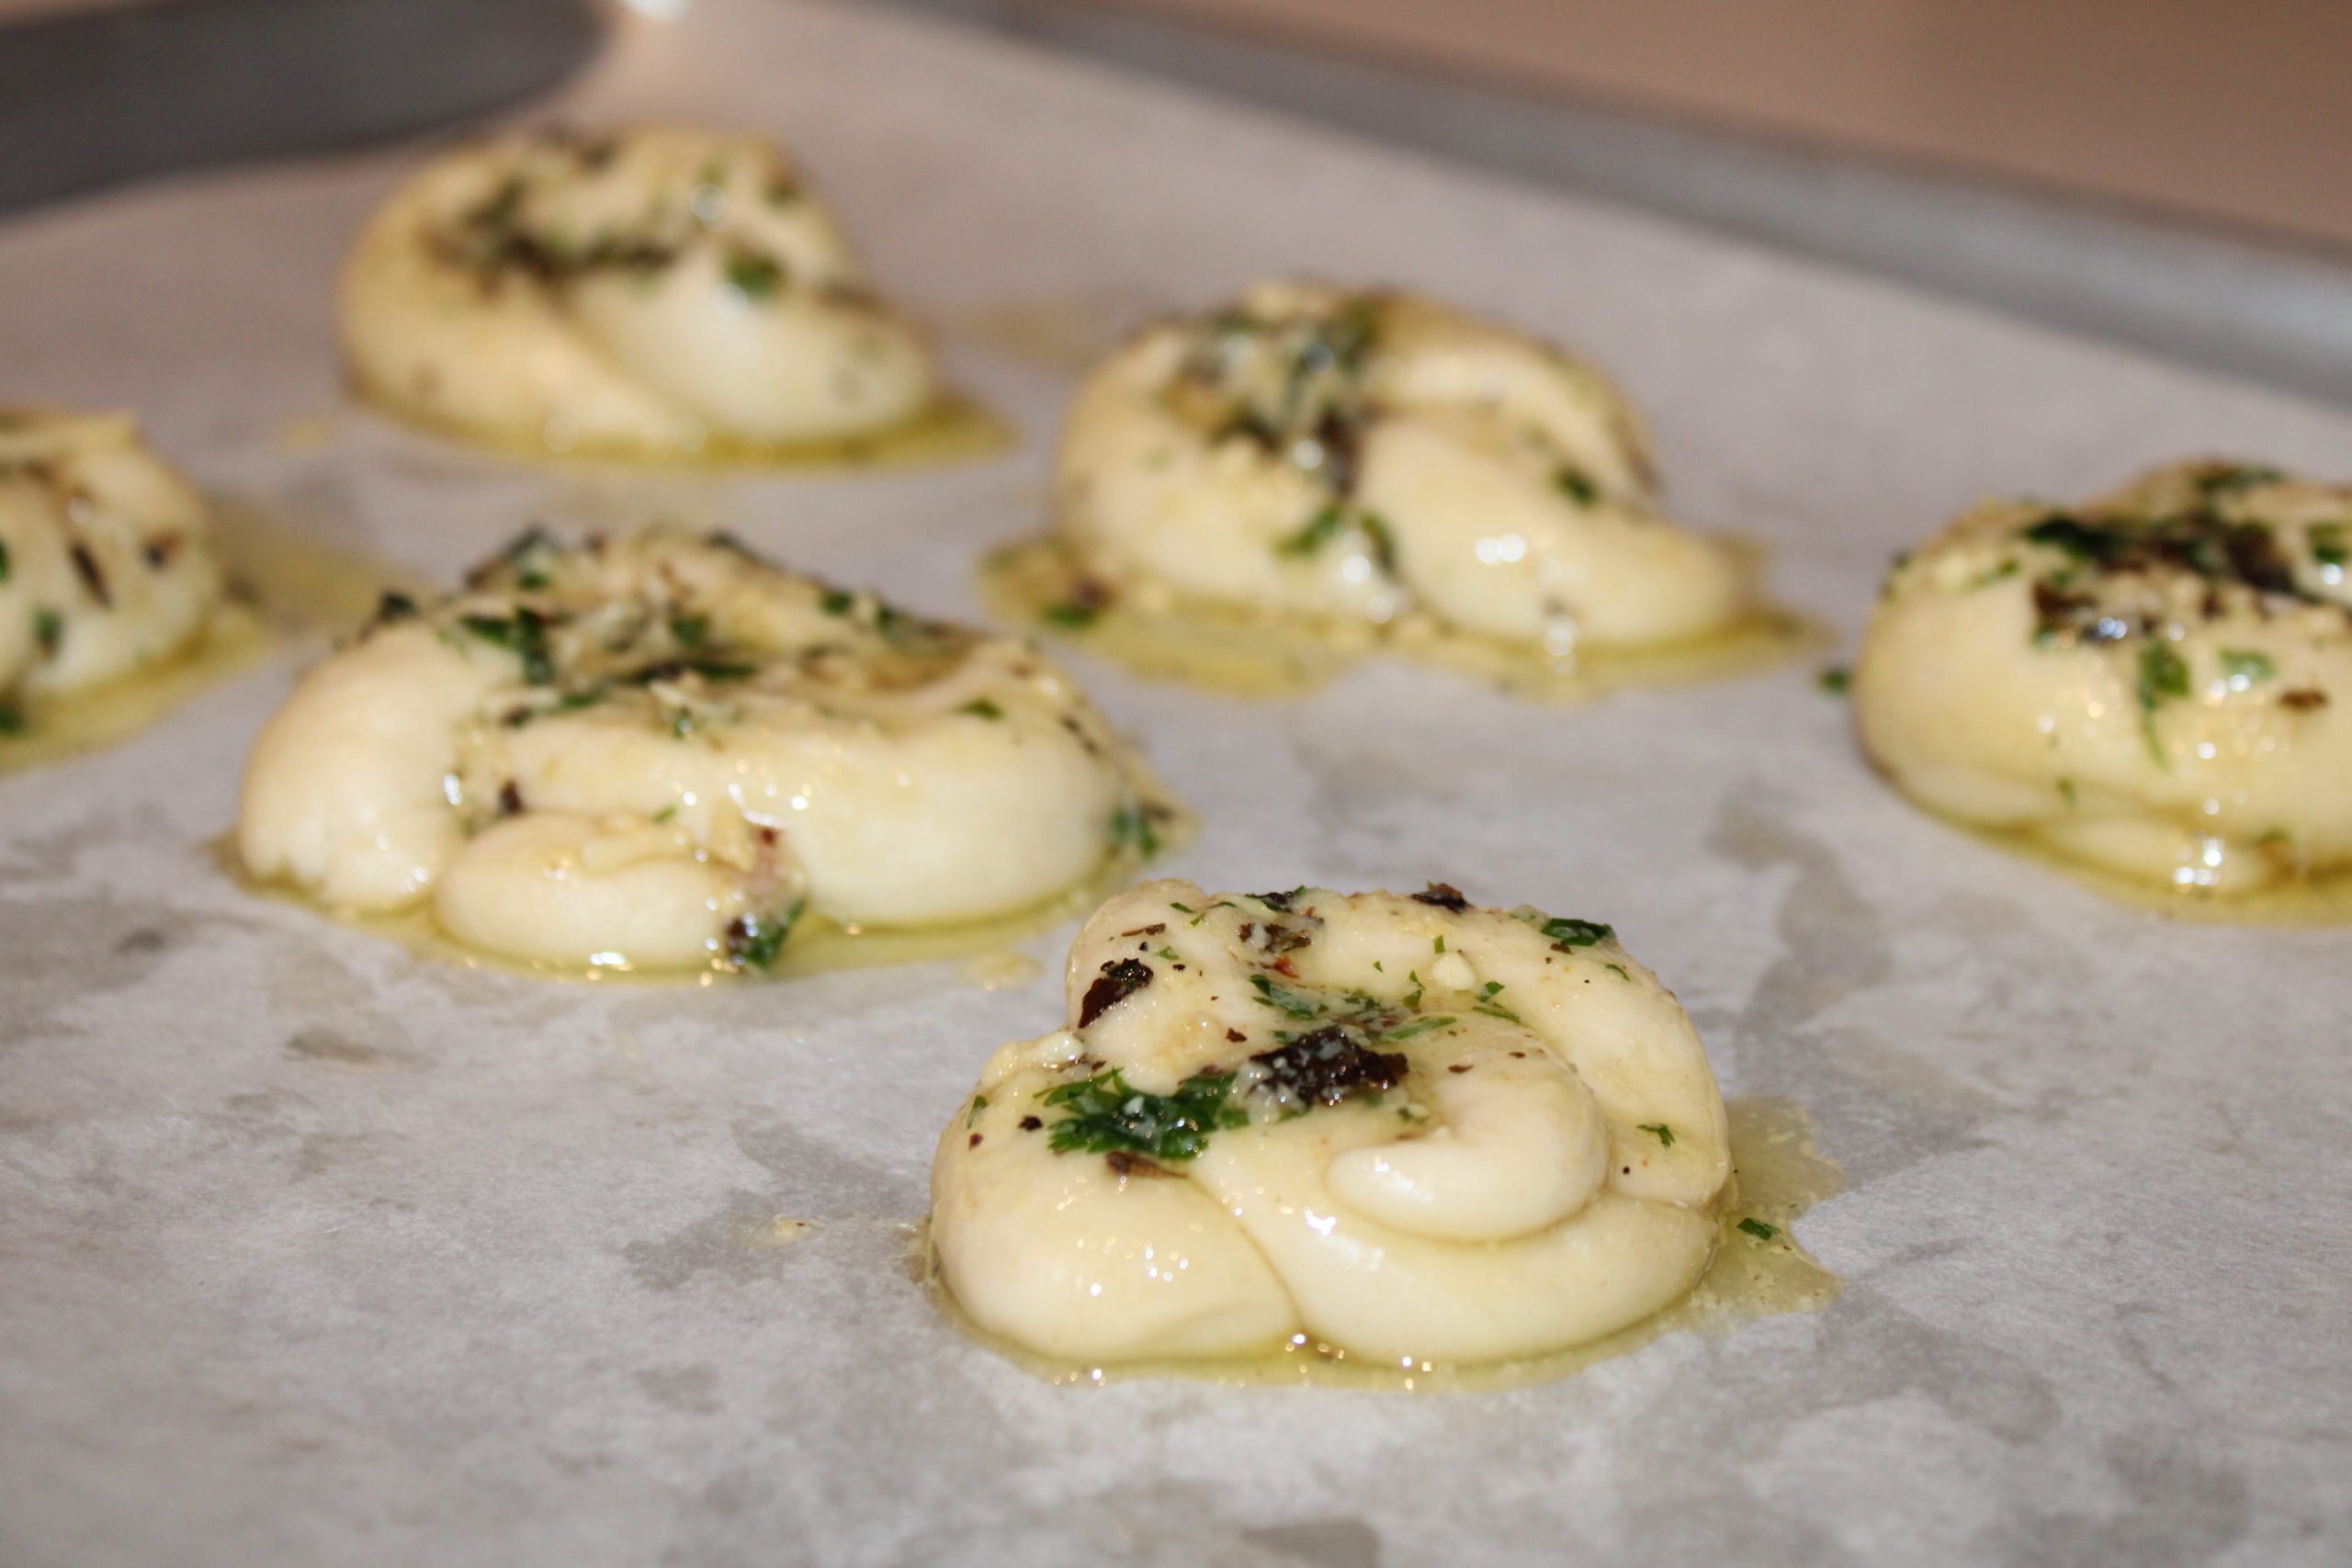
Next, tie each rope into a simple knot, tuck the ends under and place them on a parchment or silicone lined baking sheet. Trust me, this is not a fancy, or a delicate process. Check out this video or simply Google or YouTube “tying garlic knots” to catch a video of how it’s done. While lightly covered, let them rest for about 30-40 minutes; this will let them rise a bit and make for a more tender roll.

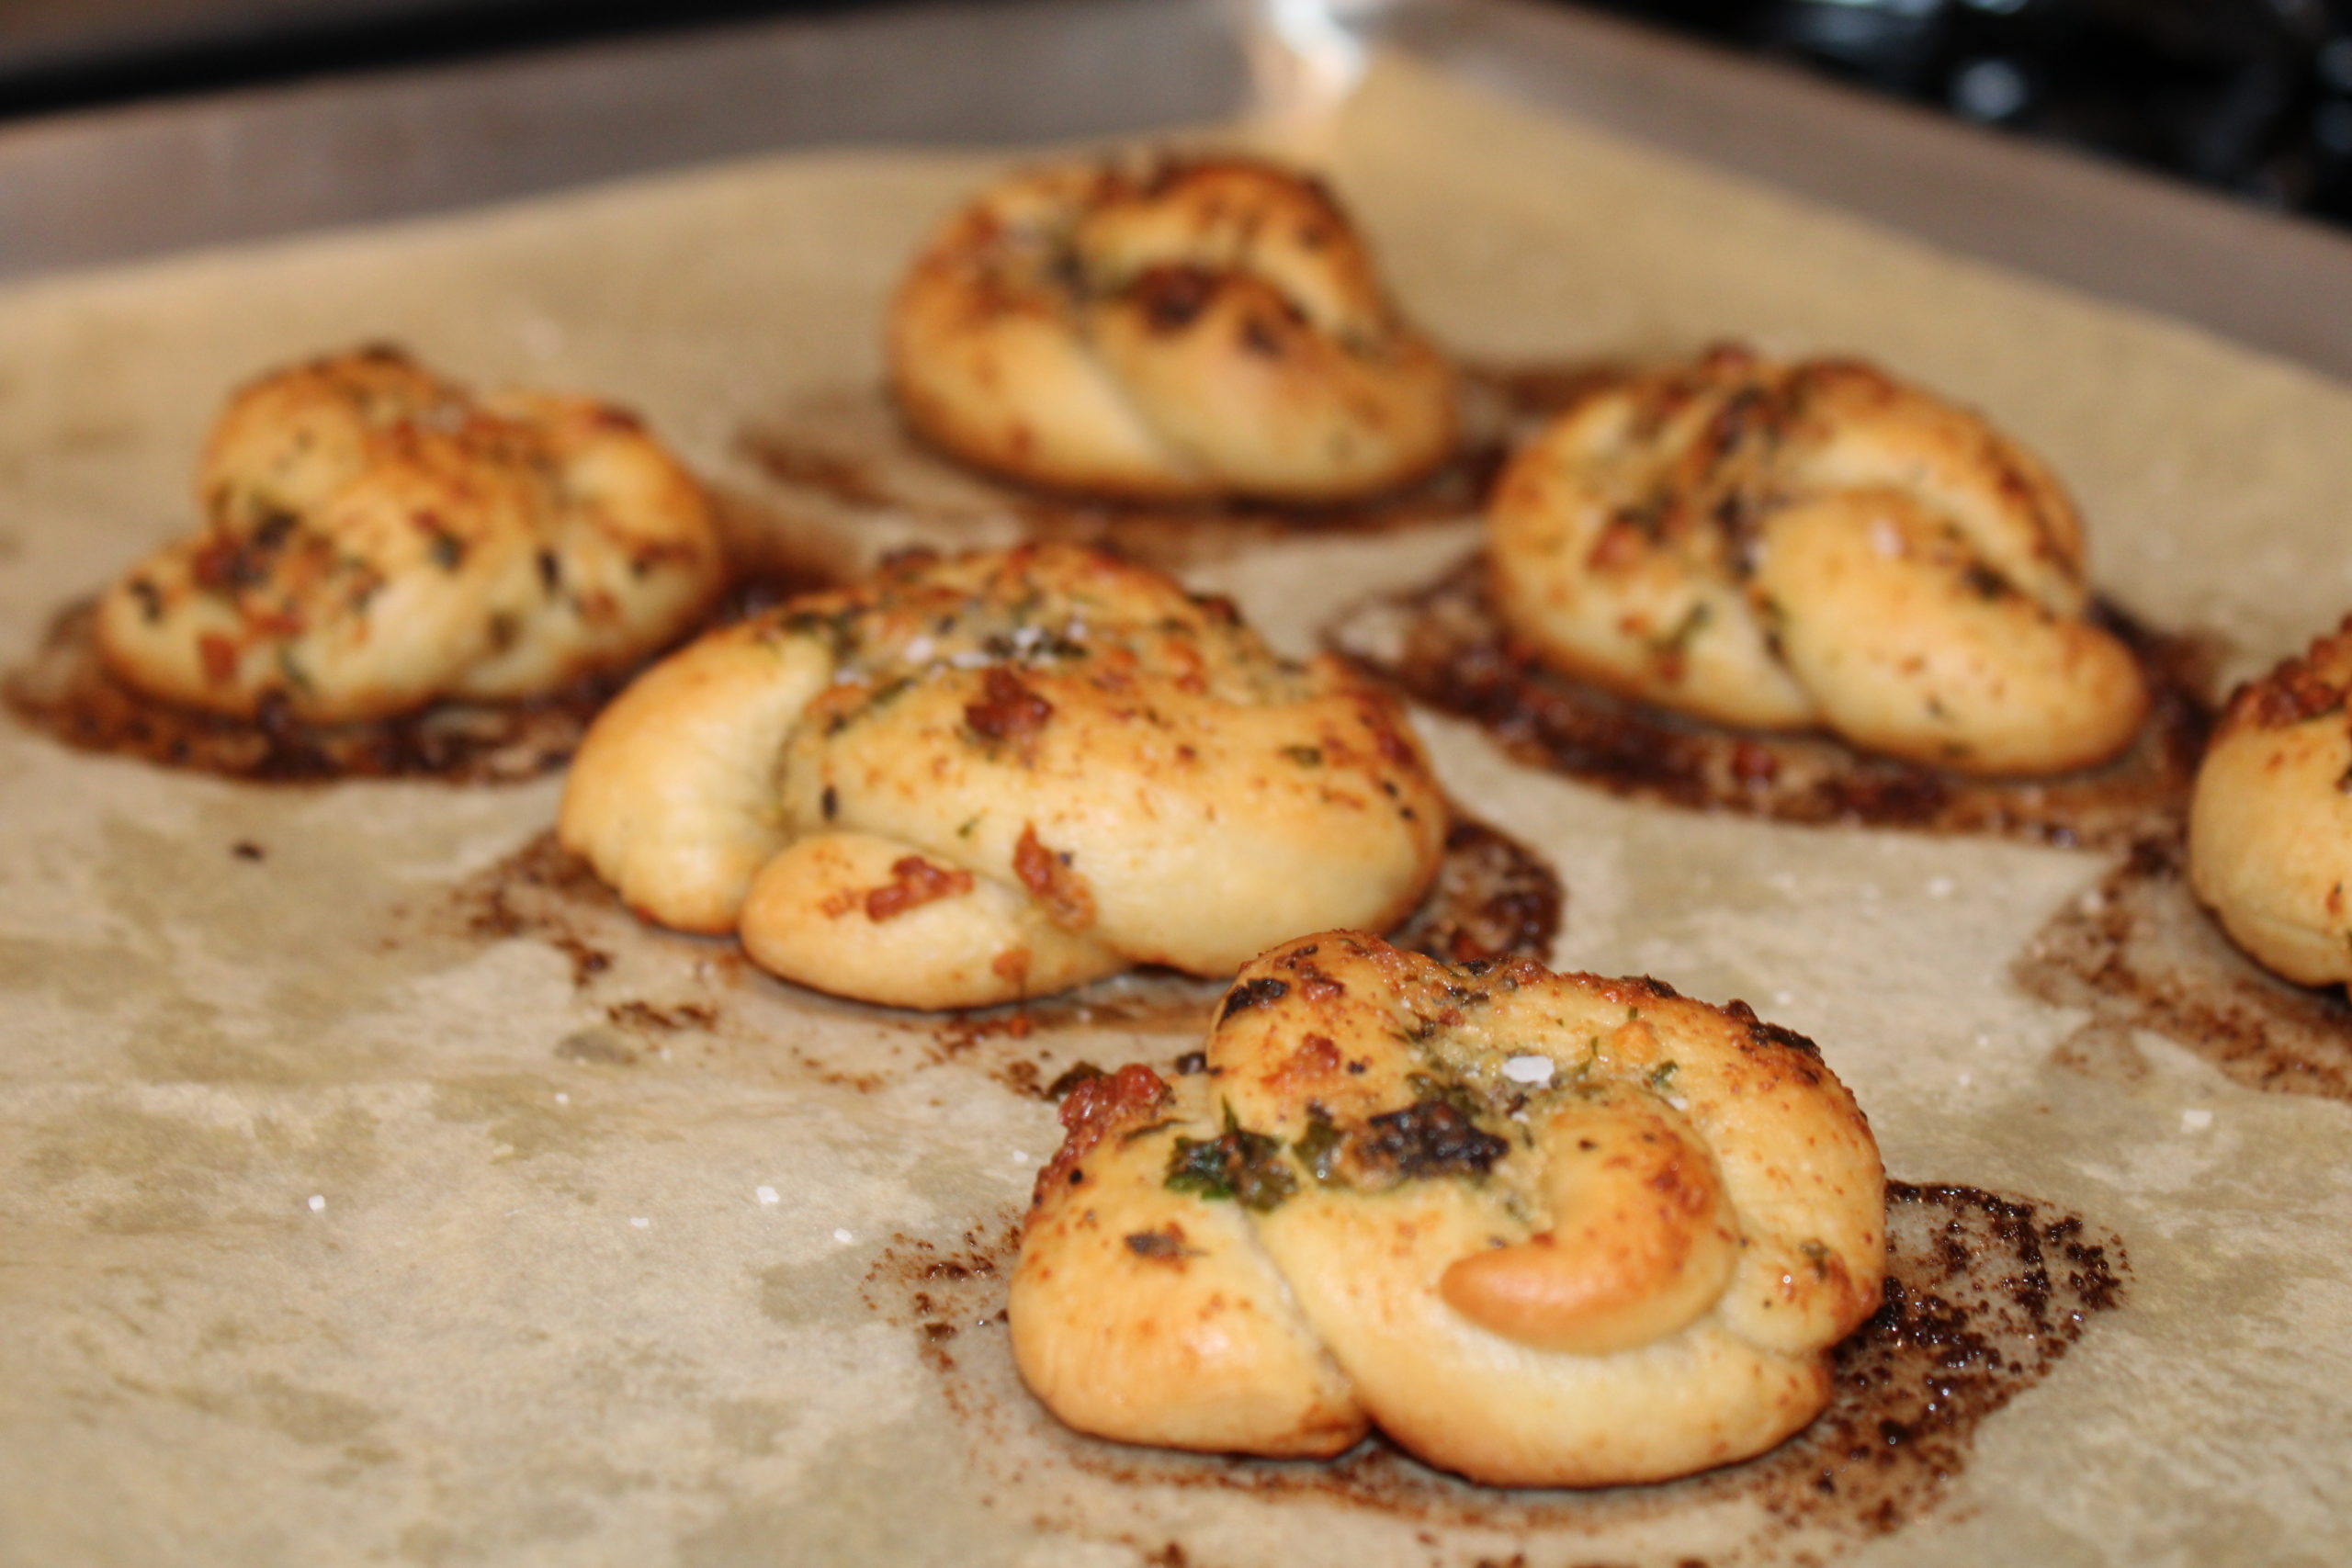
Meanwhile, preheat the oven to 400º. Combine the melted butter, garlic, salt and italian seasoning, set aside while the rolls rise. When ready to bake, brush this mixture over each roll (reserve some for later) and bake for about 20-22 minutes or until lightly golden. Remove from the oven, brush with the remaining garlic mixture, sprinkle with the parsley and the parmesan cheese. Serve immediately and enjoy.

NOTES
First and foremost, extra virgin olive oil can definitely be subbed in for the butter. Both are delicious, try each one and going forward, go with you favorite. The other big variation is the garlic. I have done the fresh garlic (picture above), but I find that it tends to get a bit dark/burned, although it tastes fine. The granulated garlic or garlic powder does not have that issue and can handle the high heat without scorching.
Additionally, there are many other herb variations that come to mind. Add a pinch of crushed red pepper, if you like a kick. Add different herbs (Za’atar comes to mind), or no herbs, just the garlic and parmesan. You decide, whatever you like, whatever your family prefers. Play around with it and get creative, you can’t fail, it will be delicious.


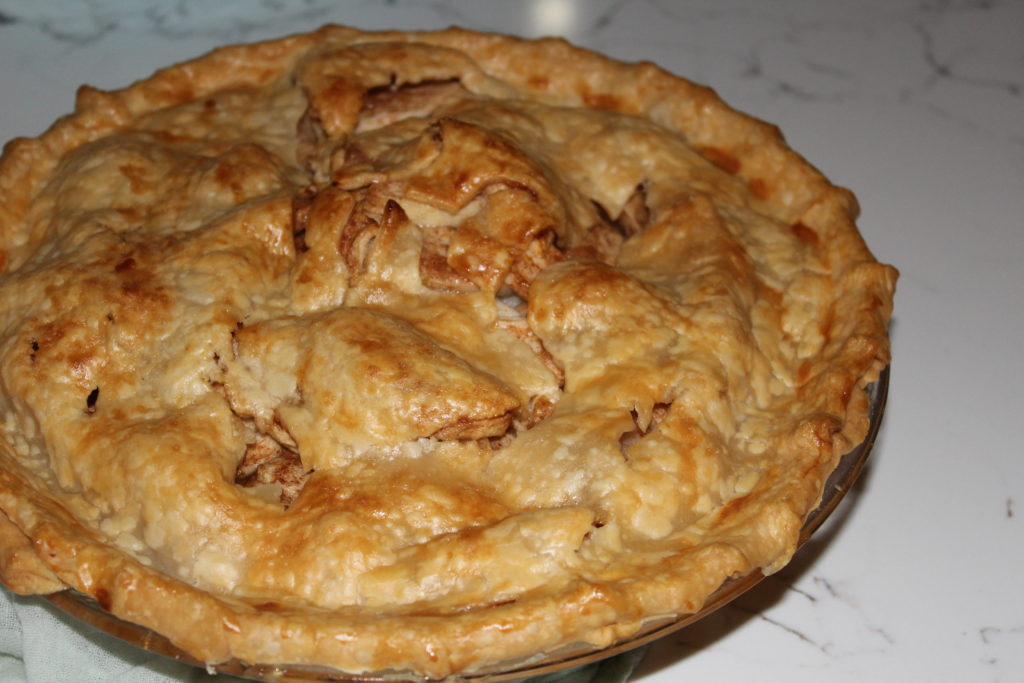
Mom’s Apple Pie

Well, fall has officially arrived and nothing says fall in New England more than a good old-fashioned apple pie. Local apples, a good, basic recipe, some quality vanilla ice cream and you will have a lot of happy campers!.

Now, I must tell you, as a child I often watched my mother pump out apple pies like she was making a grilled cheese. There would be a flurry of flour, mixing, rolling, peeling of apples, and poof…there was an incredible apple pie for dessert and the house smelled amazing. She made her own crust…I do not (I tried and just couldn’t master it!) and the speed with which she could put them together, to this day, astounds me. Coming from a very large family, one pie was definitely never enough so, multiple pies were always needed and they just appeared with so little effort or fanfare, very impressive.

INGREDIENTS
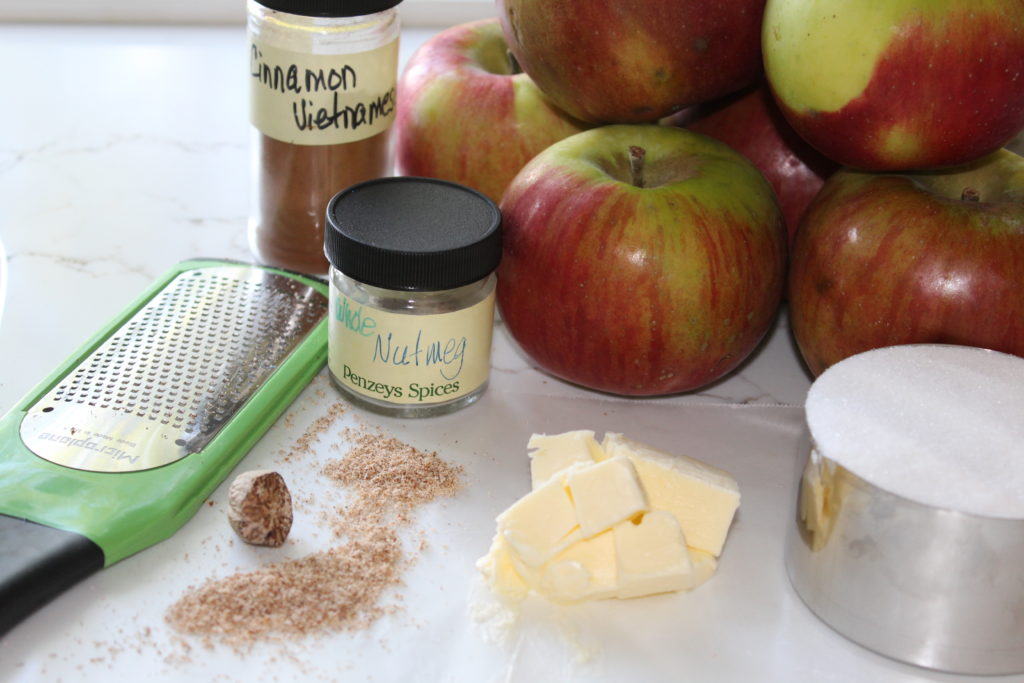
10-12 Cortland apples
1 cup sugar
1 tsp. cinnamon
1/2 tsp. nutmeg
3 Tbs. butter, diced
zest of lemon
juice from 1 lemon wedge
one double pie crust
1 egg, beaten with 1 Tbs. water

DIRECTIONS
Preheat oven to 425°.
First, roll out one crust and put in the  pie plate.
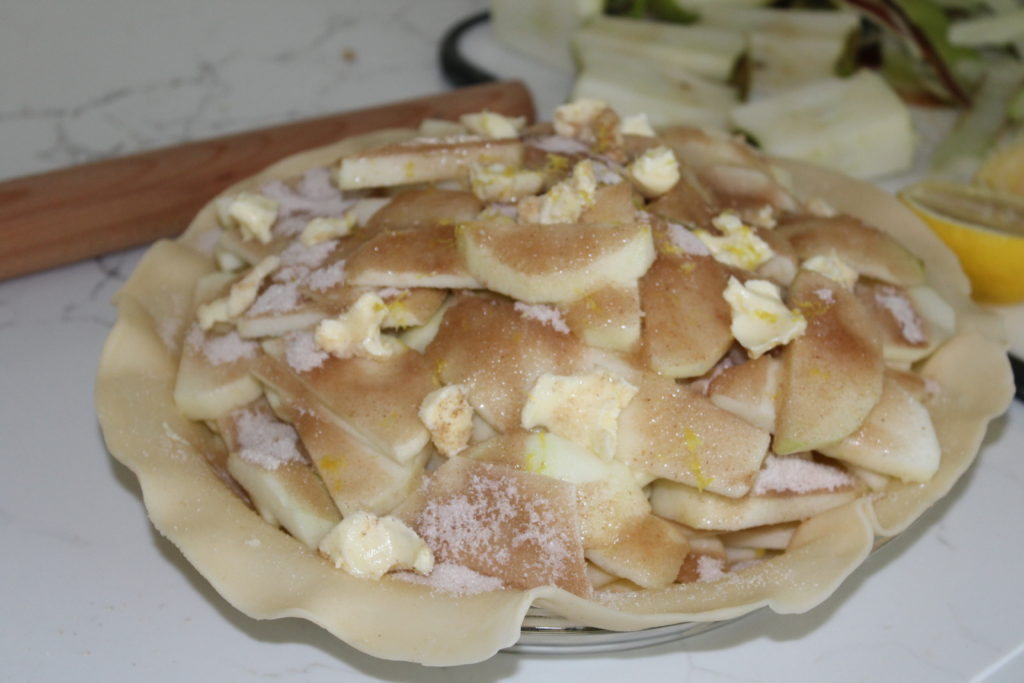
Then, combine the sugar, cinnamon and nutmeg in a small bowl. Next, peel and slice the apples. Place the apples in the bottom crust, sprinkle with the sugar mixture, dot with the diced butter, zest the lemon and squeeze a lemon wedge over the apples.

Top with second crust, cut slits to vent, brush with egg wash, and sprinkle the top with some natural, raw sugar.

Finally, cook at 425° for 15 minutes, reduce the temperature to 350° and cook for an additional 30-40 minutes or until bubbly and browned.

Serve warm, with a scoop of vanilla ice cream and enjoy.


Farmer’s Market Vegetable Salad

This is a tasty use of your farmer’s market produce. I had a little of this, a little of that, left over from my weekly farmer’s market trip and was trying to figure out how to use them. Then, I decided to put them all together, I added a simple dijon vinaigrette, a few herbs and voilá, an instant, beautiful and healthy side dish!

INGREDIENTS
2 ears of corn, blanched, cut off the cob
a handful of green beans, blanched and cut in 2″ pieces
4 small new potatoes, cooked and quartered
about a half pint of cherry tomatoes, halved
1⁄4 cup lemon juice
1 Tbs. Dijon mustard
1 cup extra-virgin olive oil
kosher salt and fresh ground pepper, to taste
handful of parsley, chopped
handful of basil, chopped

DIRECTIONS
First, combine the first four ingredients in a bowl and set them aside. Next, combine the next four ingredients in a small jar, shake well until completely emulsified. Then, pour a portion over the vegetable mixture and toss well to combine. I tend to have a good amount of dressing left over, because I prefer my salads on the dry side. Although I like it drier, use your best judgement when deciding how much dressing to add. Additionally, if you dress it earlier in the day, you may need to add a little more to moisten things up, just before serving.

Finally, add the chopped herbs, toss well to combine and serve. This tastes equally good whether served cold or at room temperature, therefore  making it a great choice for a picnic or big gathering.

NOTES
I have given you the recipe as I made it, you can adapt it and vary it, depending on your “leftovers”.

All things considered, this is a great dish for a crowd. You can just increase the quantities of vegetables and herbs (dill is a nice addition as well). Also, no worries if you have leftovers because each of these vegetables holds up well and is equally good the next day.


Mixed Fruit Cobbler with Sugared Almonds

If you’re looking for a delicious, crowd-pleasing dessert, then you’ve just found it. Summertime desserts should be easy, feed many and be pretty quick to pull together. Other than the fruit, these ingredients are mostly pantry staples, that take no time to measure out and assemble. So, please don’t be deterred by the list of ingredients and give it a try.

First, regarding the fruit, you can do innumerable combinations of your favorites. Here, I have used blueberries, peaches and nectarines. However, if you look closely at the pictures, I also threw in a few strawberries that I had. So, a great way to use up some random, leftover items. The one thing I would caution against, is just using one fruit…a combination of two or more is definitely preferred and is just more flavorful.

Additionally, feel free to mix up the amounts of each fruit to your preference or availability. If you like, try just blueberries and nectarines, a terrific combo and the nectarines don’t have to be peeled. So, that’s a big plus in my world. Additionally, add in some raspberries or mango, either would be wonderful. Finally, just don’t be afraid to be creative or practical with this.

INGREDIENTS
24 oz. blueberries
2 peaches, peeled and sliced
2 nectarines, sliced
2/3 cup sugar
2 1/2 Tbs. cornstarch
3 Tbs. lemon juice
1/8 tsp. kosher salt

TOPPING INGREDIENTS
1 cup flour
1/4 cup sugar
2 Tbs. cornstarch
1/2 tsp. baking powder
1/8 tsp. kosher salt
6 Tbs. cold butter, diced
1/2 cup half and half
1/3 cup sliced almonds
3 Tbs. turbinado sugar (raw sugar)
1 Tbs. egg white

DIRECTIONS
Preheat oven to 350º
Combine fruit in a 13×9 baking dish coated with cooking spray. Mix the 2/3 cup sugar, 2 1/2 Tbs. cornstarch, lemon juice and 1/8 tsp. kosher salt and then, sprinkle over the fruit and gently toss to combine.

For the topping, combine the flour, 1/4 cup of sugar, 2 Tbs. cornstarch, baking powder and 1/8 teaspoon of salt and stir to combine well. Cut the butter into the flour mixture until the mixture looks like coarse cornmeal. Then, add the half and half, gently mix with a fork, just until combined and moist. Next, drop by spoonfuls, evenly over the fruit mixture.

Finally, for the topping, combine the almonds, turbinado sugar and egg white. Toss to mix well and evenly sprinkle over the top and bake for about 50 minutes or until the topping is nicely browned. Serve with vanilla ice cream. This makes enough for about 10 people.


Jordan Marsh’s Blueberry Muffins

For New Englanders, most need no introduction to this recipe. To those that don’t know, Jordan Marsh was a large department store based in downtown Boston. They had a wonderful in-store bakery and though the bakery had many wonderful items, their blueberry muffins were what made them famous. These treats are overflowing with blueberries and have a yummy, sugar crusted top that makes them absolutely irresistible. Although the Boston store closed in the mid 1990’s, this recipe lives on and is still an all time favorite. Give it a try, I promise it will not disappoint.

INGREDIENTS
1/2 cup butter, room temperature
1 cup sugar
2 eggs
1-1/2 tsp vanilla extract
2 cups flour
1/2 tsp salt
2 tsp baking powder
1/2 cup milk
2-1/2 cups blueberries
2 Tbs raw sugar (for the top of muffins)

DIRECTIONS
Preheat oven to 375º.

First, cream the butter and sugar until they are light and fluffy; add the eggs, one at time, beating well after each. Then, add the vanilla and mix to incorporate. In a separate bowl, combine the dry ingredients (flour, salt, baking powder), then add to the mixture, alternating with the milk. Do not overmix.

Crush 1/2 cup of the blueberries with a fork, add to the batter, stir to combine and then fold in the remaining whole berries.

Next, spray a 12 cup muffin pan with non-stick spray and I also recommend using paper muffin liners. Because of the volume of blueberries, they definitely tend to stick to the pan and the paper liners just make things easier. Fill the liners with the batter and take note that they will almost be overflowing. Finally, sprinkle the 2 tablespoons of raw sugar over the tops. The combination of the very full muffin liners and the additional sugar on top makes a wonderful, crunchy topped muffin when they overflow a bit (and they will). Trust me, that overflowing batter, with the crispy sugar, without a doubt is my favorite part of the muffin, it will become your favorite as well.

Bake at 375º for about 30-35 minutes. Cool in the pan. After several minutes of cooling, run a knife around the edge of each muffin to release it from the pan and then cool on a wire rack for about 30 minutes…if you can wait that long!

NOTES
If you don’t have raw sugar or turbinado sugar, you definitely can use regular granulated with good results. This will seem like too much batter for only 12 muffins, but stick to the 12 muffins, because part of the yumminess is the overflowing, crunchy top. Also, when storing the muffins, do not cover them or they will be too soggy the next day.


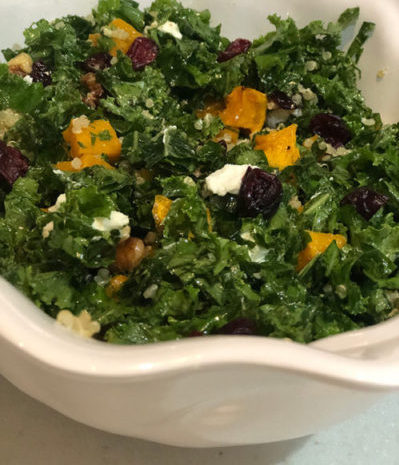
Roasted Butternut Squash and Kale Salad

Don’t say it, I understand, you don’t really like kale. Honestly, I get that. I was not a big fan either, I was just trying to be a bit more healthy and give it a fair shake. Additionally, my husband, definitely was not a kale fan. When he recently said “I really liked that kale thing, you should make it again”, I was shocked.

So, this is for all of you that want to click away and say “no thanks”. Please, just give it a try, you too might be surprised. It’s healthy, it’s hearty, it’s delicious and pretty darned easy to pull together. Another big plus, this stands up well for a couple of days and actually tastes better as it “ages” and the flavors have a chance to meld.

INGREDIENTS
1 small butternut squash, peeled, seeded, and diced into 1/2-inch cubes
2 Tbs. olive oil
kosher salt and fresh ground pepper
1 cup dry Israeli (pearl) couscous, cooked
2 cups, thinly sliced kale leaves
1/3 cup dried cranberries
1/3 cup chopped walnuts, lightly toasted
2 oz. goat cheese, crumbled

VINAIGRETTE
3 Tbs. cider vinegar
3 Tbs. extra virgin olive oil
1 small clove garlic, grated
1 Tbs. maple syrup
2 scant tsp. dijon mustard
salt & pepper to taste

DIRECTIONS
Preheat oven to 425°F
First, place the cubed butternut squash on a rimmed baking sheet, sprinkle with the olive oil, kosher salt, fresh ground pepper and toss to combine. Then, bake for 25-35 minutes, tossing occasionally, until tender and slightly browned. Next, remove the squash from the oven and set aside to cool for a bit.

Meanwhile, combine the vinaigrette ingredients and either whisk to combine in a small bowl or use a covered glass jar and shake to combine well. Preferably, make this a little bit ahead to let the flavors mingle.

Next, place the sliced kale into a bowl, drizzle with a little olive oil (maybe a teaspoon) and a half teaspoon of salt. Then, dig in (with clean hands of course!) and massage the kale for a few minutes. I know this sounds strange, but it actually softens the kale a bit, which gives it a better texture and it does make a big difference.

Now add the, couscous, cranberries, and walnuts to the kale and toss well to combine. Then, when the squash has cooled a bit, add that to the bowl and add most of the vinaigrette (because I prefer a dryer salad, I always hold some out to add later, if needed), toss well to coat the kale. Next, add the crumbled goat cheese and toss lightly to combine, trying not to break up the goat cheese. Finally, don’t forget to give it a taste, check the flavors and add more salt, pepper or dressing as needed.

NOTES
Additionally, you can switch up the grains, as you wish, depending on what you have on hand. I have tried this with quinoa (see below) and with barley, instead of the couscous and honestly, all three are delicious. Since the quinoa has a good amount of protein, it makes a nice vegetarian choice.

One other note, some people actually put the kale in a food processor and pulse it to break down the leaves into smaller pieces. This has a similar result to the massaging and either technique is fine. However, if you do choose the food processor option, be very careful, you can quickly go from small pieces, to mush if you process it too much.

Lastly, a great swap-out to the dried cranberries is dried cherries. This is a delicious alternative, Trader Joe’s has them and they are right next to the cranberries. They do tend to be larger than the cranberries, so I would chop them a little before using. I first tried them when they were out of the cranberries and I was quite surprised how tasty they were.

kale salad with quinoa


Ultimate BLT Sandwich

This time of year, we all salivate for those fresh from the garden tomatoes. Of course, there are innumerable ways to enjoy their deliciousness, and one of my favorites is a well-assembled BLT. So, with these beauties at their peak, there is no better time to make yourself the ultimate BLT.

Make no mistake, the generic version, the one we all grew up with, is definitely excellent in its own right. However, you will be missing out if you don’t try this amped-up version. It actually takes nearly no additional time to pull together and once you’ve had this, you will not being returning to the old standby. Don’t forget, the quality of the ingredients is essential here, so hit your backyard garden or head out to your local farmer’s market and get the best you can of each.

INGREDIENTS
2 slices, double thick bacon
2 slices bread of choice
1 quality tomato, yours or from farmer’s market, sliced
2 Tbs. extra virgin olive oil
1 Tbs. red wine vinegar
kosher salt
fresh ground pepper
arugula or lettuce of your choice

DRESSING
1/2 cup mayonnaise
1 1/2 tsp. fresh lemon juice
1/4 cup fresh chopped basil
1/4 tsp. cayenne pepper

DIRECTIONS
First, cook the bacon to your desired doneness, but definitely on the crispy side. Meanwhile, combine the dressing ingredients and set aside, until ready to assemble. Also, in a shallow dish or glass pie pan, combine the olive oil, vinegar, salt and pepper. Whisk to combine. Then, core and slice the tomatoes. Add them to the vinaigrette and gently turn to coat them on both sides and let them marinate for at least five minutes.

Next, preheat your broiler and move your oven rack to the top third of the oven. Now, this may seem odd, but you’re only going to toast ONE side of the bread and that’s why you need the broiler. The reason for that is with only one side toasted, the bread doesn’t become so brittle and the soft, un-toasted interior actually holds the sandwich together much better. So, place the bread slices on a cookie sheet and lightly broil/toast them, again to your preferred doneness, usually only a minute or two. Make sure you keep a close eye on them, all broilers are different and these can go from nicely toasted, to burnt in no time.

Now, it’s time to assemble your sandwich. Generously, spread the mayonnaise mixture on both pieces of the untoasted side of the bread. Then, layer the tomato slices, the bacon and the arugula (my favorite!) or lettuce and top with the other bread slice. Finally, what you’ve been waiting for…cut the sandwich in half, serve immediately with a few potato chips and enjoy the fruits of summer.

NOTES
Just an aside regarding the “mayonnaise dressing”, since you will have some leftover…this is absolutely delicious as a spread on a grilled cheese and tomato sandwich. So, do save what’s remaining and the longer it sits, the better it tastes.