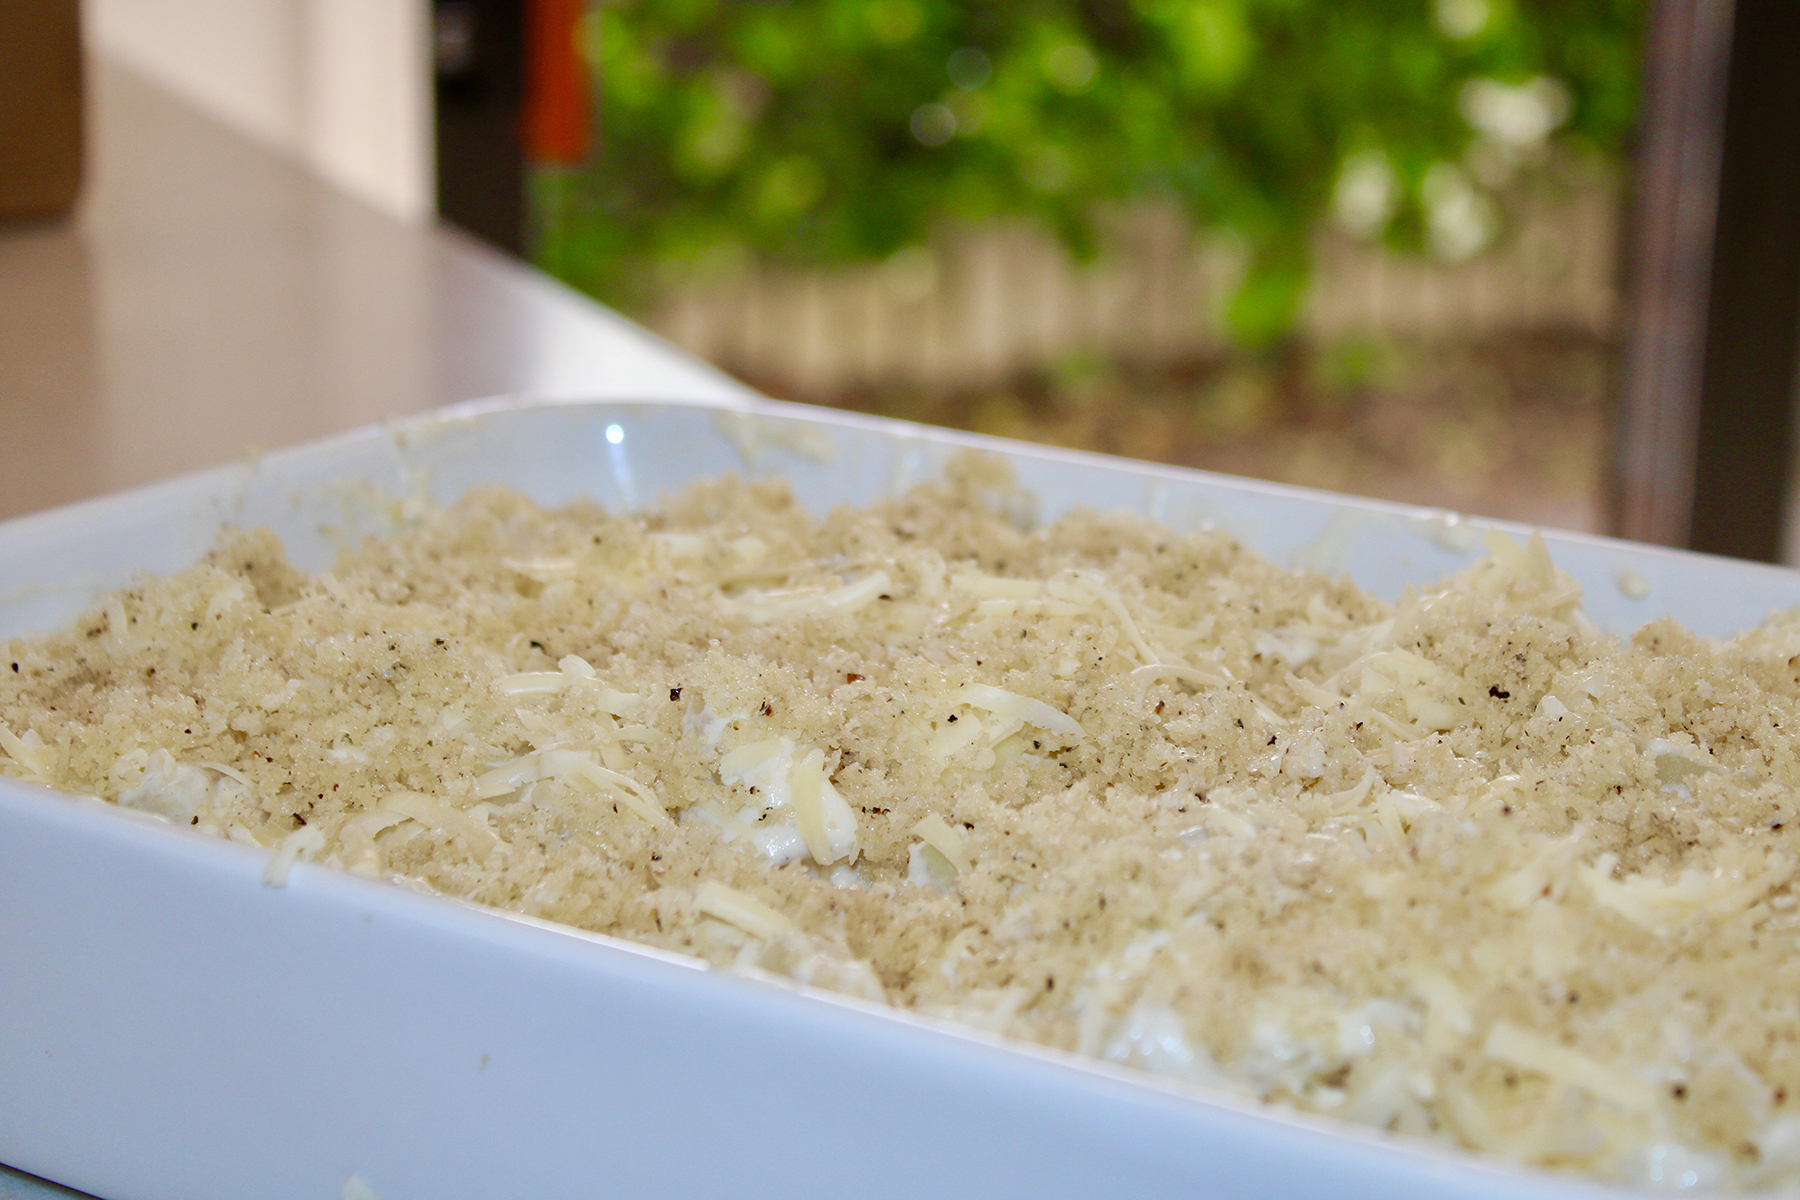
Globe Au Gratin Potatoes

Need to bring potatoes to a gathering? You have just found your new, go to dish for “fancy” potatoes. I usually reserve making them for the holidays, bringing to a gathering or a very special dinner because they are a bit decadent. Irresistibly delicious and always a big hit, but definitely rich.

This is an adaption from a recipe I found in the Boston Globe (hence the name), over thirty years ago! I have tweaked it a bit over the years, using different cheeses, swapping half and half for the original light cream and always had great luck. Give it a try, use your favorite cheese; use light cream, half and half or milk, but whichever you choose, I promise you will not be disappointed.

INGREDIENTS
5 lbs. potatoes, yukon gold or russet (see notes below)
8 Tbs. butter, divided
6 Tbs. flour
1 tsp. dry mustard
3 cups light cream or half & half
1 cup grated, extra sharp cheddar (see notes below)
1/2 cup panko bread crumbs
kosher salt and fresh ground pepper

DIRECTIONS
Preheat oven to 350º
Peel potatoes and boil until almost tender. Drain, cut into bite-sized pieces and put in a greased casserole dish.

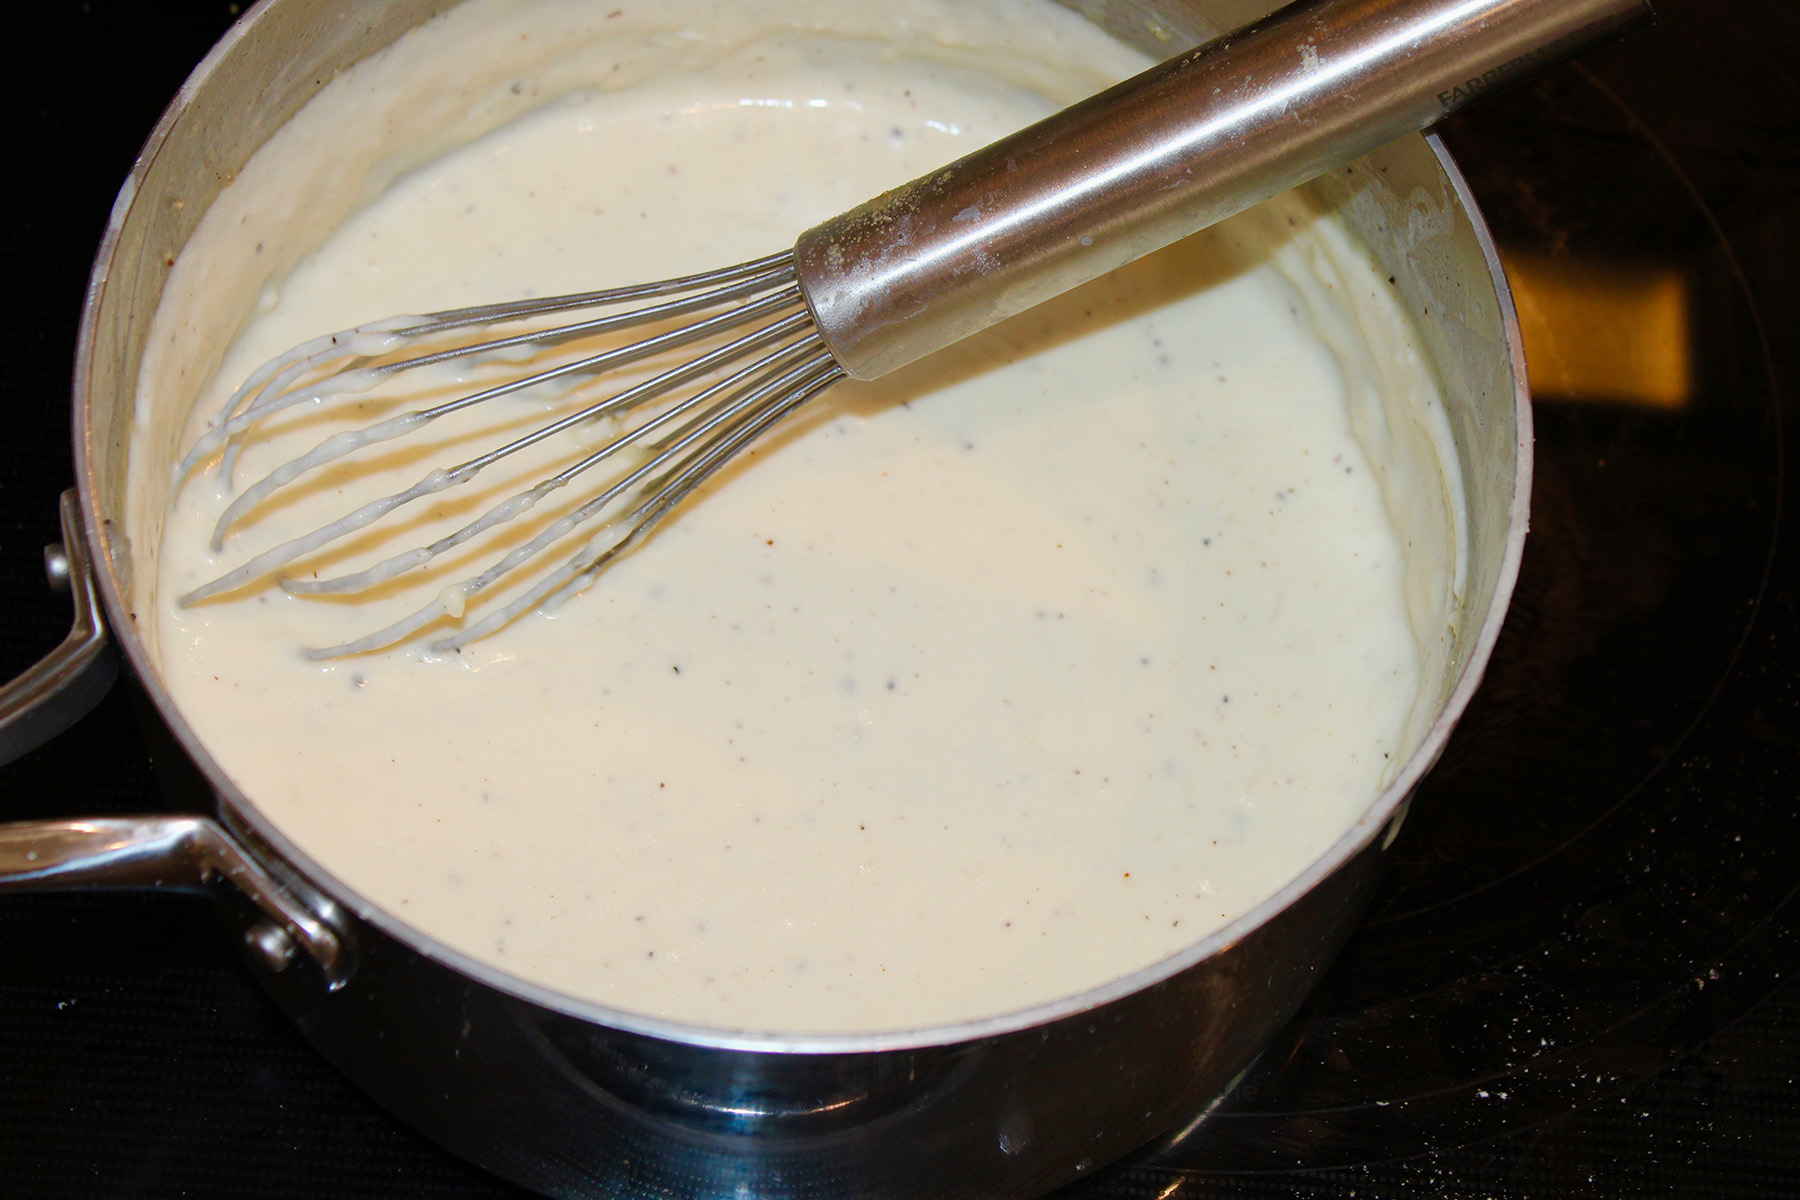
While the potatoes are cooking, melt 6 Tbs.of the butter in a sauce pan on medium heat, add the flour, mustard, salt & pepper, stir and cook for a minute or two, until slightly browned. You’re just cooking the raw taste out of the flour here. Then, slowly add the 3 cups of half and half, cook, stirring frequently until the sauce starts to thicken. Pour over the potatoes, then sprinkle the cheese on top of that.

Finally, melt the remaining 2 Tbs. of butter, pour over the bread crumbs, season with salt and pepper, and mix well. Sprinkle the bread crumbs over the potatoes and bake in a preheated 350º oven for about 20-30 minutes or until it is bubbly and browned.

NOTES
Although you can use russet or yukon gold potatoes, I think the yukon golds hold up a bit better. They are definitely my new favorite, as they keep there shape better, even if overcooked a bit. The russets, when overcooked a bit, can breakdown and tend to get a bit mushy. They still taste delicious, they’re just not as firm. Regarding the grated cheese, I highly recommend getting a block of cheese and grating it, rather than buying the bag of grated. The pre-grated versions have additives to lengthen the shelf life and it doesn’t melt as well.


Heirloom Tomato Salad Variations: Enhancing Flavor and Presentation

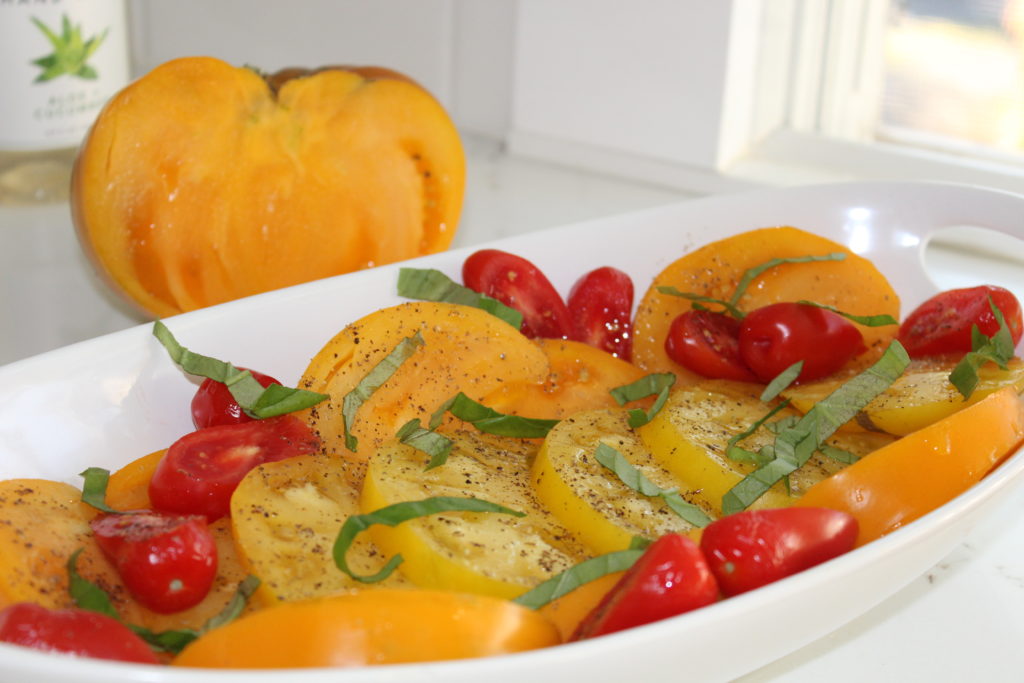
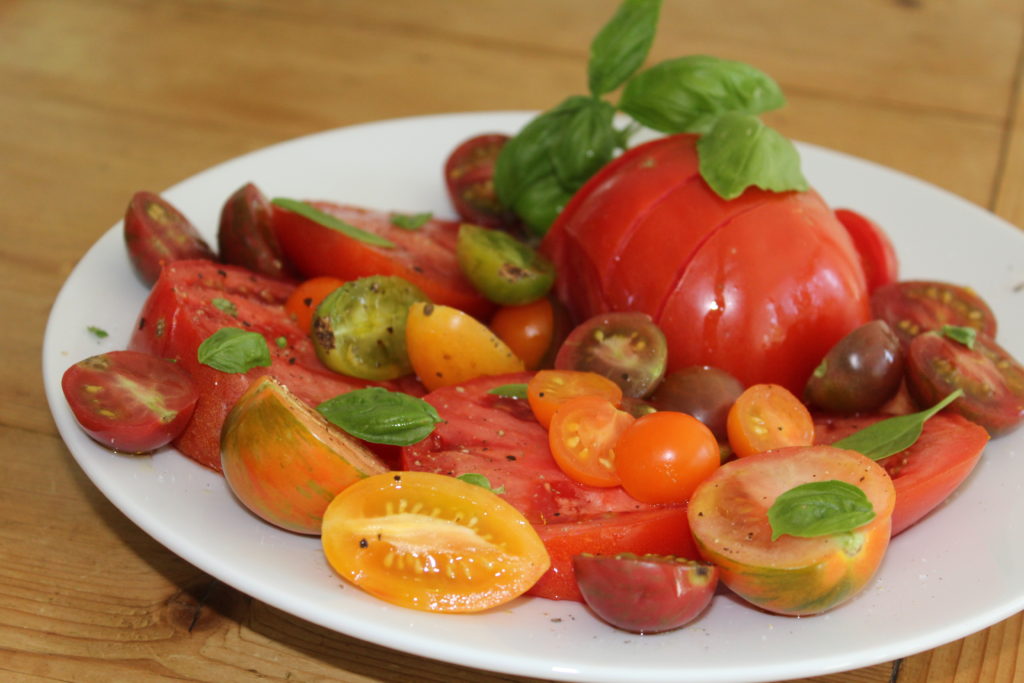
Heirloom tomatoes should always be the star and simple is always better. You can just slice or quarter them, drizzle with good olive oil, sprinkle with flaky salt, fresh ground pepper, and a sprinkling of juliennéd basil. That’s the basic formula and trust me, everyone would be quite happy at just that. However, a few additions can take it to a whole new level and make a significant difference in both flavor and presentation.

Here are a few of my favorites.

yummy heirlooms
Basic, but still yummy!

So, you have a collection of gorgeous heirlooms, different colors, different sizes. First, slice and quarter them, mixing the colors and shapes. Then, add fresh mozzarella, burrata, or some crumbled gorgonzola would work well too. Just tear or slice the cheese and sprinkle it over the tomatoes. Next, if you have some pine nuts or walnuts, toast them in a dry skillet (just heat them on low until they’re fragrant) and sprinkle those on as well. Additionally, a drizzle of pesto or some basil oil would be a wonderful option.

Here, heirlooms sharing space with lemon poached chicken and avocado.
Another simple presentation.

Whatever your choices, always be sure to include fresh basil, good olive oil, fresh ground pepper, and a pinch of good flaky salt. Be careful not to overdo the additions; less is more, keep it simple, and let the tomatoes shine.

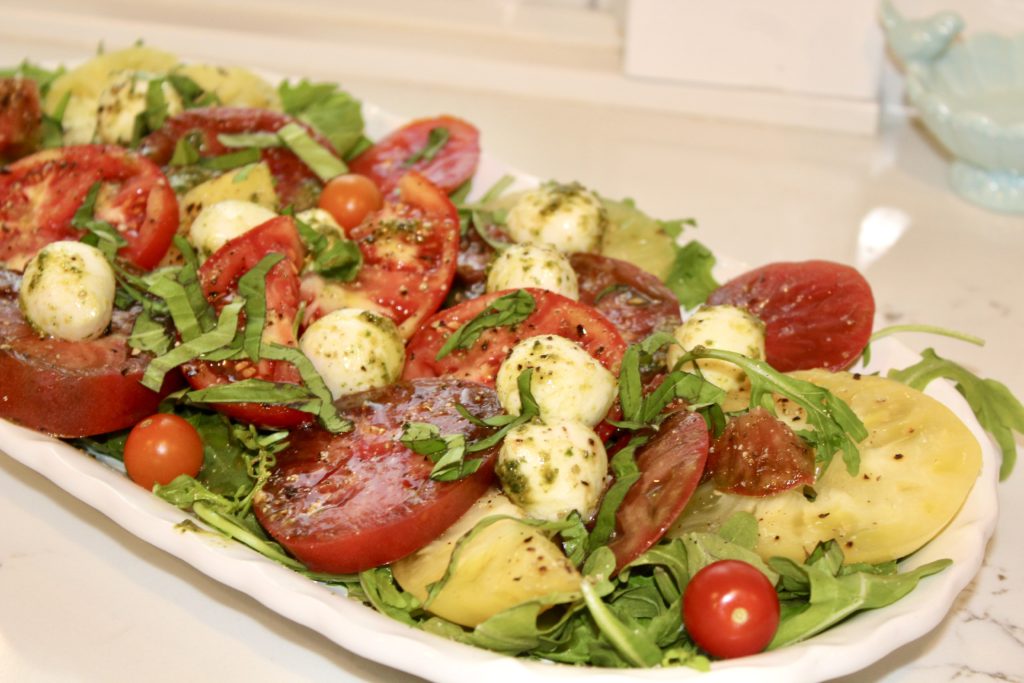
heirloom salad
Here I used mozzarella balls, tossed with pesto and served over some arugula.
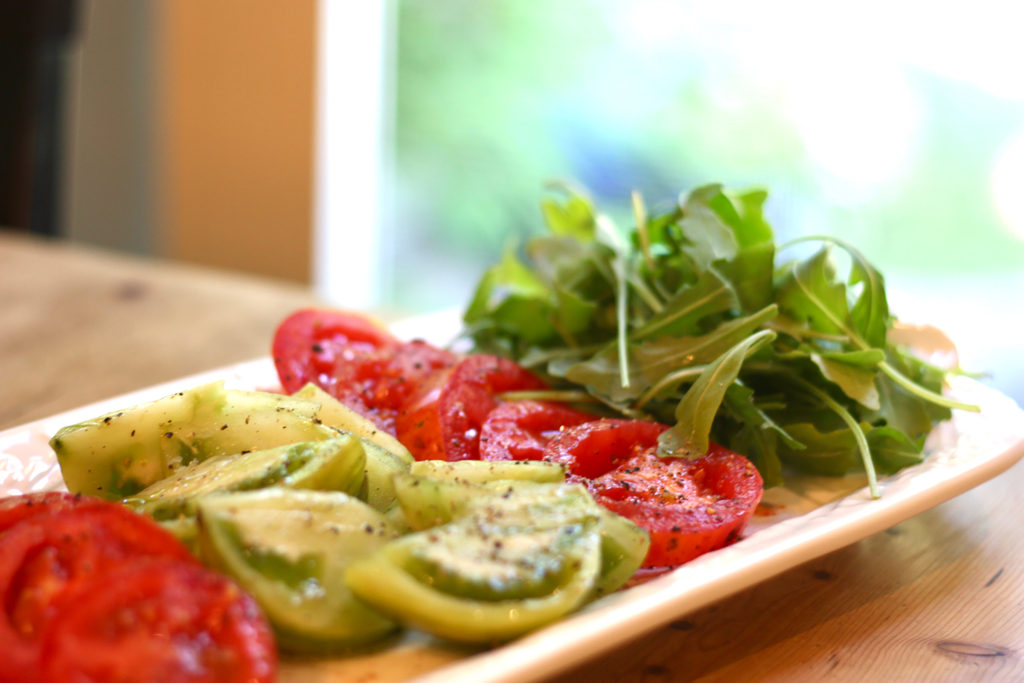
heirlooms
As simple as it gets.


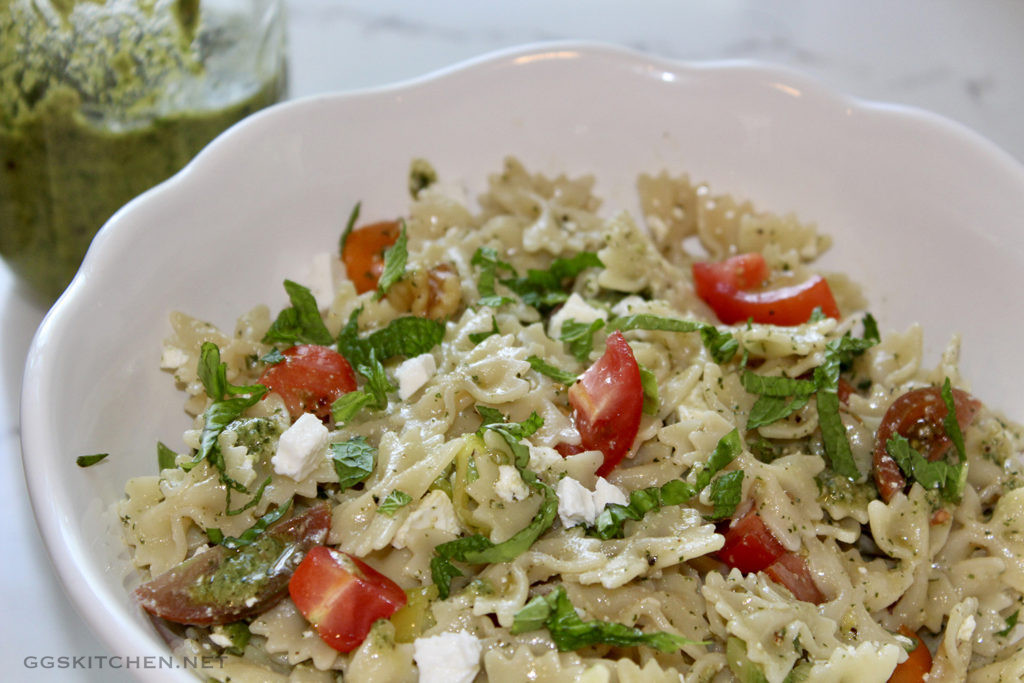
Basil Mint Pasta Salad

Yes, yes, I know pasta salad has been done a million times, however this is a different take on the boring, generic pasta salad that we’ve come to loathe. I use a basil, mint pesto as the base for this dish and once you have some on hand (and I definitely recommend that you do, especially in the summer), you can pull this together in no time. There is wonderful flavor and texture in every bite and it’s even better the next day.

Feel free to vary the ingredients to your liking and use what you have on hand. Given that it has mint, tomatoes, kalamata olive, pine nuts and feta, I would say that it’s a loose adaption of a greek pasta salad. I have not given specific amounts here, because you can be very flexible with this. Personal preference and availability of ingredients definitely play a big part in pulling this together. Don’t be afraid to add more of those things you love or have an abundance of. Alternatively, if you don’t like a certain ingredient, then just leave that out.

INGREDIENTS
basil mint pesto
extra virgin olive oil
1 lb. mini farfalle pasta or other small pasta, see note below
cherry tomatoes, halved
kalamata olives, pitted, sliced in half
toasted pine nuts
kosher salt & fresh ground pepper
feta cheese, crumbled or cubed
fresh basil & mint, julienned

DIRECTIONS
First, cook the pasta, according to the package directions and be careful not to overcook it. No one likes a mushy pasta. Meanwhile, if you don’t already have some on hand, make the basil mint pesto, which should only take about 8-10 minutes.

Next, drain the pasta and while still warm, add some of the pesto and stir to combine. Again, no specific amount; if you like a stronger flavor, add more, but taste as you go. I often add a drizzle of olive oil and a bit of the olive brine for additional flavor. Then, add the tomatoes, olives, pine nuts, stir to combine and season with salt and pepper. Remember, the feta is a bit salty, so be careful with your salt.

Finally, add the feta cheese, the julienned basil and the mint. If too dry, add another drizzle of the olive oil and/or another drizzle of the olive brine.

NOTES
I add the feta cheese at the very end, because I don’t want it to break down and get mushy. I also reserve some of the fresh herbs for sprinkling on top, just before serving. It’s not essential, but just makes for a prettier presentation.

A few great additions to this are, julienned red bell peppers, sliced scallions or sliced shallots. Another tasty option is a few sliced pepperoncini, and definitely feel free to add some of the brine from these as well, it all just adds up to more flavor.

Also, you can certainly vary the pasta shape to your liking or what you have on hand. Orecchiette is a definite favorite of mine because it has little pockets and they grab some of the ingredients, making for an even tastier bite. Another point, although I don’t give specific amounts here (other than the pasta), you do not need to buy multiples or large amounts of any one ingredient.


Basil Mint Pesto

Just in time for your next barbecue. Although this is not a traditional pesto, it is simple, delicious, and versatile. That’s a great combination, it’s a snap to make and a great reason to always have it on hand. Given it’s versatility, it can help you put a meal together in no time. Think grilled cheese, think pizza, think flavor booster for a good soup or a wonderful pasta salad (shown below). You can definitely freeze this, but I dare say that you won’t need to.

INGREDIENTS
1/2 cup walnuts
1/2 cup fresh basil, 
1/2 cup fresh mint 
1/2 cup freshly grated Parmesan, plus more for garnish 
1 tablespoon red wine vinegar
small garlic clove, grated 
Pinch of crushed red pepper
1/2 cup extra virgin olive oil
kosher salt and fresh ground pepper  

DIRECTIONS
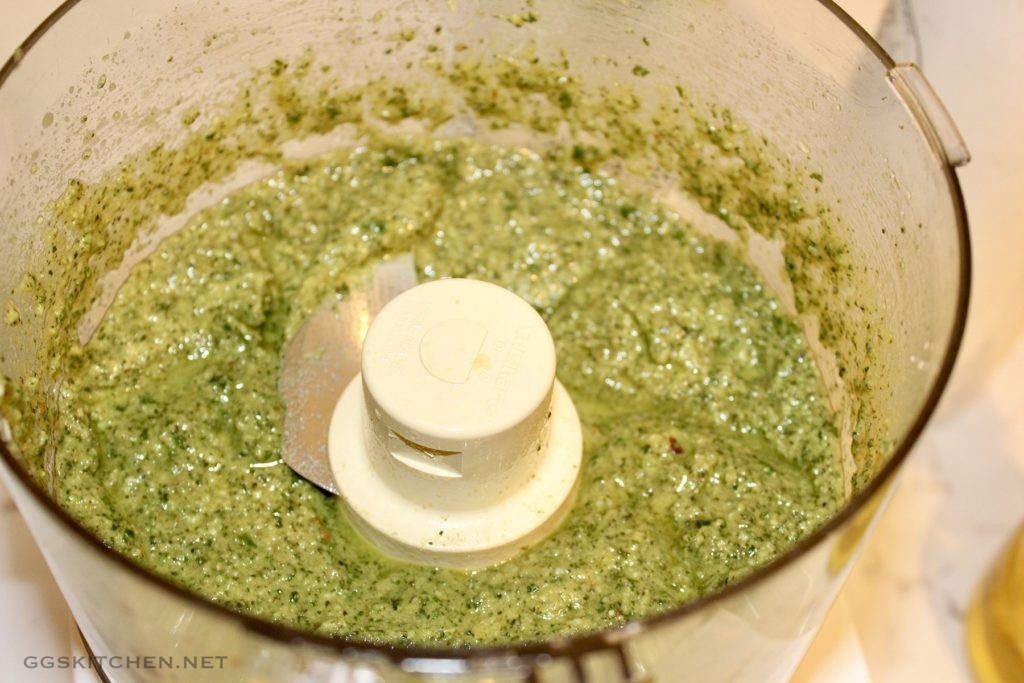
First, lightly toast the walnuts in a dry skillet for a few minutes, until fragrant and let cool slightly. Next, put the walnuts, basil, mint, parmesan, vinegar and crushed red pepper into your food processor. Pulse until the ingredients are combined but still chunky. Then add in the olive oil and pulse briefly to combine. Finally, taste and season as needed, with kosher salt and fresh ground pepper. The parmesan is a bit salty on its own, so be careful with how much salt you add. That’s it, your done!

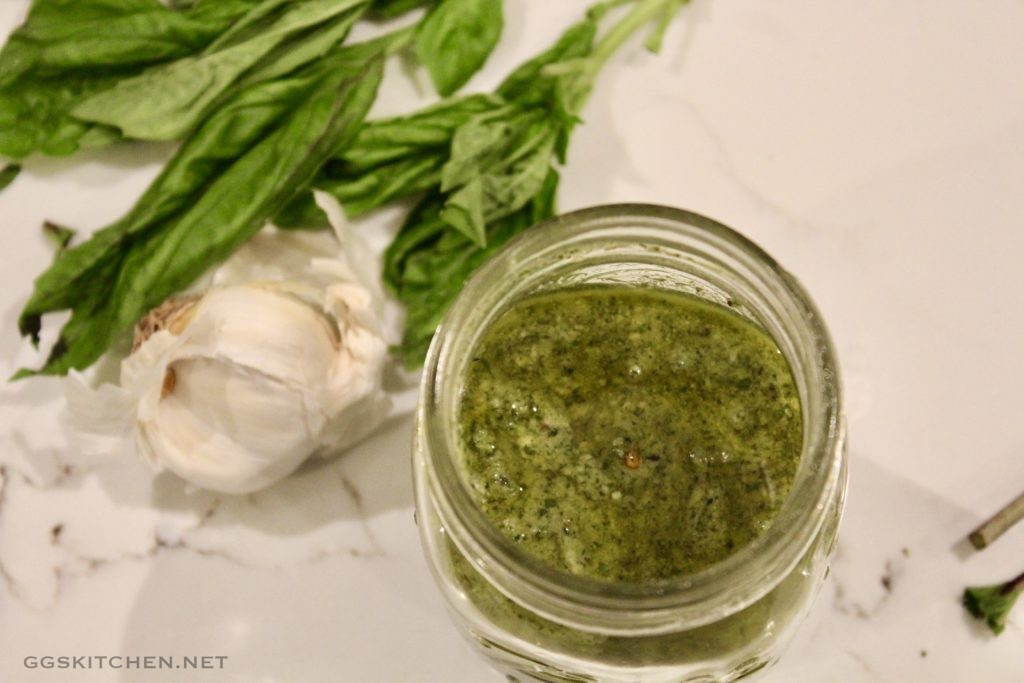
basil mint pesto

NOTES
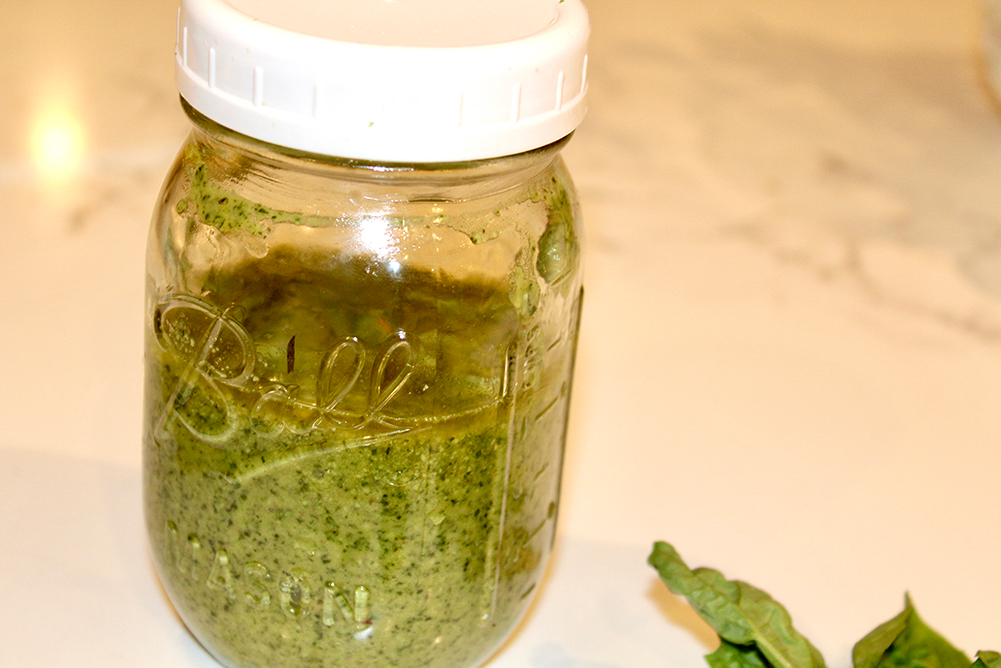
The options for using this are too numerous to list. Although the most obvious one is as a sauce over pasta, don’t stop there. Try it over grilled fish, drizzled over a tomato salad or as a spread on a sandwich or grilled cheese. Store in an airtight container. Also, take note, that this doesn’t make a huge quantity, so double it if you wish. Personally, `I find this a more manageable quantity.


Pulled Pork Perfection

This is a dangerous dish to have around. Between the intoxicating aroma filling the house and the mouthwatering flavor, this is a tough one to stop eating. Yes, I think I may have a problem, but this is so delicious! Although this takes about 4-5 hours (depending on the size and your oven) and may seem overwhelming, it is actually quite simple. So few ingredients, very little tending or fussing and the oven does all the work.

INGREDIENTS
3-5 lb. boneless pork shoulder (sometimes called Boston Butt)
1-2 large sweet onions, thickly sliced
1/2 cup spice rub, I use Bad Byron’s Butt Rub or my homemade rub
2/3 cup apple cider vinegar

DIRECTIONS
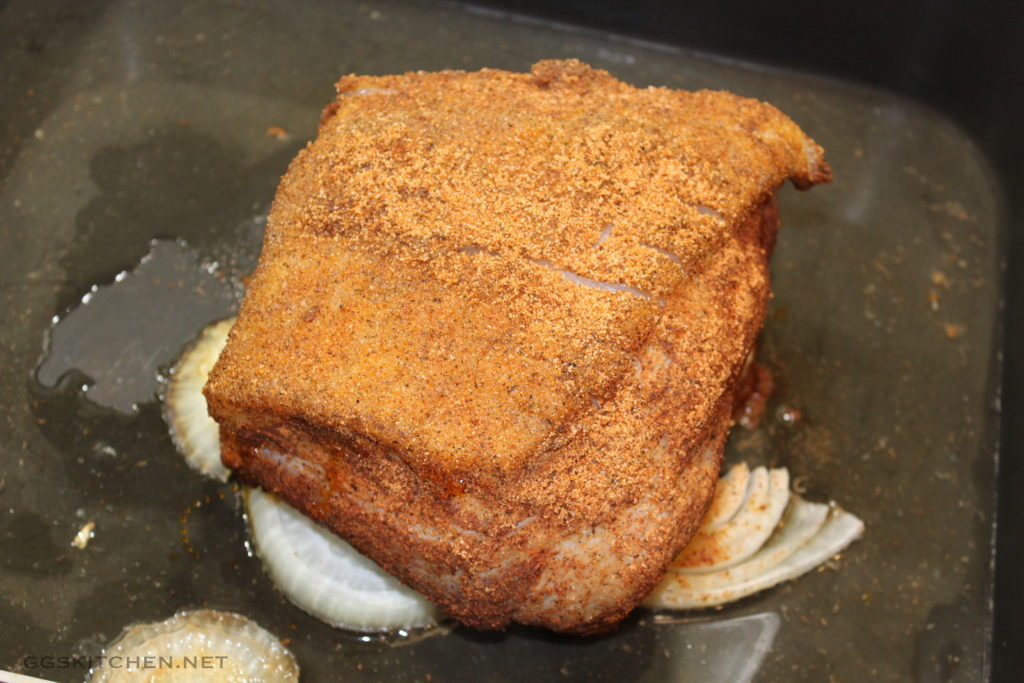
The night before or early on the day of cooking, prepare the roast. First, if your pork shoulder has one side with a heavy layer of fat, you want to score that before cooking. Just make shallow cuts, first in one direction and then again in the opposite direction, forming a diamond pattern. No need to be fuzzy here, you are just allowing the fat to render out, without curling the meat. Next, sprinkle the spice rub on all sides of the pork, using your hands to rub it in and coat it completely with the rub. It will seem like a lot, but that’s okay, it should be, it needs to be quite heavily coated. Place the roast on a large plate and cover it with plastic wrap and refrigerate, hopefully for a solid 3-4 hours, preferably overnight.

Preheat the oven to 300º
Remove the roast from the refrigerator about 30 minutes before cooking. Put the onions in your roasting pan, in one close layer. This will be the “bed” that the roast sits on and it adds great flavor to the pan juices. Place the roast on top of the onions and pour the cider vinegar into the pan around the onions. Cook the pork for 4 – 5 hours or until it shreds easily with a fork. After the first hour, baste the roast with the pan juices. If the pan juices dry up, add a small amount of water, to ensure the onions don’t burn. Continue to baste, about once an hour.

When the meat is cooked, use two forks, pulling apart the meat and shredding it into bite-sized pieces, discard any large pieces of fat and add some of the pan juices, to keep it moist until serving.

NOTES
Serve the pulled pork with buns of your choice, a drizzle of pan juices, and some Lime Cilantro Slaw. If you’re feeling energetic, you could try these, no-fail, delicious buns from King Arthur’s website. You won’t be disappointed! Alternatively, I have added potatoes, carrots and parsnips to the pan and served it more as a roast. That is a great cold weather, comfort food meal, that also never disappoints.


Irresistible Molasses Bread

Okay, I know, you don’t want to or you “can’t” make bread. Well, I’m telling you that yes, you can make bread and you should make this one. No worries about failing, this is a very easy, “anyone can make it bread”.

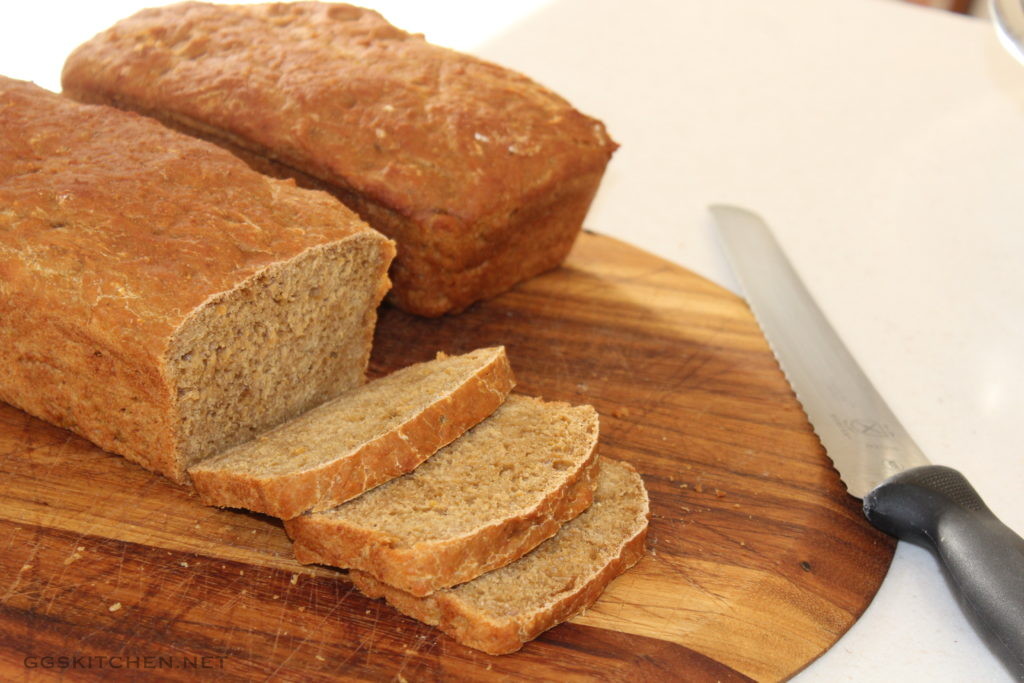
Often called Anadama bread, it is an old-fashioned, New England favorite, with a legendary history and numerous variations. Aside from all of that (google it, to learn more), this is just an easy, delicious recipe for everyday bread, with a wonderfully warm, slightly nutty flavor. It is terrific hot out of the oven, the next day and beyond, as simple toast with butter, or used for an incredibly yummy grilled cheese. Another New England favorite, that works beautifully with this bread, is a peanut butter and bacon sandwich. If you haven’t tried a peanut butter and bacon sandwich, do not delay, do not make a face…just try it, it is flat-out delicious.

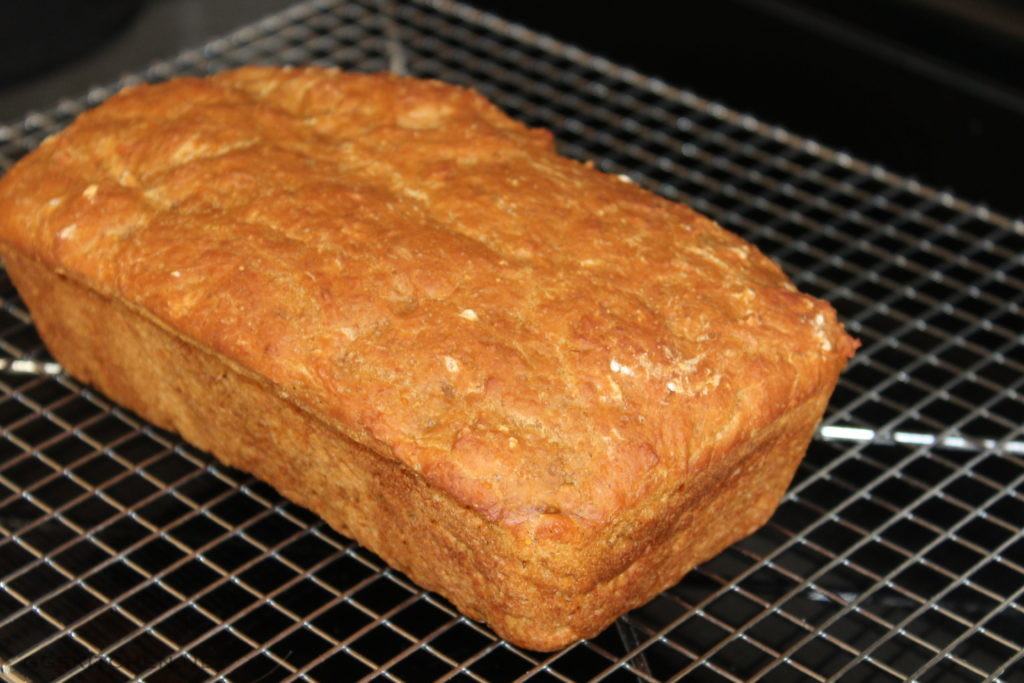
Ohlin’s Bakery, was a local favorite that made a bread, similar to an Anadama bread, that was absolutely irresistible. Unfortunately, the bakery had a bad fire and has never re-opened. We were flat-out addicted to the Ohlin’s Bakery version and this is my attempt to meld the two. While this is still not quite the same, it’s darn close and satisfies my nostalgic taste buds. Also worth noting, this makes two loaves and that is a very good thing, because it is hard to stay away from it. If you happen to have more will-power than me, don’t despair, it freezes beautifully or, delight a friend with the second loaf. One caveat, this does not bake up as a full size loaf, it is more like a quick bread size, so don’t despair when it has a lower rise.

INGREDIENTS
1/2 cup medium cornmeal
2 cups water, boiled
1/2 cup warm water
1 package yeast, 2-1/4 tsp.
1/2 cup molasses
1 Tbs. kosher salt
3 Tbs. butter, room temperature, cut into cubes
4 1/2 cups bread flour

DIRECTIONS
First, place the cornmeal in a large bowl. Then, stirring continuously to prevent lumps, slowly pour the boiling water into the cornmeal. Set aside for 30 minutes. Meanwhile, in a small bowl, put the 1/2 cup of warm water and sprinkle the yeast over it. Sprinkling this into the water, as opposed to just dumping it in, prevents clumping.

After the 30 minutes, add the molasses, salt and butter to the cornmeal mixture and stir to combine. Next add the yeast, water mixture, again, stir to combine. Then add the flour, one cup at a time, stirring to combine after each cup. By the way, I do not use a mixer for this, I do it by hand. It will be a rather wet, scraggy mess, not to worry, that’s normal.

Finally, grease two 5×9 loaf pans and spoon the mixture into the pans. No need to fuss over splitting it evenly, just eyeball it. Then, cover the loaf pans with a clean dish towel and set aside for 3-4 hours, until puffy and roughly doubled in size.

Then, when nearly ready to bake, preheat the oven to 350º, bake the bread for 40-50 minutes, or until a toothpick comes out dry. Let the loaves cool for a few minutes and then remove from the pan and continue to cool on a rack.


Roasted Rainbow Beets

Beets are one of those vegetables that we don’t seem to have often enough, for me anyway and I’m not sure why. They are absolutely delicious, simple to cook, and good for you. Also, when you happen upon rainbow-colored beets at the farmer’s market, you should grab them and treat yourself to one of the prettiest vegetables, ever. They go perfectly with almost anything and any leftovers, you can use to make a yummy beet salad.

INGREDIENTS
yellow/orange/red beets
traditional purple beets
3-4 Tbs. olive oil
several thyme and rosemary sprigs
kosher salt
fresh ground pepper

DIRECTIONS
Preheat oven to 400º
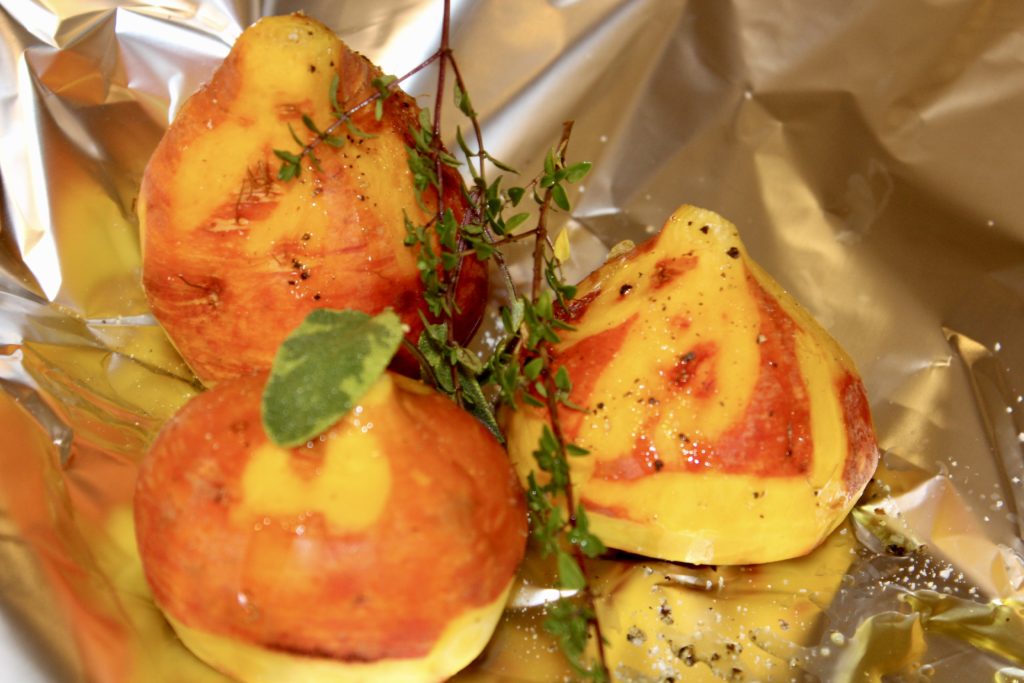
First, wash the beets and cut off the ends. Next, take a sheet of tin foil and place each color beet onto the foil. Then, sprinkle each with a little olive oil, salt, pepper and toss the thyme and rosemary sprigs over the beets. Wrap the packages, place them on a sheet pan and bake for 35 to 40 minutes.

At about the 35-minute mark, take out one package, unwrap it, and stick a knife in one of the beets, to make sure it is tender. The knife should easily pierce the beet, this is similar to checking potatoes for doneness. When tender, remove from the oven and set aside, to cool for a bit. Then, when the beets are cool enough to handle, you can peel them. You can use a pairing knife, but I find using a dry paper towel and rubbing the skin off is much more efficient and your hands don’t get as discolored. Sometimes I actually peel them before cooking, but lately, I find doing it after cooking them saves time. Either way is fine. Once you have peeled the beets, cut them into 1/4″ to 1/2″ slices. I like to put them on a bed of arugula, to show off their colors. Sprinkle with salt and pepper and serve.

Alternatively, I will often add some crumbled goat cheese, toasted walnuts, and a simple vinaigrette over everything. You could also just quarter the beets and place them in a serving bowl with a drizzle of olive oil, some salt, and pepper.


Ginger Molasses Cookies

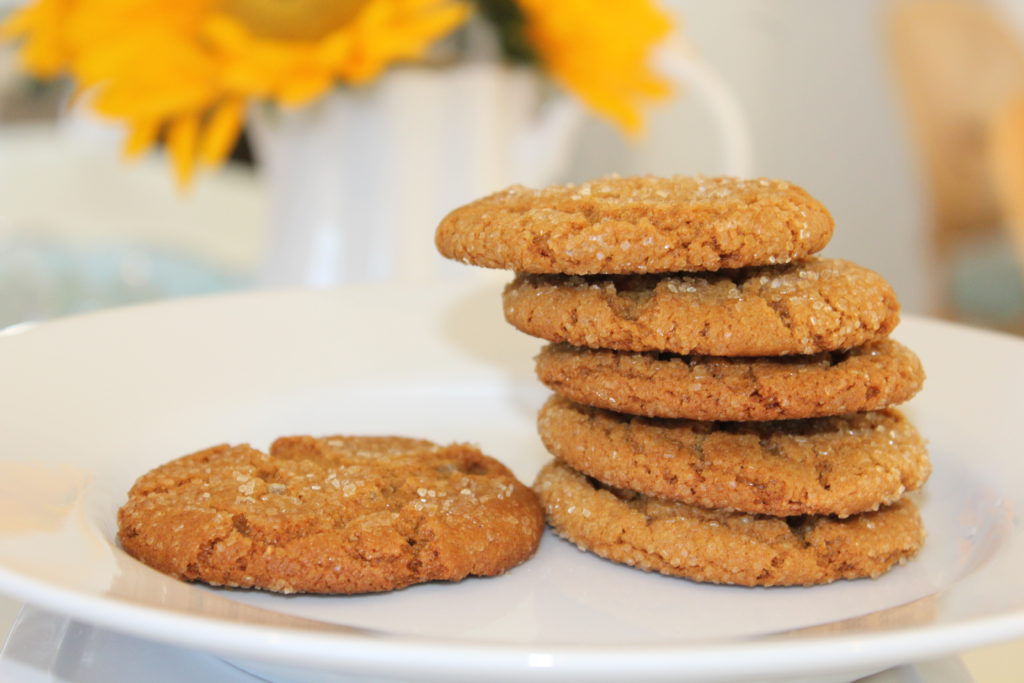
This is the quintessential cookie that signifies fall is in full swing and the holidays are soon to follow. One of my all-time favorites, tough to stop at one and it just makes a cup of coffee taste that much better. Easy, reliable, and oh so satisfying.

INGREDIENTS
3/4 cup shortening, I use Crisco
1 cup sugar
1 egg
1/4 cup molasses
2 cups flour
1 tsp. each cinnamon, ginger, ground cloves
2 tsp. baking soda
turbinado raw cane sugar, for rolling

DIRECTIONS
Preheat oven 375º
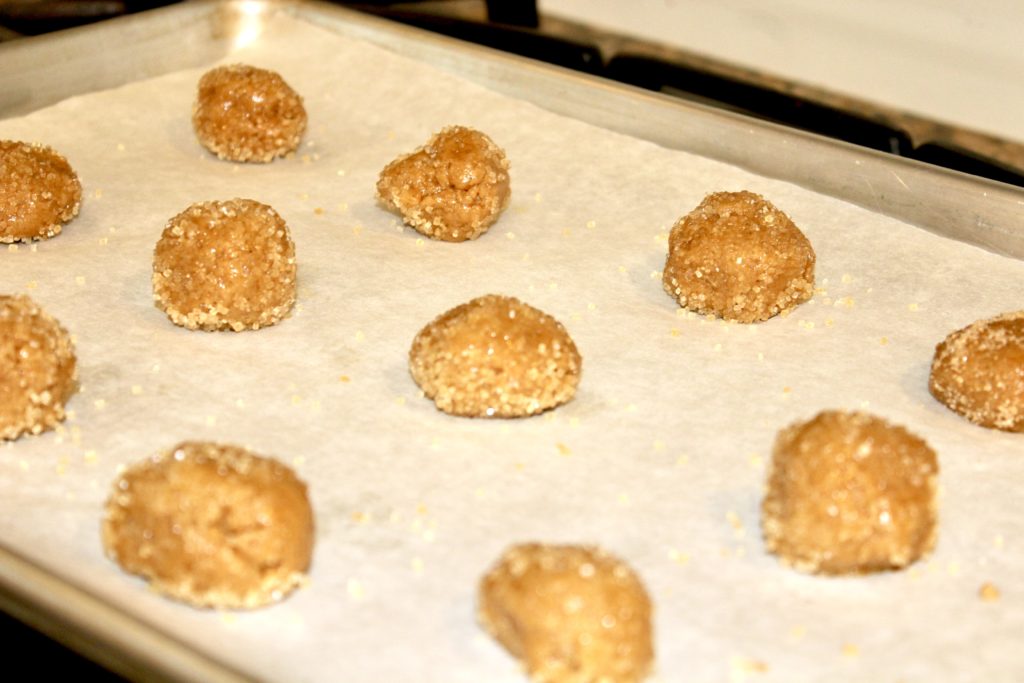
First, cream the shortening, sugar, egg, and molasses, until well combined and fluffy. Meanwhile, combine the dry ingredients and whisk them together. Next, add the dry ingredients to the sugar mixture and fully incorporate. Finally, take a small scoop of dough and roll into a ball, then dip and roll in the turbinado sugar to fully coat. Bake on an ungreased cookie sheet for about 10 minutes. Do keep a close eye on them, all ovens are different and that could affect the timing on these.

oven-ready

NOTES
If you don’t have turbinado sugar, not to worry, you could use regular sugar with similar results. The turbinado sugar just adds a little extra crunch that is a nice addition. Also, to add a bit more zip in the cookies, I often chop a bit of crystallized ginger and add it to the batter. Undoubtedly, whenever I do, I get rave reviews.

TIPS
Although many of you may already do this, I want to share this secret anyway. For all of you that have not tried this, I think it is a definite game-changer. This little trick comes in very handy when I’m baking with the little ones and I don’t want three dozen cookies in the house because, truth be told, I can’t stop eating them!

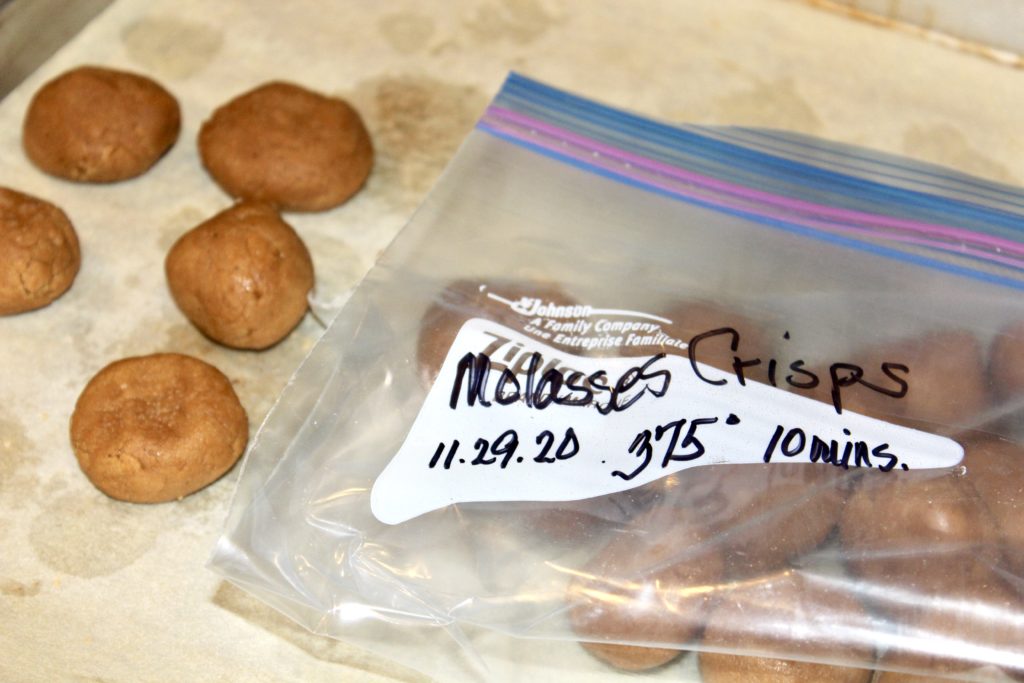
So, here it is. I make the cookie batter, cook what I want…maybe just one sheet pan full, for a small get together or just enough for me and my helpers. Then, I scoop the remainder of the dough, make dough balls and place them onto a sheet pan. Put as many on the pan as you can fit, then pop them into the freezer.

Then, after about 30 minutes in the freezer, pull them out, remove from the sheet pan and place them in a reclosable plastic bag. Make sure to mark the cookie name, cooking instructions, and the date. That way, you can pull them out, at a moment’s notice, you don’t even need to thaw them first and bake however many you want. I do this with all of my cookie batters, it’s a great way to keep us from eating two dozen in short order! Additionally, it is nice to have a selection of two or three to pick from at any given time.


Macaroni and Cheese

Well, the temperature is dropping, the world is imploding and I don’t know about you, but I want some mac and cheese. Make that bacon mac and cheese! This is serious comfort food and I promise, it won’t disappoint. Now, it definitely won’t fix this crazy world, but it will make you feel just a little bit better.

INGREDIENTS
2 oz. smoked bacon
8 Tbs. butter, separated
6 Tbs. flour
2 tsp. kosher salt
1 tsp. fresh ground pepper
1 tsp. dry mustard
1/2 tsp. nutmeg
4 cups milk, warmed
7 oz. gruyere cheese, shredded
7 oz. sharp cheddar cheese, shredded
4 oz. fontina cheese, shredded
1 lb. macaroni of choice (I prefer cavatappi)
2-3 small tomatoes, sliced
1 cup panko crumbs
small handful of fresh parsley, finely chopped

DIRECTIONS
First, let me say that the cheese amounts and kinds of cheese are definitely flexible. Use what you have on hand. If you have more of one cheese than another, use it and don’t fuss over it. Everything will be fine and more importantly, it will be delicious. Additionally, the bacon is optional, however, if you do use it, I highly recommend a thick-cut. If using the thick-cut, you would use 2 slices.

Now, time to make the white sauce. Start by cooking the bacon, until crisp, then remove to a plate with paper towels, to drain. Set the bacon aside and once cooled, chop or crumble. If there is an abundance of bacon fat, do pour that off, you only need a small coating left in the pan. Then, using that same pan, over medium heat, melt 6 tablespoons of the butter and add the flour. Continuously stir for two to three minutes or until the flour turns a light golden brown. Then, add the salt, pepper, mustard, and nutmeg, continue stirring and cook for another minute.

Next, slowly add the warmed milk, while constantly whisking to prevent lumps from forming. Slow and steady is the way to go with this sauce. It doesn’t take long, but it does need attention, constant stirring for a few minutes to let the milk be incorporated and warm the mixture enough to start thickening. Then, add the cheese and do the same for a few minutes to allow the cheese to melt. It doesn’t need to fully melt, it will finish in the oven. Meanwhile, cook the pasta according to the directions, however just slightly undercook it. Have no fear, it will finish cooking in the oven.

Drain the pasta, add it to the sauce and add the bacon as well. Stir to combine well and then pour into a large, ovenproof casserole dish. Now, melt the last two tablespoons of butter, add to the panko crumbs, along with the parsley, a hefty pinch kosher salt, some fresh ground pepper and stir to fully combine. Then, slice the tomatoes and place them in an overlapping row down the middle of the casserole. Finally, sprinkle the crumb mixture over the tomatoes and macaroni. Bake in the oven for about 35-40 minutes or until bubbly and the crumbs are golden brown.

NOTES
Alternatively, you could use individual gratin dishes instead of a large casserole, as in my picture above. This is a nice presentation, especially if you’re making it for company. Although the tomatoes are a yummy touch, omit them if you wish. Also, feel free to omit the bacon if it feels too rich. However, I do think you should try it with the bacon and the tomatoes at least once!


Roasted Delicata Squash

We all know that choosing vegetables can be a rather ho-hum and boring endeavor. So, if you’re feeling the need to shake up your vegetable selections, I have the perfect choice for you and it’s delicata squash. This is one of the easiest winter squashes to prepare and I have yet to have anyone not like it. Surprisingly, many people aren’t even familiar with this variety and I’m hoping to change that. The skin is thin, nutritious, adds a wonderful texture, and makes for super quick prep. Did I mention that it’s delicious, equally at home for a quick weeknight meal or for a fancier addition to a company meal? That all adds up to a definite win-win, in my book.

INGREDIENTS
1-2 delicata squashes
drizzle of olive oil
sprig or two of fresh rosemary and thyme
drizzle maple syrup, honey or hot honey (my favorite)
kosher salt
fresh ground pepper

DIRECTIONS
Preheat oven to 425º
First, I would give the squash a quick rinse, since you won’t be peeling it. The best preparation is also the easiest, the simplest and that is just plain, basic roasting, in a very hot oven, with very few embellishments.

After the quick wash, cut off each end and then cut the squash in half, lengthwise. Next, scoop out the seeds and then slice into 1/4″ -1/2″ half-moon slices. I prefer them closer to the 1/2″, the thicker slices are more substantial and are less likely to overcook. However, if you’re tight on time, the thinner slices will roast up much quicker. Just be sure to watch them closely, so they don’t overcook.

Then, place the squash on a rimmed baking sheet, drizzle with the olive oil, a small drizzle of the syrup or honey and sprinkle with kosher salt and fresh ground pepper. Place the herb sprigs on top, toss to coat well, and make sure they are in a single layer. Depending on how much you’re cooking, you might need two sheet pans. They need a little space to carmelize and crisp up, if they are too close together, they will just steam. Still tasty, but not as good.

Finally, roast for about 30 – 40 minutes, turning them halfway through the baking time; they should have some definite brown spots. The roasting time depends on how thick the slices are and on your oven, so always keep an eye on them towards the end of the estimated time. When done to your liking, transfer to a serving dish and sprinkle with a pinch of flaky sea salt and serve.

roasted delicata

NOTES
Although I really do prefer the more simple approach to highlight the squash’s flavor, you might want a bit more embellishment. Two of my favorite options are to add a sprinkle of cayenne pepper (unless I’m using the hot honey) or your favorite spice rub. The best hot honey I’ve had is Mike’s Hot Honey and a little goes a long way. So, try adding a very small amount to start. My only caution is, don’t go too crazy, remember, you want the squash to shine, but it really does add a nice kick of flavor.

By the way that hot honey is an incredible addition to so many dishes. Once you have it, you will find yourself reaching for it constantly.