Fish en Papillote

This could seriously be one of the fastest dinners to pull together. It doesn’t hurt either that it is healthy and delicious. The variations are endless, don’t hesitate to switch it up a bit and use what you have on hand.

I happen to have a brother-in-law that does a lot of fishing and recently shared some fresh halibut (lucky me), so that is what I used here. However, you can pretty much use any fish that you prefer…swordfish, cod, sole, salmon, they all work well with this preparation. I didn’t want to go to the market so, I just used what I had on hand. The ingredient list is for one parchment package, so just repeat the process for however many servings you are cooking.

INGREDIENTS
1 sheet of parchment, per filet
6-8 oz. filet, per person
kosher salt & fresh ground pepper
1-2 scallions, sliced
4-5 cherry tomatoes, halved
1 Tbs. capers
1-2 Tbs. white wine
1 Tbs. butter
3-4 sprigs of thyme, lemon thyme if you have it
2-3 lemon slices

DIRECTIONS
Preheat oven to 450º
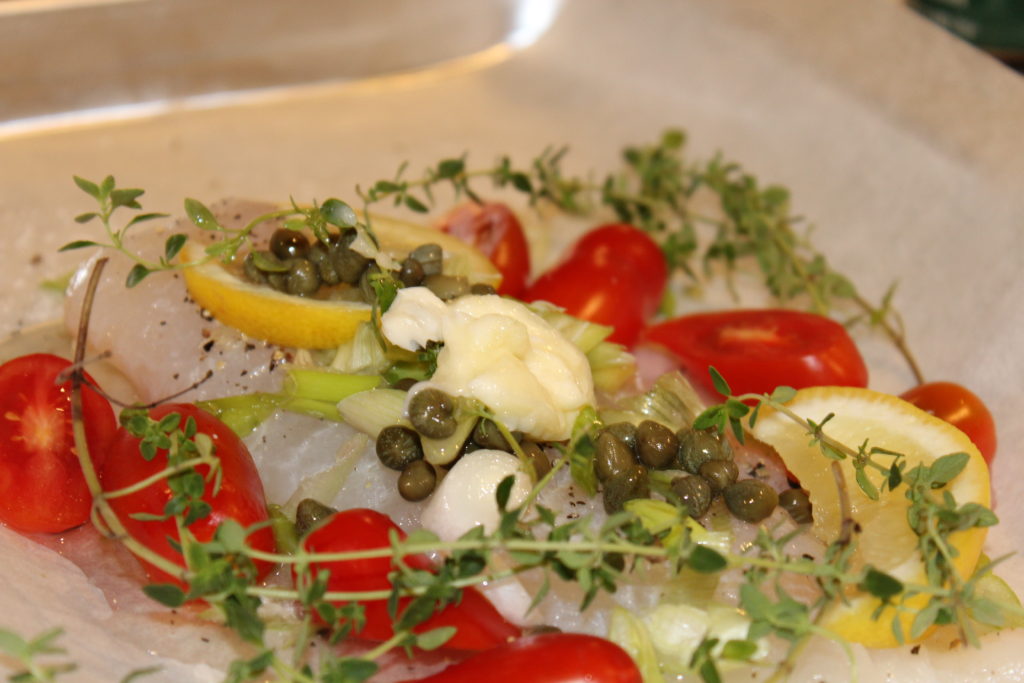
For each filet, lay out one sheet of parchment paper (tin foil would also work) on a rimmed sheet pan. Place filet on one side of the parchment, then place the tomatoes around the filet, season with the salt and pepper. Next, add the sliced scallions, the capers, wine and top with the butter, the thyme sprigs and then top with the lemon slices.

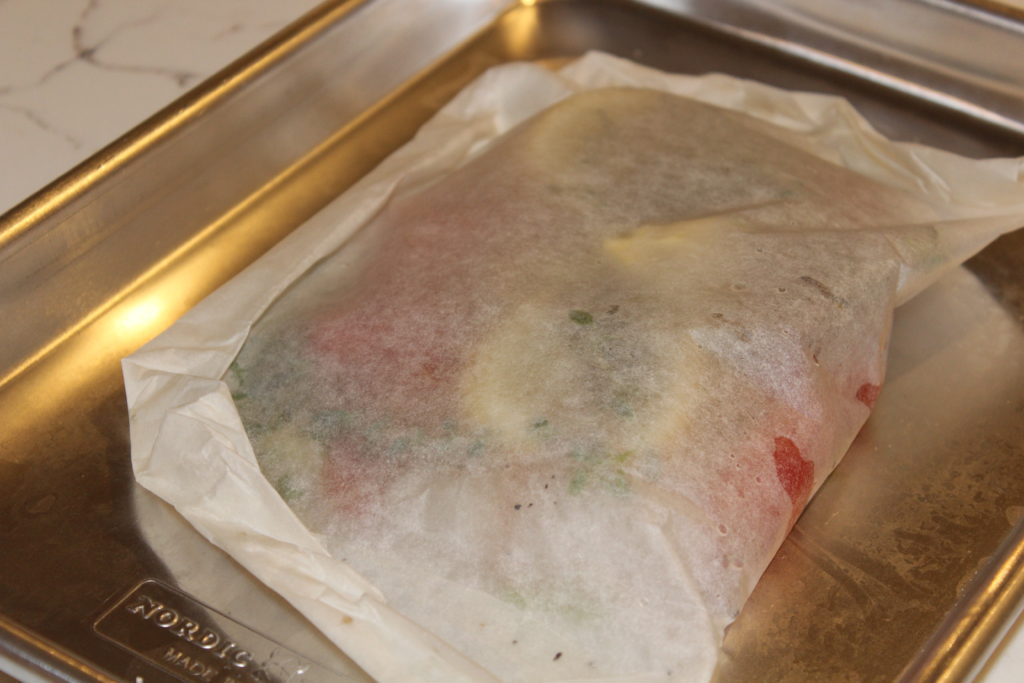
Finally, fold over the parchment and seal the edges by rolling and crimping the edges. Do this for each portion and have no fear, there is no perfect way to do this. They may not look perfectly packaged (you will get better at it, the more you do it), however they will still taste incredible! You should be able to get two to three packages per sheet pan.

Lastly, just pop them in the oven and cook for 10-15 minutes, depending on the thickness of each filet. If you are doing several packages, you can increase the cooking time to 15-18 minutes. When done, remove each package to a dinner plate, cut open (careful, hot steam!), squeeze a bit of lemon juice over the contents and serve it right in the parchment. Since everything is cooked right in the parchment, cleanup is a snap.

NOTES
Some nice additions are kalamata olives, julienned vegetables, a pinch of crushed red pepper, or sliced summer squash. Also feel free to change up the herbs; rosemary, dill or parsley are good here too. As I said, the variations are numerous here, the choices are all yours.


Mocha Chocolate Chip Cookies

Meet your new go-to cookie recipe. With three minor tweaks to the classic Toll House cookie recipe, these changes deliver major impact in the flavor department. The addition of espresso powder, along with more brown sugar than white, and double the vanilla extract, the flavor of these cookies is elevated to rock star status for me. Without a doubt, these are one of my all time favorites.

INGREDIENTS
2 sticks butter, at room temperature
1 cup brown sugar
1/2 cup granulated sugar
2 eggs
2 tsp. vanilla
1 tsp. instant coffee or espresso powder
2 1/4 cups all-purpose flour
1 tsp. baking soda
1 tsp. salt
12 oz. semi-sweet chocolate pieces
fleur de sal or Maldon salt, for finishing

DIRECTIONS
Preheat the oven to 375°.
First, beat the sugars and butter in mixing bowl until light and fluffy, about 3-4 minutes. Next, add the espresso powder and vanilla. Then, blend in the eggs, one at a time, and mix well. Add the combined flour, baking soda and salt; mix well to combine.

Finally, stir in the chocolate chips and scoop spoonfuls onto a non-greased (or parchment lined) cookie sheet and bake for 10-12 minutes, until golden brown. When done, remove them from the oven and immediately sprinkle a pinch of the finishing salt on each cookie. Allow to cool briefly and then try and resist these!

chocolate chip cookies

NOTES
Obviously, the addition of a cup of walnuts or pecans is always an excellent option. Because I have some that do not like nuts (crazy, I know), I often add nuts to half the dough and then everyone is happy!

To elevate this even further, you can try a really good baking chocolate, in bar form, then roughly chopped. Aside from the flavor which is a step up, the texture is a nice departure with the chunks instead of the morsels. Either way, you can’t go wrong.


Blueberry Galette

This is for all of you non-bakers. I understand the aversion to baking pies, worrying how they will turn out, fear of failure and all that stress. Well, that is what makes this recipe so appealing, it comes together in minutes, with virtually no stress. Doesn’t hurt that it’s delicious and a definite crowd pleaser.

Although I give you a crust recipe here (scroll to the bottom), you can certainly make it even easier, with excellent results, by using a good, store-bought pie crust. My only caution…do not bother with the frozen crusts that come in a tin foil pan.

FILLING INGREDIENTS
12 oz. blueberries
1 Tbs. corn starch
1/4 tsp. cinnamon
1/4 cup sugar
1 1/2 tsp. fresh lemon juice
zest of half a lemon
turbinado sugar, for sprinkling

ASSEMBLY
Preheat oven to 375º.
In a large bowl, combine the blueberries, cornstarch, lemon juice, zest, cinnamon and sugar. Then, toss well to combine and coat the berries. Roll out the crust (store bought or homemade…see below) on a lightly floured surface, to about a 12″ round. Transfer the crust to a parchment lined baking sheet.

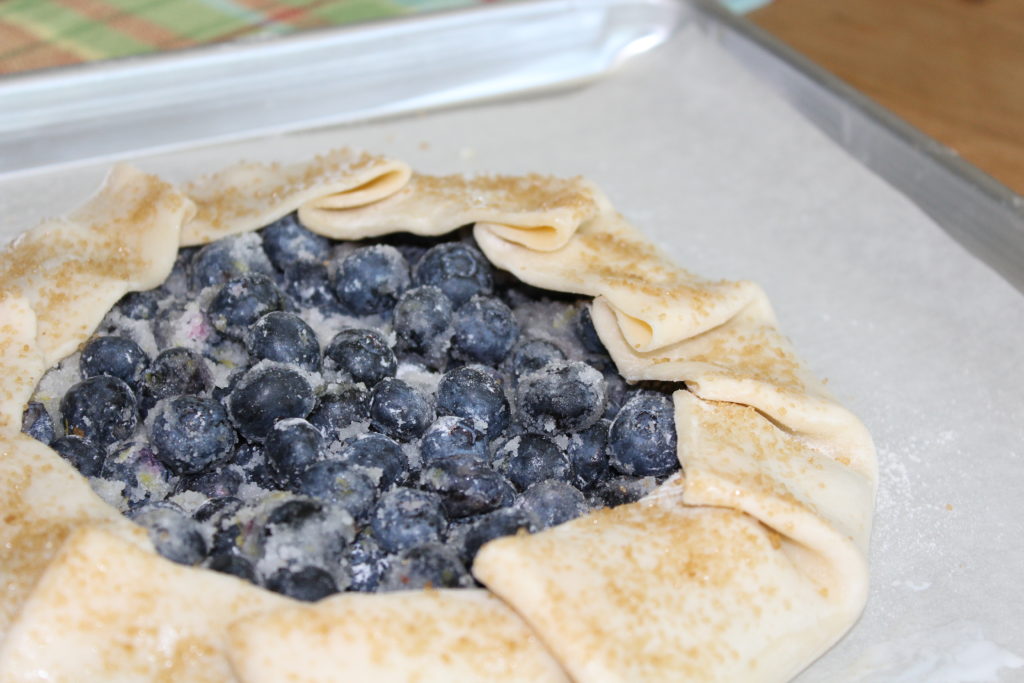
Next, mound the blueberry mixture in the middle of the crust, leaving about a 2″ border. Then, fold the edges over the blueberry mixture, overlapping slightly. Brush the edges of the crust with some milk and sprinkle with the turbinado sugar.

oven ready
…oven ready

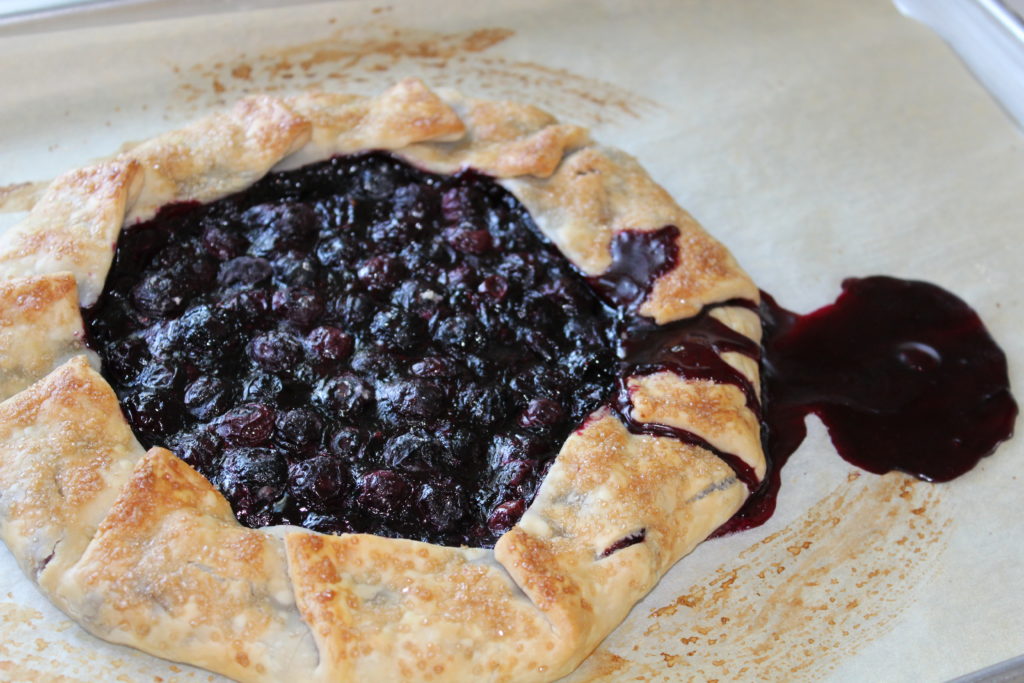
Finally, bake the galette for about 45 minutes or until the crust is a deep brown and the filling is bubbling. Make sure to check on it, all ovens vary and it may take a little more or less time. Cool a bit before serving. This can also be done earlier in the day, then briefly reheat in the oven, before serving. Make sure to top with some good vanilla ice cream!

...and this is why you use parchment!
…and this is why you use parchment!

Here is the crust recipe, for those of you that wish to go to the next level and make your own. I don’t think you’ll be disappointed!

CRUST INGREDIENTS
1/2 cup pecans
1 cup plus 2 Tbs. all-purpose flour
2 tsp. sugar
1/2 tsp. kosher salt
1/4 tsp. cinnamon
1 stick (8 oz.) butter, chilled and diced

CRUST
Preheat oven to 350º.
Toast the pecans, in a single layer, on a sheet pan, occasionally tossing, until fragrant and slightly browned, about 10-15 minutes. When pecans have cooled, pulse them in a food processor until the texture of coarse meal.

Add the flour, sugar, salt, cinnamon and pulse to combine. Then, add the butter and again, pulse until the mixture is resembles coarse meal, leaving a few larger, pea-size pieces. Transfer the mixture to a large bowl and drizzle with 4 Tbs. of ice water. Mix well, until it comes together, adding another tablespoon of water, if needed. Gently pat the dough into a small disk, wrap in plastic and chill for an hour or more. This can be done a couple of days prior to using.


Lime Cilantro Slaw

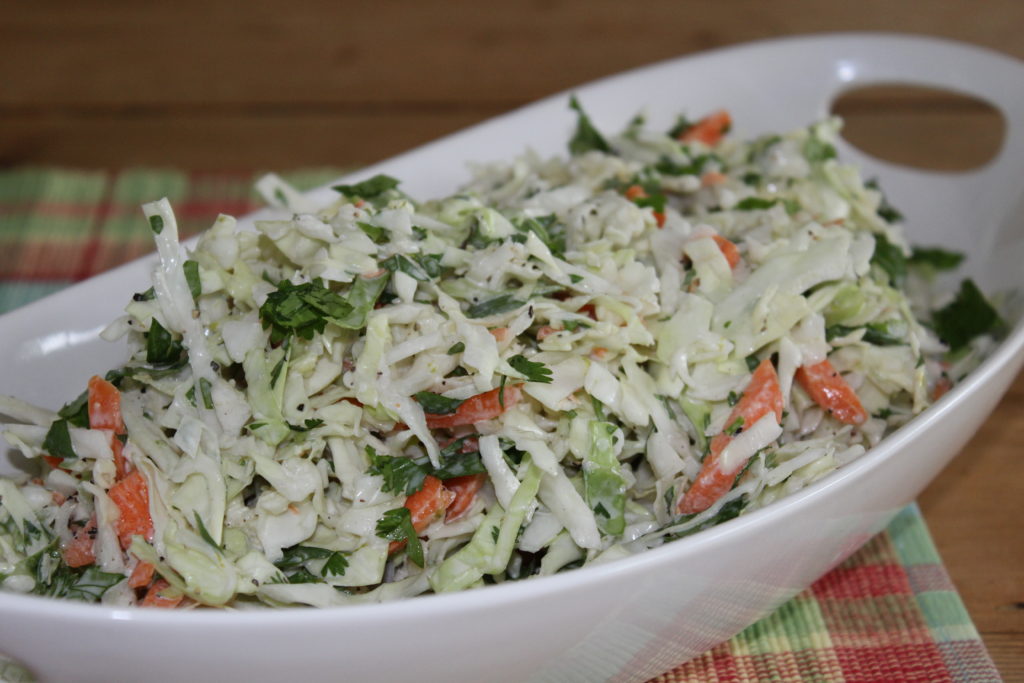
Perfect for pairing with Baby Back Ribs or Pulled Pork Perfection. This is a wonderful, light, and refreshing departure from the usual coleslaw recipes. Have no fear, even if you don’t like mayonnaise-based slaw, you will love this. Yes, there is some, however, it is nearly undetectable, thanks to the lime juice and I promise, you will not be disappointed.

INGREDIENTS
3 Tbs. mayonnaise
1/2 small clove garlic, grated or mash (see below)
Kosher salt and fresh ground pepper
1 medium lime, zested and juiced
1 package of slaw mix
3-4 scallions, thinly sliced, use white and green parts
3-4 Tbs. chopped fresh cilantro leaves

DIRECTIONS
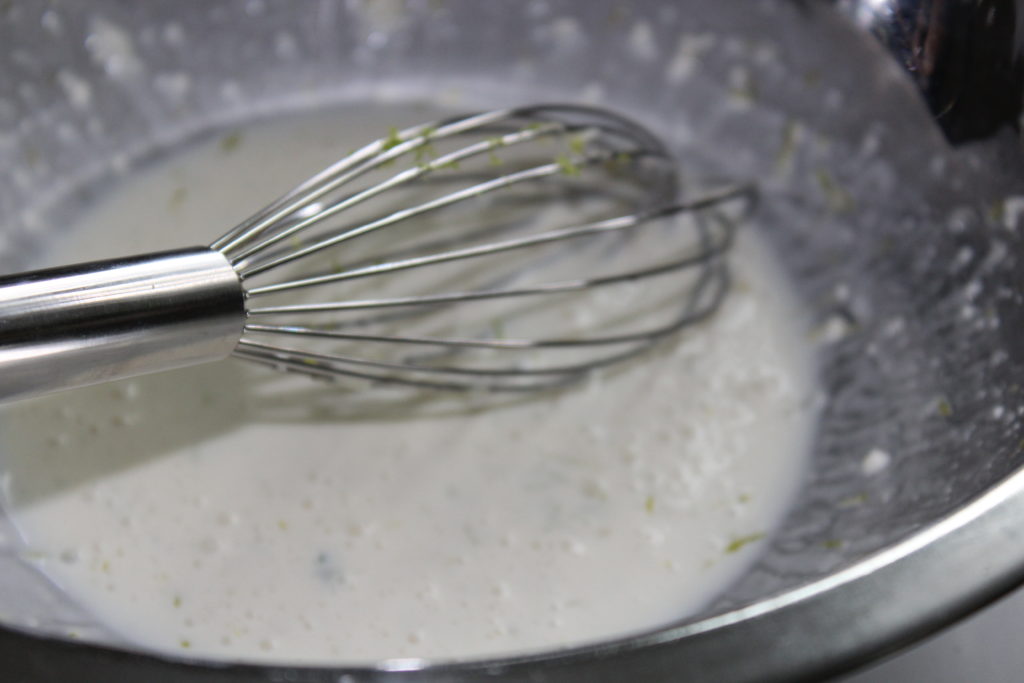
First, chop the garlic, sprinkle it with a pinch of salt, and mash it into a paste with the side of a chef’s knife. Alternatively, you could just grate the garlic. Then, in a small bowl, combine the mayonnaise lime zest, the lime juice and the garlic mash. Whisk to combine completely and set aside for 15- 20 minutes, to blend the flavors.

Finally, in a medium bowl, combine the slaw mix, scallions, and cilantro. Pour the dressing over the mixture and stir to combine completely. Season with 1/4 tsp. salt and several grinds of pepper or to taste. This is best done early in the day or the day before, because the longer this sits, the better the flavor.

Serve this slaw at your next barbecue with Baby Back Ribs, some corn bread and baked beans. It’s a winning combination!

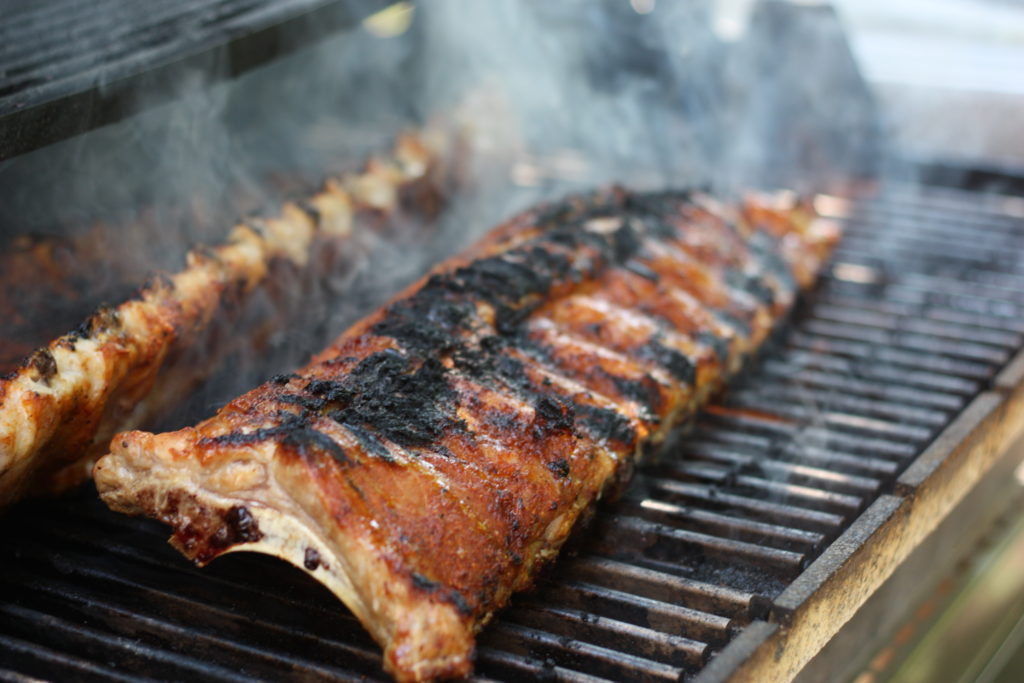
grilled baby back ribs
Don’t miss this recipe, it’s a definite keeper! Perfect pairing with the Lime Cilantro Slaw.


Sweet & Salty Roasted Pecans

These nuts are a game changer, they are flat-out addictive and you will keep coming back for more. I have a number of recipes for roasted nuts, however this one tops them all. They are salty, sweet, crunchy and more importantly, they stay crunchy. They are equally amazing on their own, as a cocktail snack, in a salad or as a topping over some ice cream with salted caramel sauce.

So, consider yourself officially warned and please don’t blame me for not being able to stop eating them.

INGREDIENTS
1 teaspoon kosher salt
1/2 teaspoon freshly ground black pepper
1⁄2 teaspoon ground cinnamon
4-5 cups pecan halves
11⁄2 cups water
3 cups sugar
2 tablespoons mild vegetable oil
2 teaspoons vanilla extract
a pinch or two of flaky salt

DIRECTIONS
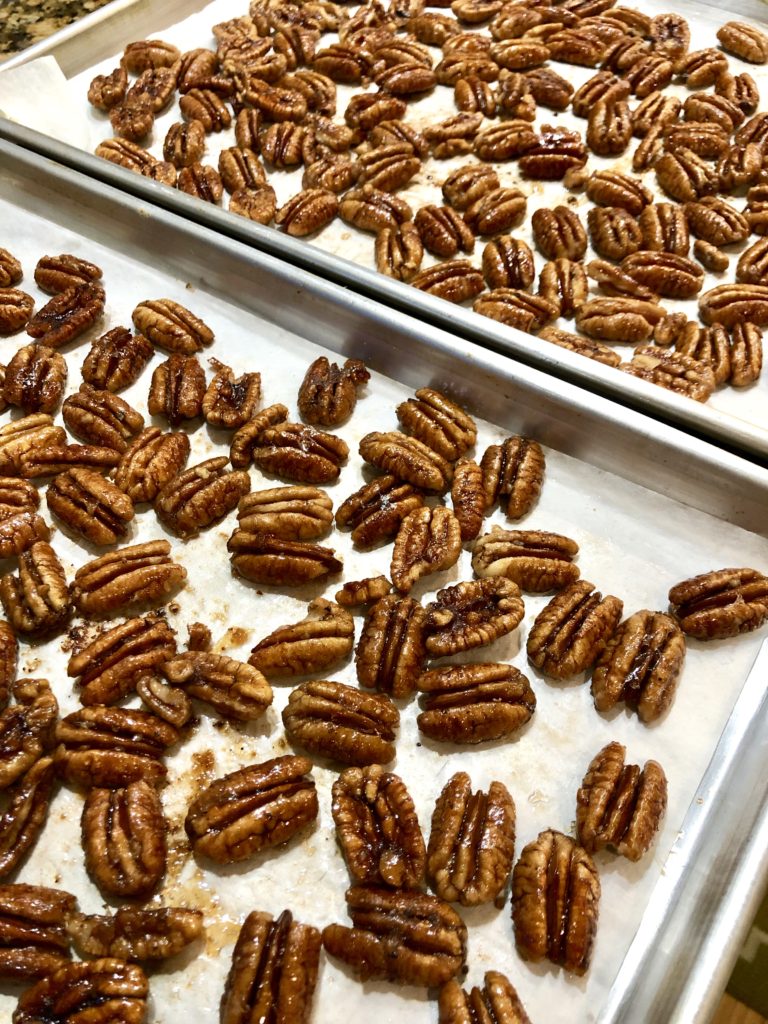
Preheat the oven to 325º and line 2 rimmed baking sheets with parchment paper. Next, in a saucepan over medium heat, combine the pecans, water, and sugar. Bring to a simmer and stirring often, cook the pecans for 5 minutes. Meanwhile, combine the salt, pepper and cinnamon in a small bowl and set aside. Then, with a slotted spoon, remove the nuts from the pan, spread them in a single layer on the baking sheets. Using two forks, separate them so they don’t touch each other and have room to bake individually. Then, bake for 20 minutes, or until they turn a deep and toasty brown.

Remove from the oven and cool for 5 minutes. Push the nuts into a mound in the center of each sheet. Then, drizzle each mound with half the oil and half the vanilla extract and toss to coat. Sprinkle each mound with half the cinnamon mixture and toss well to coat them evenly.

Again, spread the nuts on the baking sheets in one layer. Finally, return to the oven for about 10 minutes, or until browned and crisp. Remove from the oven, sprinkle with a flaky salt, such as Maldon and let cool completely before transferring to an airtight container. I bet you can’t eat just one!

pecans

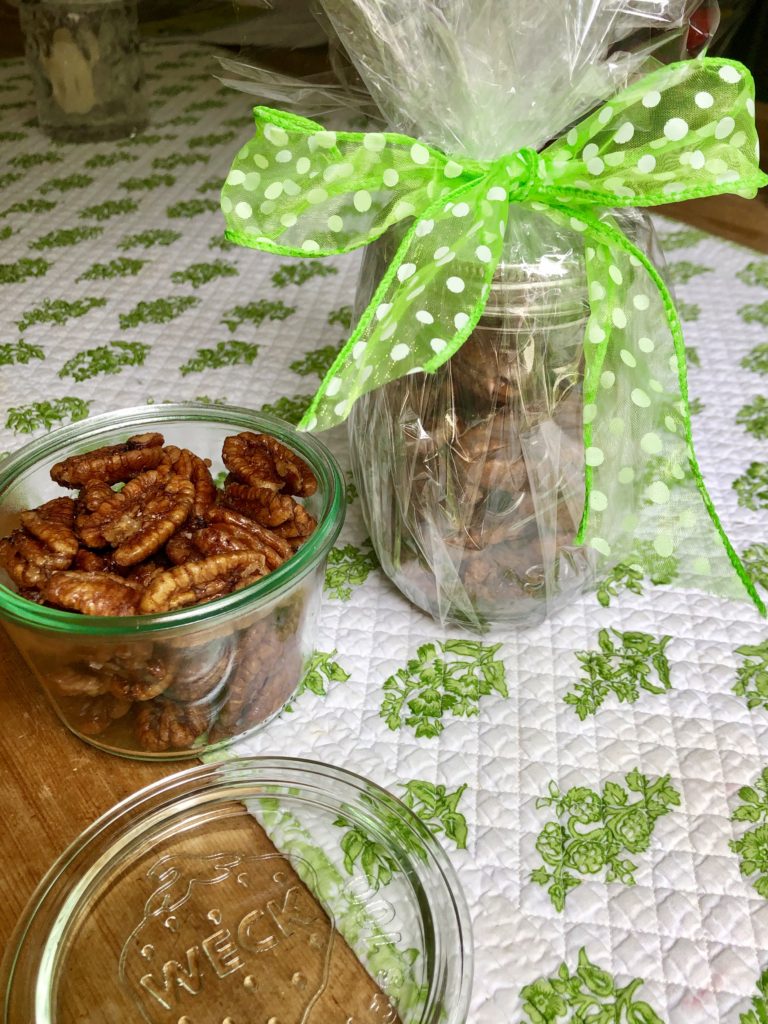
Additionally, they make a nice hostess gift. Simple to make, tasty, versatile, addictive…it doesn’t get any better.


Cucumber Dill Soup

Wonderfully soothing and cool, makes this recipe perfect for a hot summer day. Alternatively, even though the recipe calls for english cucumbers, this would also be a great way to use up your garden cucumbers, later in the season. Although I haven’t tried this with regular garden cucumbers, I can’t imagine them not being equally delicious. I will update when I have had a chance to try them myself.

INGREDIENTS
3 english cucumbers, peeled, halved lengthwise and seeded
1 cup greek yogurt
3-4 scallions, sliced
3-4 Tbs. chopped fresh dill
1/2 clove garlic, minced, optional
juice and zest of 1 lemon
1 cup chicken stock
2 Tbs. extra virgin olive oil

DIRECTIONS
First, coarsely chop the cucumber halves and transfer to a large bowl and reserve a handful for garnish. Next, add the scallions, lemon zest and dill to the bowl, then stir to combine. Next, combine the yogurt, lemon juice, and garlic (if using) stir to combine and pour over the vegetables. Set the mixture aside, at room temperature, for about an hour; this will allow the flavors to develop.

Then, transfer the mixture to a food processor, blender or NutriBullet and purée until smooth. With the machine still running, slowly add the stock and continue until fully blended. You decide how smooth you would like your soup. Personally, I like it quite smooth and therefore use my NutriBullet and blend in two or three batches (if using the NutriBullet, just add the stock at the same time as the cucumber mixture). The difference when doing this is significant, the mixture has a wonderfully smooth and thick texture. Place in the refrigerator to chill, for at least one hour.

Finally, when ready to serve, pour the soup into a bowl and garnish with a few of the remaining chopped cucumbers and a small sprig of dill.


Lemon Dill Potato Salad

Barbecue season is upon us and I don’t know about you, but I am always looking for a good salad that covers two requirements and this one fits both beautifully. A vegetable and a starch, combined in one pretty little package! It’s great for a crowd and refreshingly delicious as well. Trust me this will be a hit at your next barbecue.

INGREDIENTS
Dressing
1 tsp. lemon zest
1-1/2 Tbs. lemon juice
1-1/2 Tbs. white wine vinegar
1/2 tsp. dijon mustard
1/2 tsp. honey
1/4 tsp. kosher salt
1/2 tsp. fresh ground pepper
3 Tbs. extra virgin olive oil
2 Tbs. chopped fresh dill
Salad
1-1/2 lbs. fingerling potatoes, cut larger ones in half
1 bay leaf
2 cloves garlic, smashed and peeled
12 oz. haricots verts (very thin green beans)
about a half pint of cherry tomatoes
1 large shallot, finely chopped
2 Tbs. extra virgin olive oil
dill sprigs and lemon slices (optional garnishes)

DIRECTIONS
Dressing
Combine the first seven dressing ingredients in a small bowl. Next, while whisking constantly, drizzle in the olive oil, until the mixture is emulsified. Then, whisk in the dill and set the dressing aside.

Salad
Place the potatoes, bay leaf and garlic in a pot, add cold water to cover slightly. Bring to a boil then, reduce the heat and simmer until the potatoes are just tender, 8-10 minutes, depending on the size of your potatoes. With a slotted spoon, remove them from the water and transfer to a large bowl. Discard the bay leaf and garlic, but keep the water to cook the green beans. While the potatoes are still hot, add about 3 tablespoons of the dressing and toss to combine.

Next, return the pot of water to a boil, add the green beans and cook for about 2 minutes or just until crisp tender. With a slotted spoon, transfer the beans to a bowl of ice water, to stop them from continuing to cook.

Sauté the shallots in the olive oil for a minute or two, then add to the potatoes. Drain the green beans, pat dry and add to the potatoes and shallots. Add the tomatoes and most of the remaining dressing. I like to hold some back, if not serving immediately. Then, when ready to serve, if it seems a bit dry, you can add more to moisten and freshen it up. Garnish with the dill and lemon slices and serve.
NOTES
Variations abound with this basic recipe. Try small red bliss potatoes, sugar snap peas or fresh corn. Try some fresh basil and parsley, the difference is always surprising and delicious. Play around with ingredients, use what you have available, you won’t be disappointed.


Asparagus Tart

Spring has arrived…supposedly. I sit here in New England, where currently, it is 42º outside and it’s mid-May! But given the calendar, the warmer weather has to be around the corner.

At the market, the asparagus were looking so good and they are one of my favorite spring vegetables so, I had to buy them. Then, I decided I wanted to prepare them a little differently and thought this would be a nice change and a nice spring-looking dish.

Honestly, you will be so impressed with yourself when you make this tart! It is just silly easy and it tastes even better than it looks. Now don’t be deterred by the length of these directions, I am going a bit overboard to explain each step, but believe me, this came together in no time.

INGREDIENTS
1 sheet puff pastry
goat cheese log, room temperature and preferably marinated goat cheese
1/2 cup freshly grated parmesan cheese
fresh asparagus
extra virgin olive oil
kosher salt and fresh ground pepper
1 egg, for egg wash
Maldon salt (or other flaky, finishing salt), optional

DIRECTIONS
First, thaw the puff pastry, using the package instructions; that’s usually overnight in the refrigerator. Then, when you’re ready to prepare the tart, preheat your oven to 400º.

Clean and trim your asparagus and place them on a sheet pan. Then, sprinkle them with a little olive oil, kosher salt and some fresh ground pepper. Roll them around to coat them evenly. Next, place them in the preheated oven and roast for about five minutes. You are not looking to fully cook them, just a short precook. After about five minutes, remove from the oven and let them cool.

Now, I must say, if you have very thin asparagus, you probably don’t need to do that step. However, mine were a bit chubby and I wanted to make sure they would be cooked through in the finished product. If you don’t precook them, you should still coat them with the olive oil, salt and pepper.

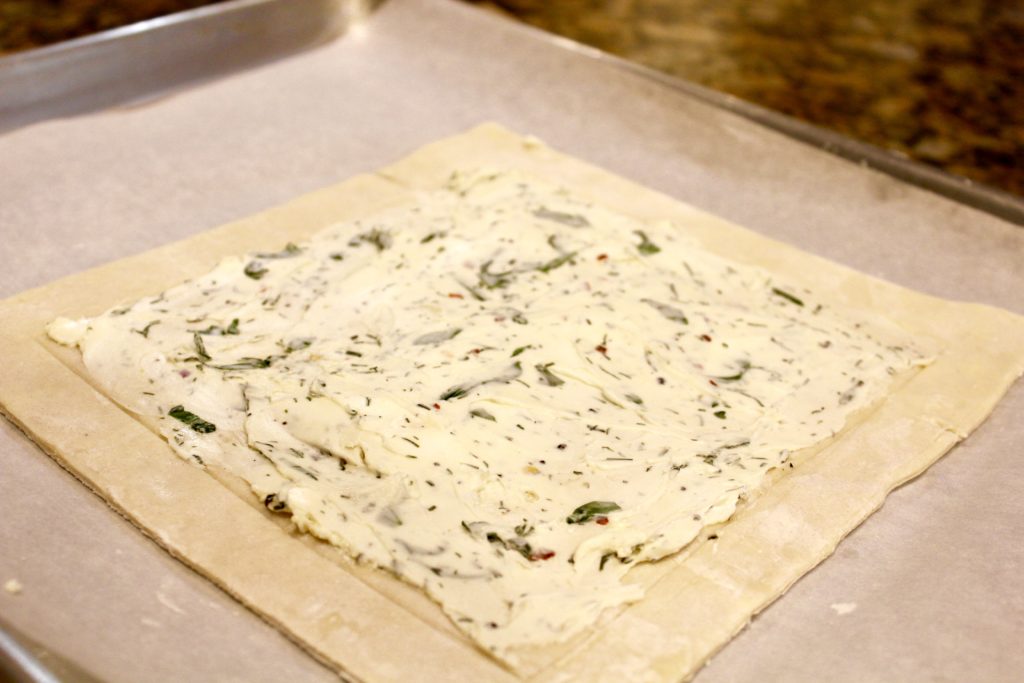
While the asparagus are roasting, on a lightly floured surface, roll out the sheet of pastry. You not really looking to enlarge the pastry sheet, you just want to smooth it out a bit. Then, take a sharp knife and score the pastry about 1″ to 1-1/2″ from the outer edge, all the way around. This will give you the nice puffy edge. Make sure you don’t cut all the way through.

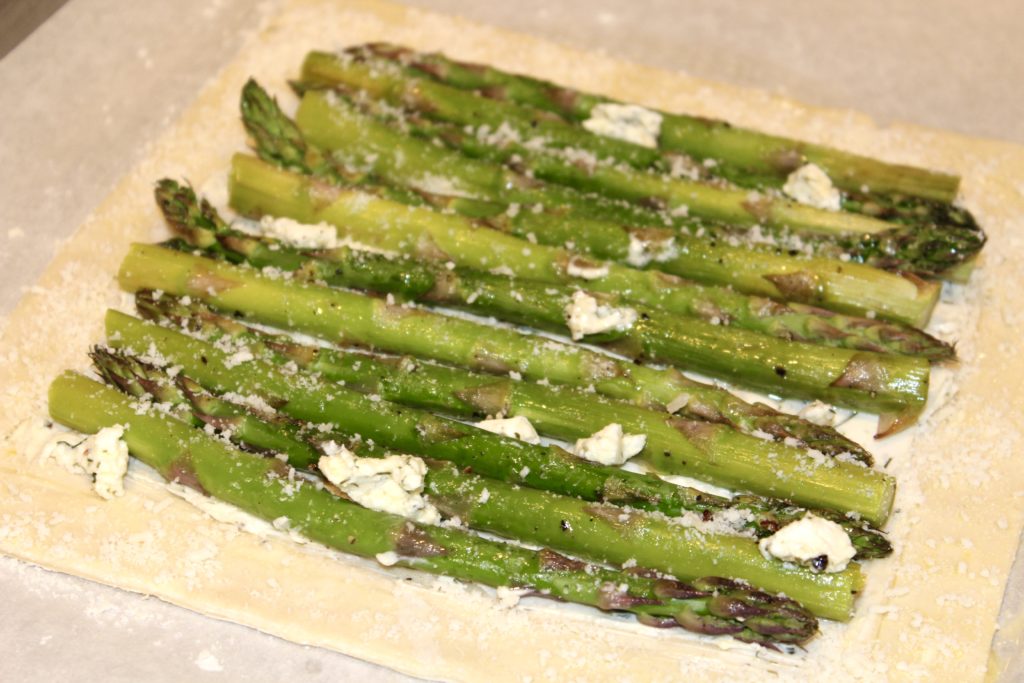
Next, spread the room temperature goat cheese on the pastry sheet, inside your scored edge. A thin layer is all that you need here and you probably won’t use all of the cheese that you have. Then, place the cooled asparagus on the cheese, in any pattern or order that you like. Add a few small dollops more of the goat cheese over the asparagus and a sprinkling of the parmesan.

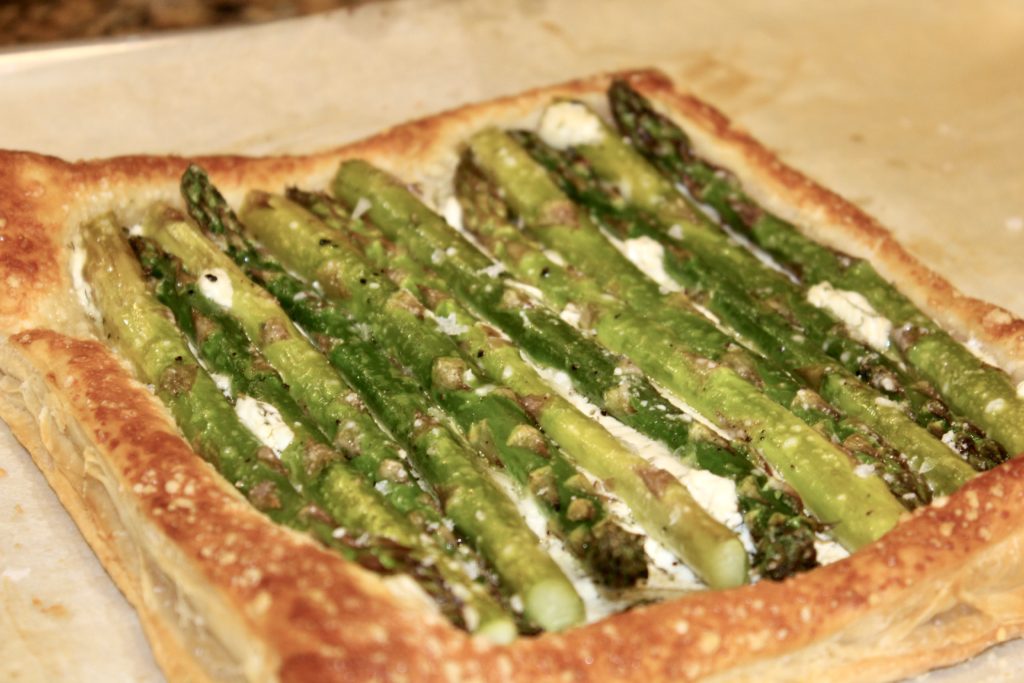
Now, add a tablespoon of water to the egg and mix well. Brush the egg wash on the empty, scored border. Then, sprinkle some parmesan cheese over the egg washed border and place in the oven. Cook for about 15-20 minutes or until the pastry is browned and the asparagus are cooked tender (not mushy!). Remove from the oven, immediately sprinkle a small pinch of the flaky salt over the asparagus (if using) and let cool slightly. I prefer serving this barely warm or at room temperature, the choice is yours. Enjoy and let me know how you liked it.

NOTES
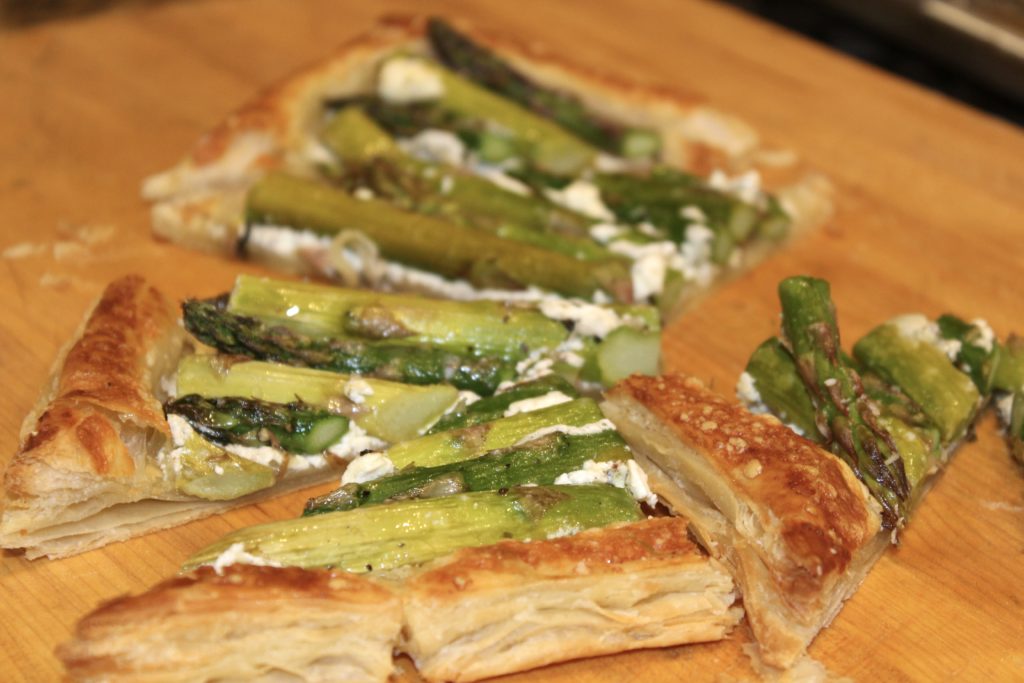
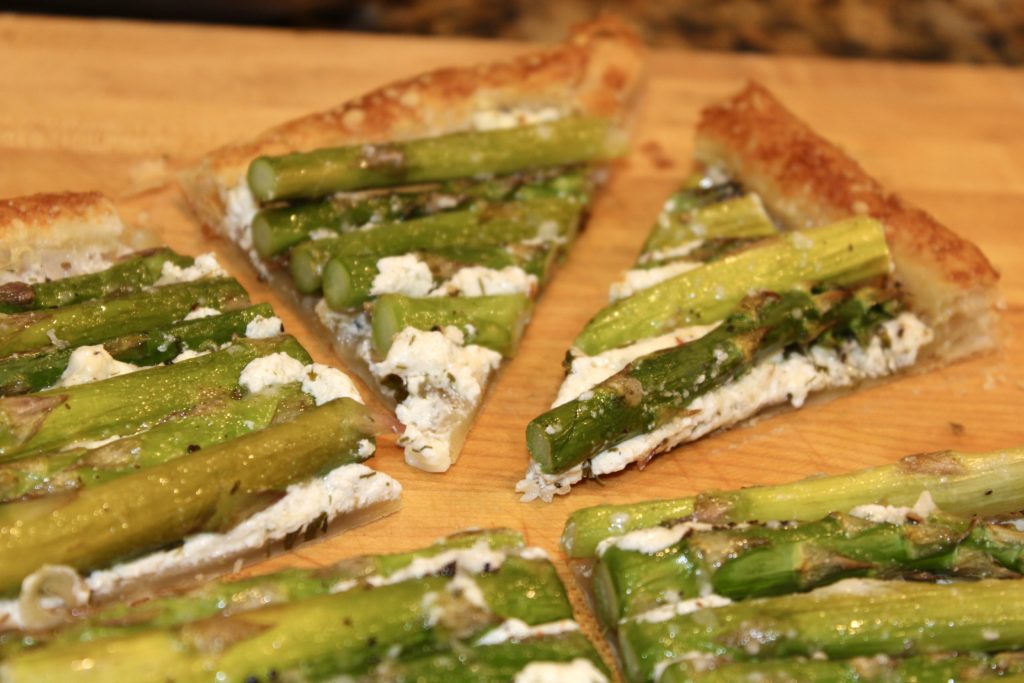
You can pretty much do any free-form shape in this recipe. However a large rectangular shape works easiest, for me. Alternatively, doing a few smaller squares works well too, especially if you are intending it as individual servings. Try cutting them in triangles to pass as an hors d’oeuvre.


Pan Seared Sea Bass

Lately, I’ve been trying to add more fish to my daily roundup and because of its simplicity and lightness, this recipe fits nicely. Honestly, it is a bit embarrassing to even call it a recipe, since it couldn’t be easier or faster to get on the table. However, isn’t that what we all want…quick, super simple AND tasty. This will not disappoint.

Although I use sea bass here, you can actually use most any firm, white fish, the choice is yours. Just use what you like or whatever is fresh and available. They are all equally delicious and quite suitable to this preparation.

INGREDIENTS
4 sea bass filets
1 Tbs. olive oil
1 Tbs. butter
kosher salt
fresh ground pepper
mango salsa (store bought is fine)

DIRECTIONS
First, preheat a pan with the olive oil and the butter. Then, pat the filets dry with a paper towel and season them with the salt and pepper.

Next, sautè the filets 2-3 minutes per side, depending on their size and thickness. Remove to a platter and immediately squeeze some lime juice over each filet. Top with the mango salsa, a sprinkling of parsley (forgot that in the picture!) and serve with a simple side salad. That’s it, you’re done!

My preference here is an arugula salad, lightly dressed with good olive oil, a squeeze of lemon and some salt and pepper. That’s it, easy, beautiful and quite tasty…and best of all no guilt!


Mango Salsa

I just love this recipe, it’s clean, tasty and easy! Additionally, it’s quite versatile. Use it as a dip with tortilla chips, a yummy condiment with fresh grilled fish or as a simple side with grilled chicken. And, truth be told, I’ve been known to have just a small bowl of this as a snack. It really is a great recipe, as I said…healthy, tasty and easy, you just can’t go wrong with this one!

INGREDIENTS
1 mango, peeled and diced
1/2 cup peeled, seeded, diced english cucumber
1 Tbs. finely chopped jalapeño
1/3 cup diced red onion
juice & zest of 1 lime
1/3 cup roughly chopped cilantro

mango salsa

DIRECTIONS
Combine all ingredients, add salt & pepper to taste. Serve cold with either tortilla chips or as a side/topping for your favorite fish. If you prefer your salsa with a bit more kick, keep the jalapeño seeds, if not, discard the seeds. Also, if your lime doesn’t seem juicy enough, feel free to add more if it seems too dry.