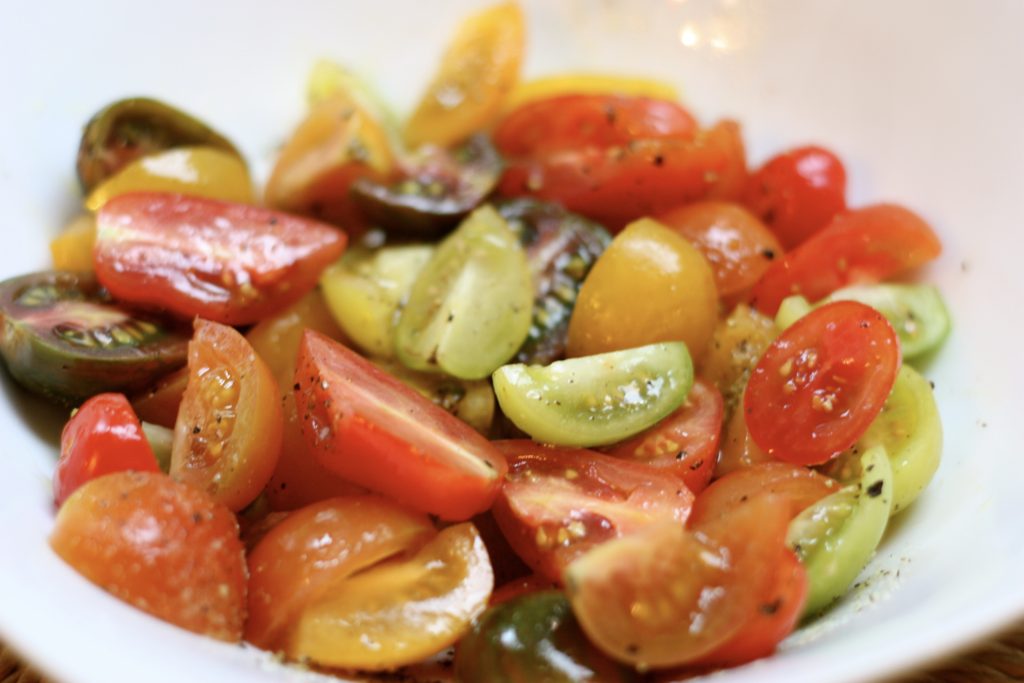
Sautéed Cherry Tomatoes

Have an overabundance of cherry tomatoes and need a quick, tasty vegetable? Then you will love this recipe. I hope it will become a staple in your “get it on the table quickly” lineup. Even if some of your tomatoes have started to shrivel, don’t despair, they will still taste delicious! Although it is a quick weeknight veggie, it is also a great choice for company meals and goes well with almost any meat or fish dish.

INGREDIENTS
assortment of heirloom cherries or what you have on hand (half them if they are on the large size)
small drizzle of extra virgin olive oil
kosher salt
fresh ground pepper
fresh flat leaf parsley, chopped
fresh basil, julienned

DIRECTIONS
Preheat skillet on medium heat, add the oil, tomatoes, salt and pepper. Sauté for 2-3 minutes or until tomatoes are blistered. Then, take off the heat and add the herbs, toss to coat, check for seasonings and serve.

That’s it…easy, tasty and healthy. Give it a try and let me know how you like it.

VARIATIONS
Although I prefer the simplicity of the recipe as is, you could certainly add some extras if you wish. Some of the add-ins that I have tried are toasted pine nuts, sliced shallots, a minced garlic clove and/or crumbled cheese. All with great results. However, you don’t have to stop there, get creative and let me know your favorites.


Sautéed Salmon with Leeks and Tomatoes

Lately I have been trying to focus a bit more on healthy meals. Ironically, in the mail last week, was a recipe from a very good friend, who also happens to be an incredibly good cook. She sent me this to try and promised it was not only delicious, but a snap to make and of course quite healthy.

Now, it’s not that I don’t trust her, but I have not been the biggest fan of salmon. Although I do try to have it occasionally because I know it is so good for you. So for you Marty, I made it tonight and you were spot on, I loved it and I highly recommend it. Sometimes you just have to go on good faith and trust that good friends won’t disappoint!

PS, a little update since I first posted it back in 2018, this has definitely become one of my all-time favorite quick, healthy meals.

INGREDIENTS
4 boneless salmon fillets
kosher salt & fresh ground pepper, to taste
1 leek, well trimmed, white part only
1 pint cherry tomatoes
3 Tbs. olive oil
2 Tbs. lemon juice
2-3 Tbs. julienned fresh basil or flat leaf parsley

DIRECTIONS
The salmon should be at room temperature, check for bones (remove with tweezers if you find any) and sprinkle with salt and pepper. After trimming the leek, slice down the middle, submerge in a bowl of water and swish around to rinse away any sand particles. Then, remove from water, pat dry with a towel, slice into thin strips and finely chop. You should have at least 1/3 cup. Slice the cherry tomatoes in half. I prefer to slice them on the diagonal, no particular reason, other than I think they look better on the diagonal.

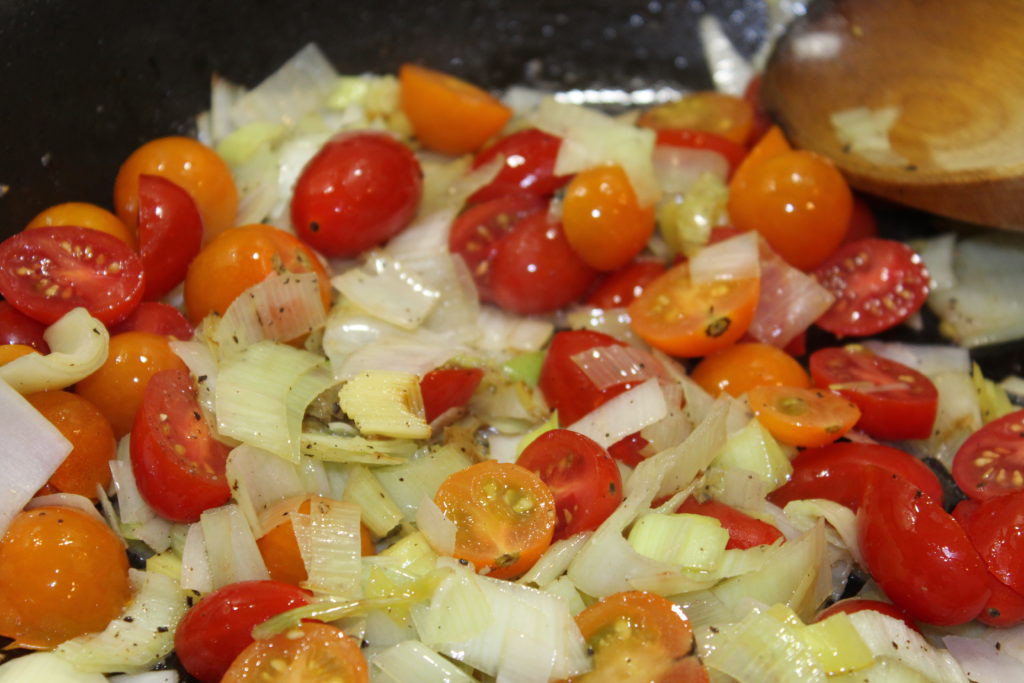
leeks and tomatoes

Heat 2 Tbs. of the oil in a nonstick skillet over moderate heat and add the salmon, skin side up. Cook for 2-3 minutes before turning. Cook on the second side for 2-3 more minutes (depending on how well done you prefer) and then transfer to a warm platter. Add the remaining oil to the skillet, then add the tomatoes, leeks, salt, pepper and lemon juice. Cook for 2-3 minutes, pour the mixture over the salmon, sprinkle with the basil and serve.

This is so quick, easy and tasty. Please give it a try and let me know how you like it.


New England Fish Chowder

Authentic New England, from an old Cape Cod recipe…easy, delicious and pretty darn quick to pull together!

Going way back, Cape Cod had very strong Portuguese roots and many favorite New England and Cape Cod recipes had their beginnings in that community.  They were fabulous fishermen and they were also incredible cooks. Their meals were usually very simple, very economical, full of flavor and this one is no exception. To be honest, although I love  New England clam chowder, I actually prefer this simple fish chowder, it’s just soothing comfort food that reminds me of my childhood, when it was a frequent meal.

Any mild white fish will work well in this recipe. Whether you like a thin or thick broth, the choice is yours, but do yourself  a favor and just try this. Even if you think you don’t like fish chowder, I urge you to make this and please do let me know your thoughts.

INGREDIENTS
3 Tbs. butter, split
1/3 cup sliced onion
1 1/2 cups water
2 cups chopped potatoes (about 4)
1 lb. haddock or any mild, white fish
2 tsp. corn starch or flour
3 cups whole milk, use cream if you prefer a thicker broth
salt & fresh ground pepper to taste

DIRECTIONS
First, sauté onion in 1 tablespoon of butter. Then, add water and potatoes. Next, cover and simmer for 15 minutes, or until potatoes are tender. Then, cut the fish into chunks and add to the pot. 

Next, make a paste with the corn starch/flour and a little of the milk, stirring to combine until smooth. Then, add the mixture to the pot. After you have thoroughly incorporated the flour mixture, add the rest of the milk and stir to combine. Finally, bring the mixture to a boil, then immediately lower the heat and simmer for 3 to 4 minutes. This will thicken the broth slightly. Just before serving, add the remaining 2 Tbs. of butter, give it a minute to melt and serve.

NOTES
If you prefer a thicker broth, you can definitely use light cream, half and half, or a combination light/heavy cream. You could also use a 2% milk, however it will be a much thinner broth. Play around with the options and find what works best for you.


Almond Biscotti

This is a wonderful and delicious classic, adapted from Maria’s Pastry Shop in Boston’s North End.

INGREDIENTS
1 cup whole unblanched almonds
1 1/4 cup flour
1 1/4 cup confectionery sugar
1 tsp. baking powder
2 eggs, lightly beaten
1 egg white, for egg wash
1 tsp. cinnamon
1/2 tsp. orange zest

DIRECTIONS
Preheat oven to 350°
First, spread the almonds on a sheet pan and toast for 8-10 minutes. Then, when the almonds are cool, coarsely chop them.

Next, combine the flour, sugar, baking powder, and almonds in a large bowl. Meanwhile, in another small bowl, mix the eggs, cinnamon, and the zest, stir to combine. Pour the egg mixture into the center of the flour mixture and gradually mix them, just enough to make a dough. The dough will be very sticky and wet. However, if it is too moist, add a little sugar and flour in equal proportions.

Then, on a lightly floured board, shape the dough into a long log. The shape should be similar to a baguette, about 17“ by 3” and then lay it on a parchment-lined sheet pan. Alternatively, if you find it easier to handle, you could make two long loaves.

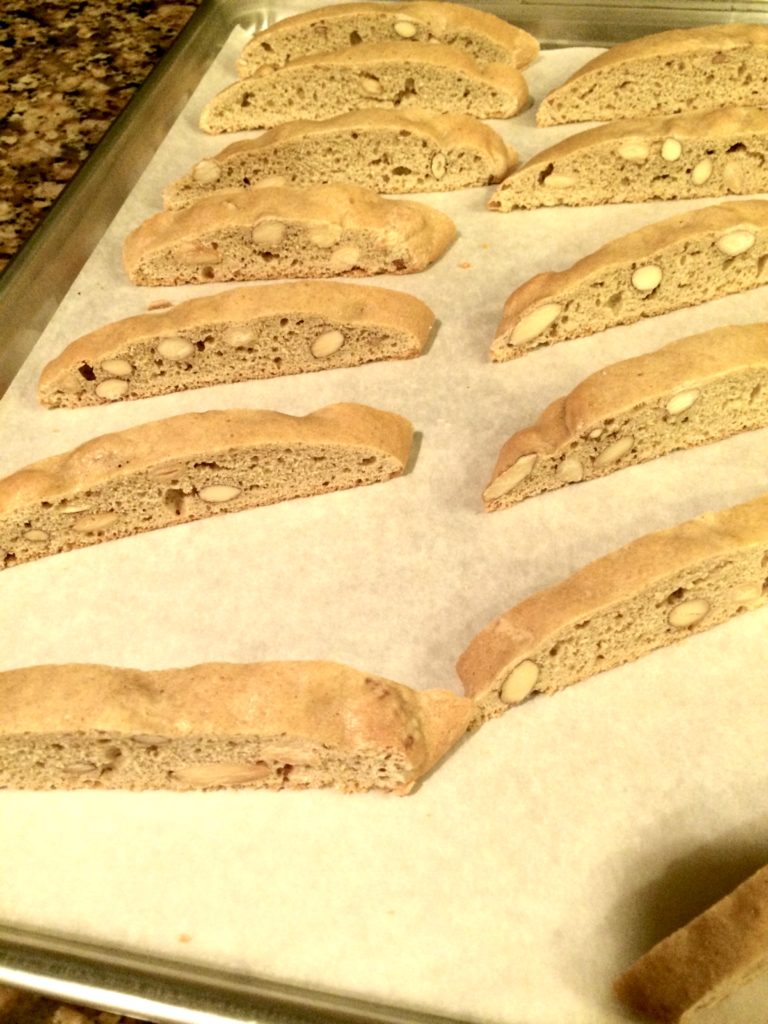
Beat the egg white with a tablespoon of water, brush the log and then bake for about 25 minutes, until lightly browned. Remove the log from the oven and let it cool for 20 minutes. Then, while still slightly warm, cut the log into 1/2″ diagonal slices. I find that a serrated bread knife works best for slicing.

Finally, lay the slices out at room temperature or place them back in the turned-off oven, to dry out. Let them cool completely and store them in tightly covered tins. Consequently, the end result is a very crunchy traditional biscotti. However, if you prefer them a little less crunchy, then don’t let them dry out quite as much.

NOTES
Although I am more of a purist and prefer them as is, I will admit that dipping them in chocolate is a nice option. Try a selection of dark chocolate, white chocolate, and milk chocolate. This varied combination makes for a more interesting and festive dessert platter. Additionally, you can package these up nicely for a great hostess gift.


Dark Chocolate Fudge Sauce

Pretty simple recipe for such a rich and creamy fudge sauce and reheats beautifully. I keep it in ball canning jars and reheat right in the jar. This makes enough to fill two 8 oz. jars, with a bit left over.

INGREDIENTS
1 1/4 cups sugar
2/3 cup whole milk
1/4 tsp. salt
1/3 cup unsweetened cocoa powder
3 oz. unsweetened chocolate, chopped fine
4 Tbs. unsalted butter, chopped
1 tsp. pure vanilla extract

DIRECTIONS
First, heat the sugar, milk, and salt in a  saucepan over medium-low heat, gently whisking, until sugar has dissolved and liquid starts to bubble around edges of saucepan, 5 to 6 minutes. Next, reduce heat to low, add cocoa, and whisk until smooth.

Then, remove the saucepan from the heat, stir in chocolate, and let stand for a couple of minutes, to allow the chocolate pieces to melt. Next, whisk sauce until smooth and chocolate is fully melted. Add butter and whisk until fully incorporated and sauce thickens slightly. Finally, whisk in the  vanilla and serve. Sauce can be refrigerated for up to 1 month. Gently reheat sauce in microwave until soft enough to pour.


Escarole and Bean Soup

There is a chill in the air and cooler weather is definitely on the way. Therefore, this is a wonderful, hearty soup to try now. Although this is more like a stew, you can certainly add or subtract broth to your desired consistency. Serve with homemade crostini for a nice hearty lunch.

INGREDIENTS
2-3 Tbs. olive oil
2-3 garlic cloves, thinly sliced
1/2 tsp. crushed red pepper flakes
1 oz. pancetta, chopped (optional)
1 head escarole (approximately 1 lb.), washed & chopped into bite-sized pieces
2 14 oz. cans cannellini beans, drained & rinsed
3-4 cups chicken broth
kosher salt & freshly ground pepper to taste
freshly grated parmesan
slices of rustic bread, grilled or toasted

DIRECTIONS
Heat a soup pot over medium-high heat and add enough olive oil to cover the bottom. Next, add the garlic, red pepper flakes, pancetta (if using) and sauté them for a minute or two. Then, add the escarole and stir to coat with the oil.

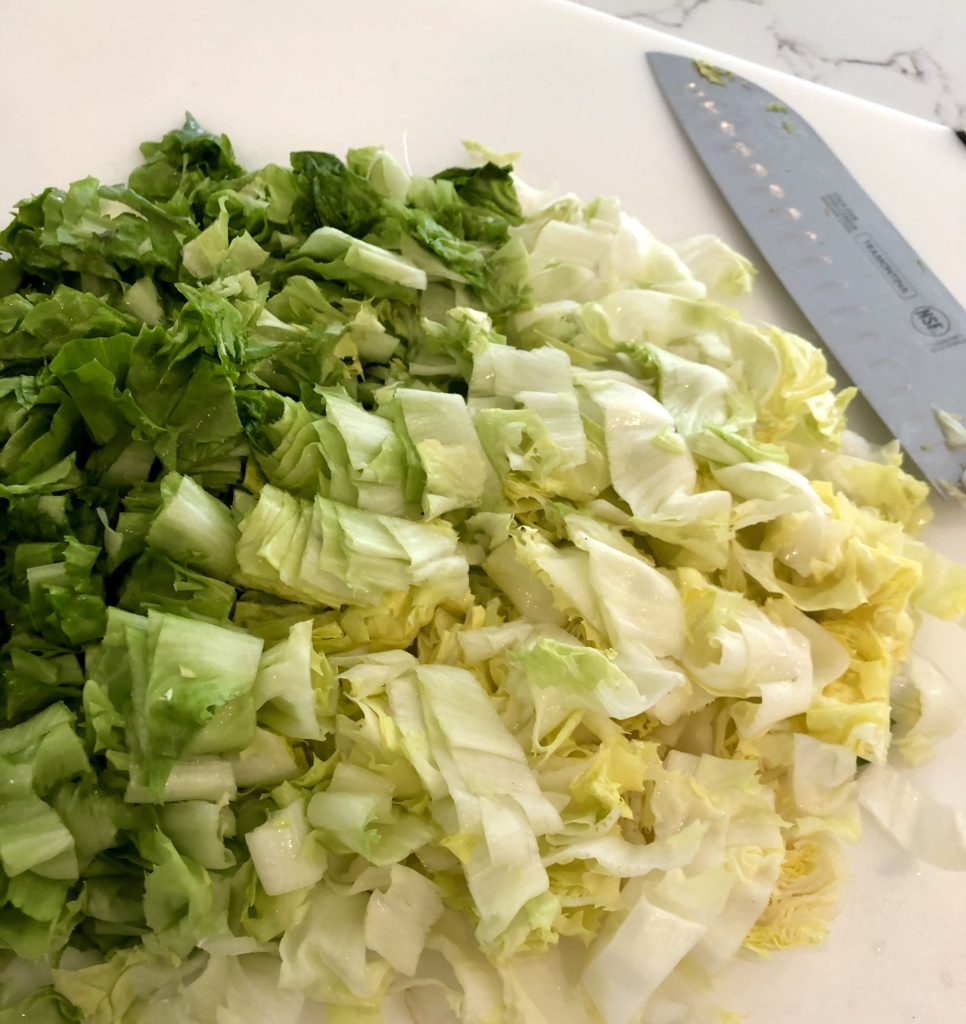
escarole

Continue sautéing, stirring occasionally, until the escarole begins to wilt.
Then, stir in the beans, lower the heat, add the broth (more if you like a soupier consistency) and season with salt and pepper. Continue to simmer for 10-20 minutes.

TO SERVE
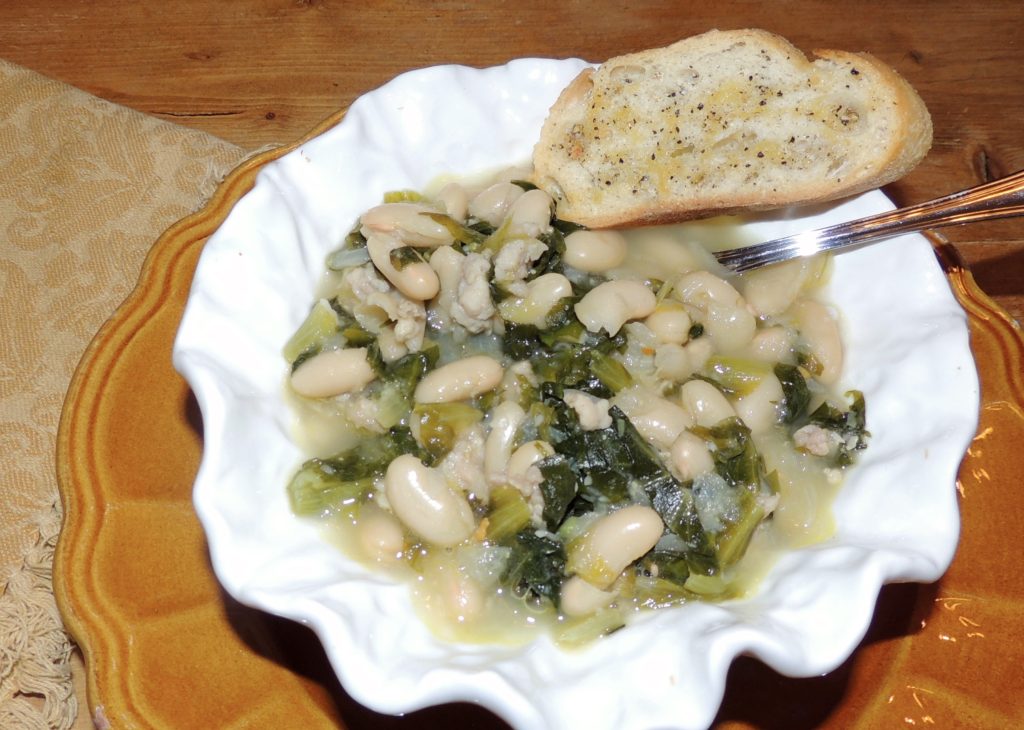
Divide equally among four soup bowls, drizzle a little extra virgin olive oil over each serving, garnish with the parmesan and serve with a slice of good crusty bread.

escarole & bean soup

NOTES
Alternatively, try a hot, italian sausage link, removed from its casing, instead of the pancetta. Adding a parmesan rind to the broth is also a nice addition.


Shrimp Scampi Grilled Pizza

This is a deceptively delicious option for grilled pizza. Although not necessarily one that I would have gravitated toward, because I didn’t like the thought of seafood on pizza…I know, silly me. However, I have definitely changed my mind and this is now one of my absolute favorites!

INGREDIENTS
2 Tbs. olive oil
2 Tbs. unsalted butter
3 cloves garlic, minced
1 lemon, zested and juiced
pinch of red pepper flakes
1/4 cup white wine
1 pound, 16-20 count fresh shrimp peeled, deveined, split horizontally
1 cup shredded mozzarella cheese
1/4 cup grated Parmesan cheese
handful fresh italian parsley, chopped
1 round fresh pizza dough
coarse corn meal

DIRECTIONS
Preheat your grill on high.
In a large skillet, melt butter and oil over medium-low heat. Then, add the garlic and lemon zest and cook for about a minute. Then add the wine and lemon juice, red pepper flakes and simmer for 2-3 minutes. Finally, add the shrimp and cook, only until pink and then remove them from pan and set aside. Continue simmering the sauce to reduce it a little bit.

Meanwhile, roll out the pizza dough in the coarse cornmeal. The cornmeal gives the crust a wonderful crunch and texture that everyone seems to love, especially me! I like my pizza very thin and crunchy, however you do the thickness you prefer. Also, I usually cut the round of dough into four pieces. I just find that to be a more manageable size to work with, on the grill and it is a more individual size.

GRILLING
When you finish rolling out, drizzle the dough with a little olive oil, salt and pepper. Then, move your pizza (no toppings yet, at this point, we are just cooking one side) to a pizza peal or sheet pan. When ready to grill, lift your dough with two hands, lay the loose (bottom end) end onto the grill and lay it away from you, directly on the preheated grill. Close the lid.

Stay close, because this only takes about 2-3 minutes. Have your tongs and a large, grill spatula ready. Lift the lid and you should see a wonderful, somewhat puffy piece of dough. If there are big bubbles, just deflate them with your tongs or spatula. Lift the dough slightly, to check the bottom. If the dough is somewhat stiff and has good grill marks, then remove from the grill. Just to let you know, when I am making this for more than two people, I prepare the crusts to this point. Then, when ready to eat, finish the toppings and the cooking.

Lower the heat to medium.

Drizzle a little more olive oil on the uncooked side and flip over. Now, on the cooked side, spread the scampi sauce evenly and then sprinkle on the mozzarella. Finally, distribute the shrimp over the pizza and sprinkle that with the parmesan. Back out at the grill, rest your sheet pan on the edge of the grill, take your tongs and gently slide the pizza from the pan to the grill and close the cover. Again, stay close and check after about five minutes. When the cheese is melted and the bottom has a good crust, then it is ready. Slide the pizza off the grill,  using the tongs and supporting underneath with the spatula.

NOTES
Don’t be overwhelmed, I know this seems daunting, but it really is quite simple, once you get over the fear of failure. Please just give it a try and I promise you won’t be disappointed. You can check out more detailed instructions in my grilled pizza recipe. Let me know how you make out.


Chicken Thighs Baked with Lemon, Sage, Rosemary & Thyme

Adapted from an old Fine Cooking recipe .
One of my all time favorites and a definite go-to for a yummy weeknight meal or a great company dish. Chicken thighs are incredibly tasty and difficult to overcook, hence it’s a good choice for most any chicken recipe. I know many rely more on chicken breasts, but you should not overlook the humble chicken thigh, it is much tastier!

INGREDIENTS
2 large cloves garlic
Coarse salt or sea salt
3 to 4 Tbs. extra-virgin olive oil
12 chicken thighs, trimmed of fat, rinsed, and patted dry
2-3 large lemons, cut into 1/4-inch rounds
several fresh rosemary sprigs, snipped into twelve 2-inch pieces
1 bunch fresh thyme, snipped into twelve 2-inch pieces
12 sage leaves
freshly ground black pepper

DIRECTIONS
Using a mortar and pestle, mash the garlic with a large pinch of salt to create a coarse paste (alternatively, use a small mixing bowl and the back of a wooden spoon, or mince the garlic very finely on a cutting board). Add the oil very slowly, while pounding and grinding the paste, continuing until the aioli is thick, creamy, and emulsified. Put the chicken in a ziplock bag, rub the aioli all over the skin. Cover and refrigerate at least 2 hours or overnight.


Chicken Paillard

Delicious,  quick and light. This versatile recipe is great for company or just a quick weeknight meal. Either way, it will quickly become a favorite.

INGREDIENTS
4 boneless, skinless chicken breasts
1 cup flour
3 eggs, whipped with a fork
2 cups panko crumbs
1/4 cup freshly grated parmesan (optional)
salt and freshly ground black pepper
2 Tbs. extra virgin olive oil
2 Tbs. butter

DIRECTIONS
Begin by pounding out the chicken breast gently between 2 pieces of plastic wrap. Alternatively, if you are lucky enough to have a good market near you that already has good, very thin cutlets, use those and no pounding is needed. Don’t overlook a good local Italian market, they often have them. I have found that pre-packaged cutlets, including name brand chicken, are not quite thin enough and still should be pounded thinner.

Prepare breading station with 3 containers, flour in one, egg & a tablespoon or 2 of water in the second and the panko and parmesan (if using) in the third. Season all three with kosher salt and fresh ground pepper.

Dredge cutlets in flour, then egg and then panko. Lay the coated breasts out on sheet pan, lined with parchment and refrigerate, uncovered for a minimum of 15-30 minutes to let the egg dry out; this will ensure a crisp crust.

Add the olive oil and butter to a 12″ saute pan. Over medium-high heat, saute the cutlets, in batches, for about 2-3 minutes per side, depending on the thickness.

Place cutlet on top of arugula salad, drizzle cutlet with a smidge of olive oil and a squeeze of lemon juice on each cutlet. Serve immediately.

NOTE:

For arugula salad, just sprinkle with kosher salt, fresh ground pepper, extra virgin olive oil and squeeze fresh lemon juice over all. Toss, add shaved parmesan and serve.


Roasted Root Vegetables

Nothing better than a fabulous fall/winter vegetable dish. You can use any combination of root vegetables, the choice is yours and the amounts can vary according to your preferences or what you have on hand.

INGREDIENTS
3 large beets, scrubbed and quartered
12-15 brussel sprouts, halved
3-4 parsnips, peeled, cut into large chunks
1 large sweet potato, peeled and cut into chunks
1 medium butternut squash, peeled and cut into chunks
4 shallots, peeled and halved
1/4 cup olive oil
2 Tbs. pure maple syrup
several sprigs each of rosemary & thyme, chopped
kosher salt & fresh ground pepper
3 scallions, sliced (for garnish)

DIRECTIONS
First, preheat the oven to 375°.
Then, put all vegetables (not the scallions) onto a rimmed baking sheet in a single layer, drizzle with the olive oil and maple syrup. Next, add the chopped herbs, sprinkle with the salt and pepper, and then mix to coat everything evenly.

Bake for about an hour, tossing occasionally. Then, transfer to a serving dish, sprinkle with the scallions and serve immediately.

NOTE:
This can definitely be done earlier in the day, kept at room temperature, transferred to a baking dish and finally, finished off just before dinner.