Chocolate Cake with Mocha Frosting

If you are looking for a special treat for the birthday person, or a dinner party, you need to give this a try, I promise you won’t be disappointed. This is my go-to recipe for chocolate loving birthday girls (or boys of course) and I give full credit to Ina Garten, aka, Barefoot Contessa. The beauty of this is that you can have full confidence the very first time making one of her recipes. No fiascos, no surprises and more importantly, you know it will be an instant hit. This cake is no exception. Also, there is no question that this is a bit more involved than a box cake mix, but the little bit of added time is well worth the effort.

INGREDIENTS
12 Tbs. butter (1 1/2 sticks), room temperature
2 cups sugar
1 Tbs. pure vanilla extract
3 extra large eggs, room temperature
1-3//4 cups all purpose flour
1 tsp. baking soda
1 tsp. kosher salt
2/3 cup hot tap water
2/3 cup unsweetened cocoa powder, Pernigotti or Droste are good ones
1 tsp. instant espresso powder
2/3 cup half and half

DIRECTIONS
Preheat the oven to 350 degrees. Grease a 9 × 13 × 2 inch baking pan, line it with parchment paper, then grease and flour the pan.

First, place the butter and sugar in the bowl of an electric mixer, fitted with the paddle attachment and beat on medium speed for 4 to 5 minutes, until light and fluffy, scraping down the bowl. On medium speed, add the vanilla, then beat in the eggs, one at a time, until incorporated and the batter is smooth.

Next, sift the flour, baking soda, and salt together in a medium bowl. Then, in another bowl or a liquid measuring cup, whisk together the hot water, cocoa powder, and espresso powder until smooth. Add the half-and-half and whisk until smooth.

Now, with the mixer on low, add the flour and chocolate mixtures alternately in thirds, starting and ending with the flour. With a rubber spatula, scrape down the bowl to be sure the batter is well mixed. Then, pour the batter into the prepared pan, smooth the top, and bake for 25 to 35 minutes, until a cake tester inserted in the center comes out clean. Cool completely in the pan. Turn out onto a flat platter or board, remove the parchment paper and frost the top with the mocha frosting. Cut in squares, add a dollop of vanilla ice cream and serve.

MOCHA FROSTING INGREDIENTS
12 oz. bittersweet chocolate, (Lindt) 1/4″ chopped
3 Tbs. butter, room temperature
2 tsp. instant espresso powder
1-1/4 cups heavy cream
1 tsp. pure vanilla extract

DIRECTIONS
Meanwhile, place the chocolate, butter, and espresso powder in a bowl. Heat the cream to a simmer and pour it over the chocolate mixture, stirring occasionally, until the chocolate is melted. (If the chocolate isn’t melted, microwave the mixture for 15 seconds.) Add the vanilla and stir until the mixture is smooth. Cover and refrigerate for 30 minutes only, until cool but not cold.

Finally, scrape down the bowl and beat the frosting with a handheld mixer on high speed for 15 to 20 seconds only, until the mixture forms soft peaks. (If you overbeat it, it will curdle!) Spread on the cake immediately with a metal spatula.

NOTES
Not to worry if you don’t have either of those high-end cocoa powders or chocolate, you can definitely use the run of the mill supermarket version. However, remember that the better the chocolate, the better the flavor.


Key Lime Pie

This is a classic dessert, that needs no introduction. However, making it fresh adds a whole new dimension to the yummy factor. I know many stores have a version of this, but honestly you can’t compare them to the homemade version. My first encounter with this recipe, was at a friends house for dinner (thanks Betsy) and I’m not sure I had ever had a homemade version of key lime pie. It was so delicious and everyone was talking about it. I have now made it several times and the reactions are always the same, it just never disappoints. An added bonus, when entertaining, you can make it well ahead of time and just keep it chilled.

INGREDIENTS
Crust
11 graham crackers
1/3 cup sugar
6 Tbs. butter, melted

Pie Filling
2- 14oz. cans sweetened condensed milk
1/2 cup light sour cream
zest from 2 regular limes or 4 key limes
3/4 cup key lime juice

Topping
1 cup heavy whipping cream
1/2 cup powdered sugar
1 tsp. pure vanilla extract

DIRECTIONS
Preheat the oven to 375º.
Roughly crumble the graham crackers into the bowl of a food processor and pulse until finely crumbled. Then, add the sugar and melted butter and process until it starts to stick together. Press the mixture into a 10″ pie pan and bake for 7 minutes. Set aside to cool for 20-30 minutes.

Reduce the oven to 350º.
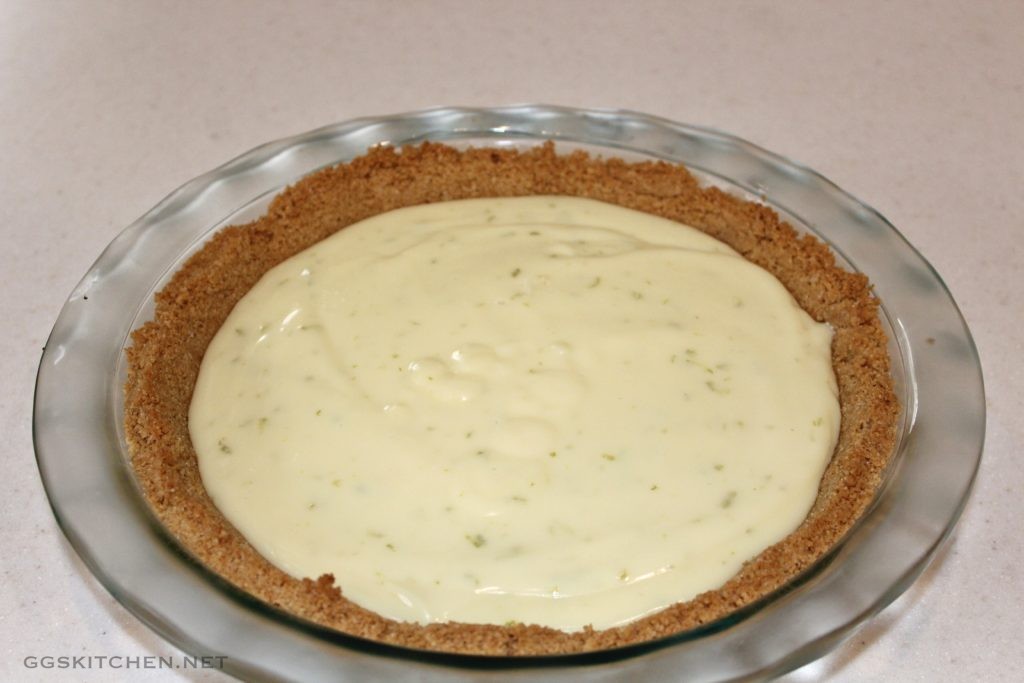
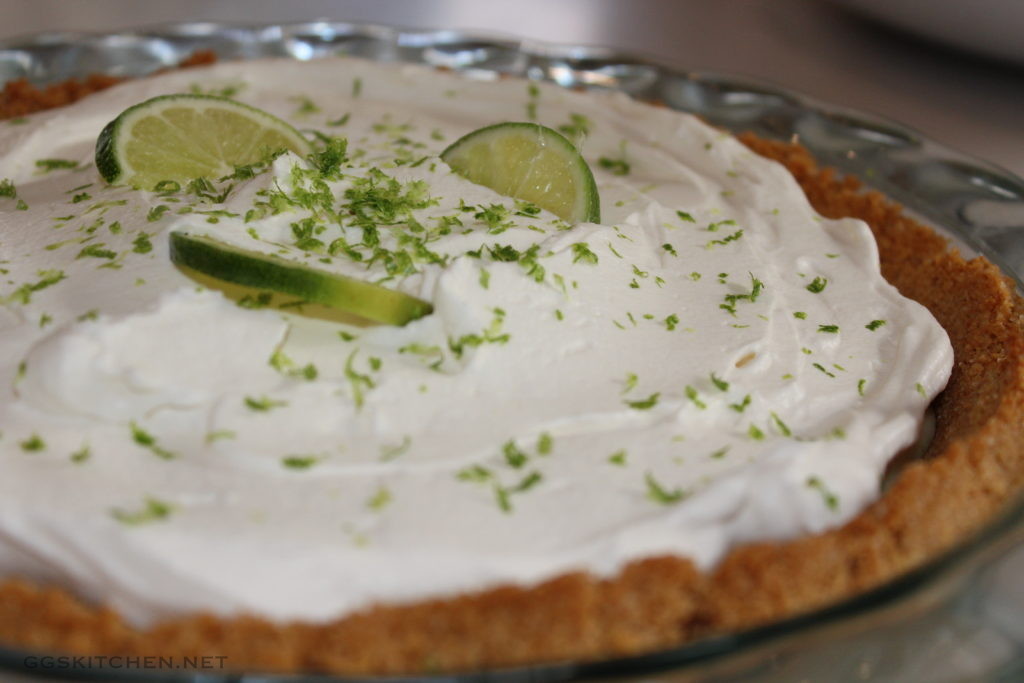
Meanwhile, in a medium bowl, whisk together the sweetened condensed milk, sour cream, lime zest and lime juice. Pour the mixture into the pie crust and bake for 10 minutes. Cool for a bit and then refrigerate for 2- 3 hours. When fully chilled, whip the heavy cream, sugar and vanilla together, until stiff peaks form. Finally, spread the whipped cream over the pie, garnish with lime zest and if you wish to get fancy, a couple of thin lime slices.

NOTES
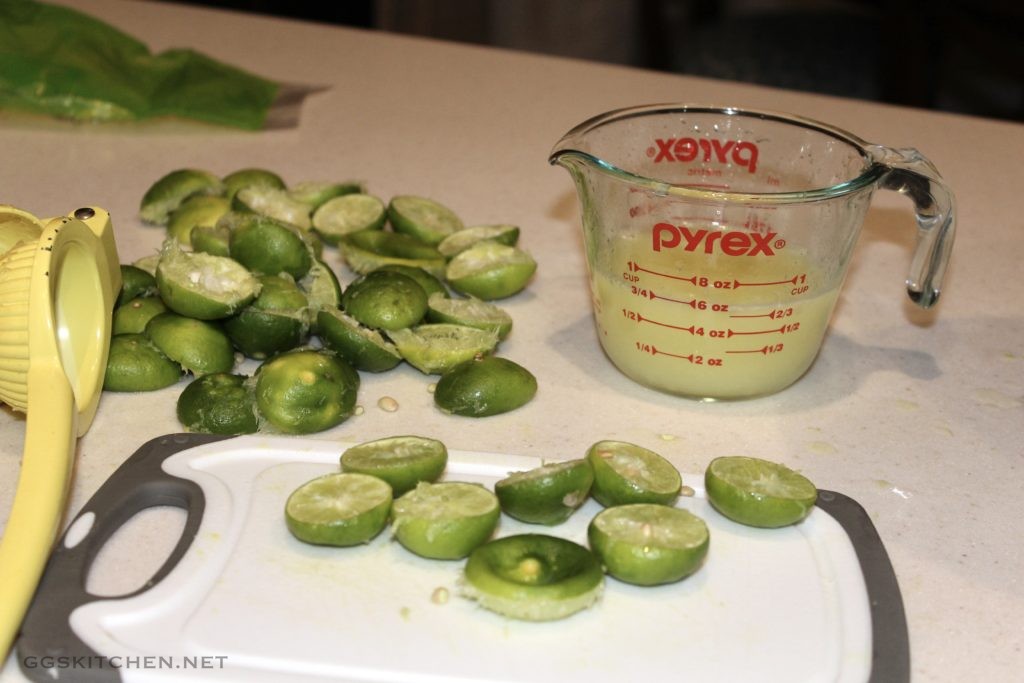
I have tried this with both key limes and regular limes. I’m not going to lie, I could tell the difference. However, I would not hesitate to use the regular limes if that’s all that was available. Also, be forewarned when using key limes, it can be a bit tedious because they’re tiny, so you need a lot…I think I used 30, to get the 3/4 cup!

Additionally, make sure that you zest the limes before juicing them. It’s nearly impossible to zest it after you’ve extracted the juice.


Mom’s Apple Pie

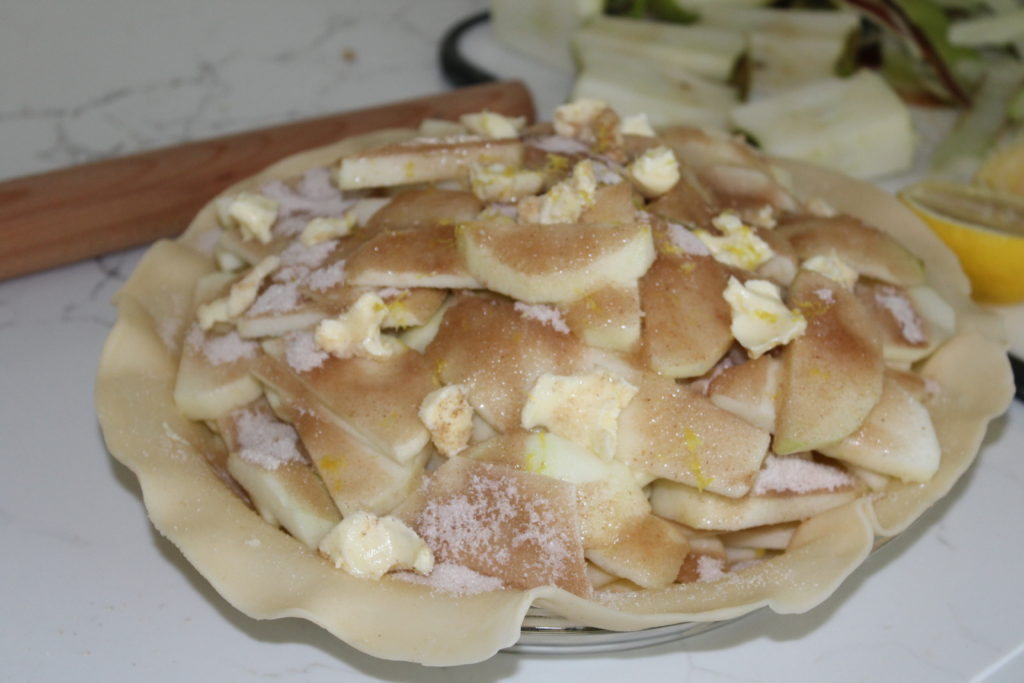
Well, fall has officially arrived and nothing says fall in New England more than a good old-fashioned apple pie. Local apples, a good, basic recipe, some quality vanilla ice cream and you will have a lot of happy campers!.

Now, I must tell you, as a child I often watched my mother pump out apple pies like she was making a grilled cheese. There would be a flurry of flour, mixing, rolling, peeling of apples, and poof…there was an incredible apple pie for dessert and the house smelled amazing. She made her own crust…I do not (I tried and just couldn’t master it!) and the speed with which she could put them together, to this day, astounds me. Coming from a very large family, one pie was definitely never enough so, multiple pies were always needed and they just appeared with so little effort or fanfare, very impressive.

INGREDIENTS
10-12 Cortland apples
1 cup sugar
1 tsp. cinnamon
1/2 tsp. nutmeg
3 Tbs. butter, diced
zest of lemon
juice from 1 lemon wedge
one double pie crust
1 egg, beaten with 1 Tbs. water

DIRECTIONS
Preheat oven to 425°.
First, roll out one crust and put in the  pie plate.
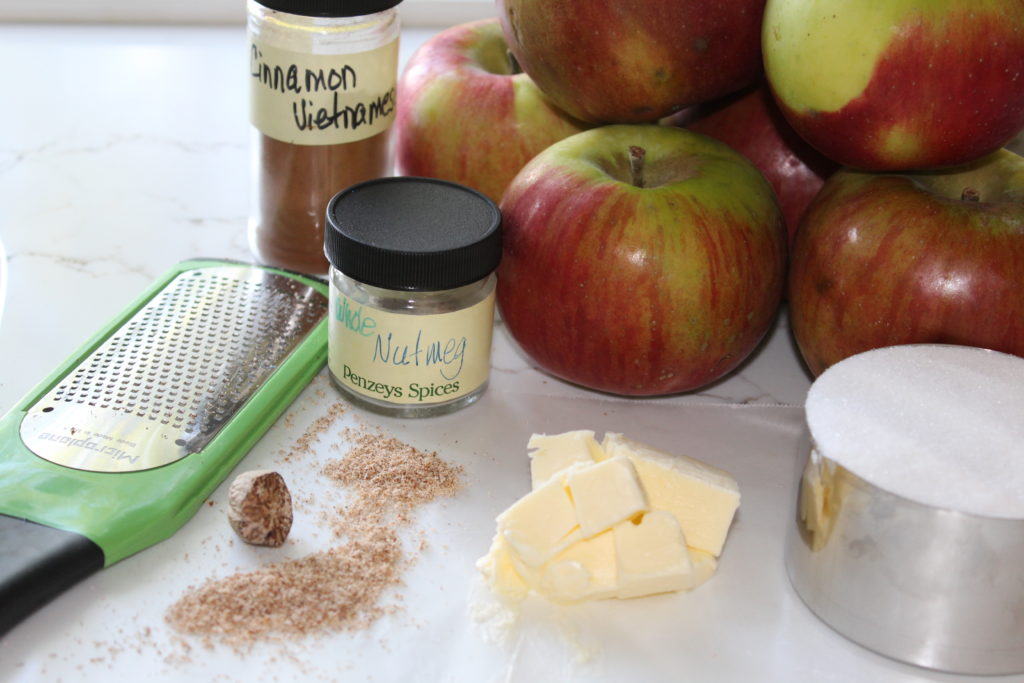
Then, combine the sugar, cinnamon and nutmeg in a small bowl. Next, peel and slice the apples. Place the apples in the bottom crust, sprinkle with the sugar mixture, dot with the diced butter, zest the lemon and squeeze a lemon wedge over the apples.

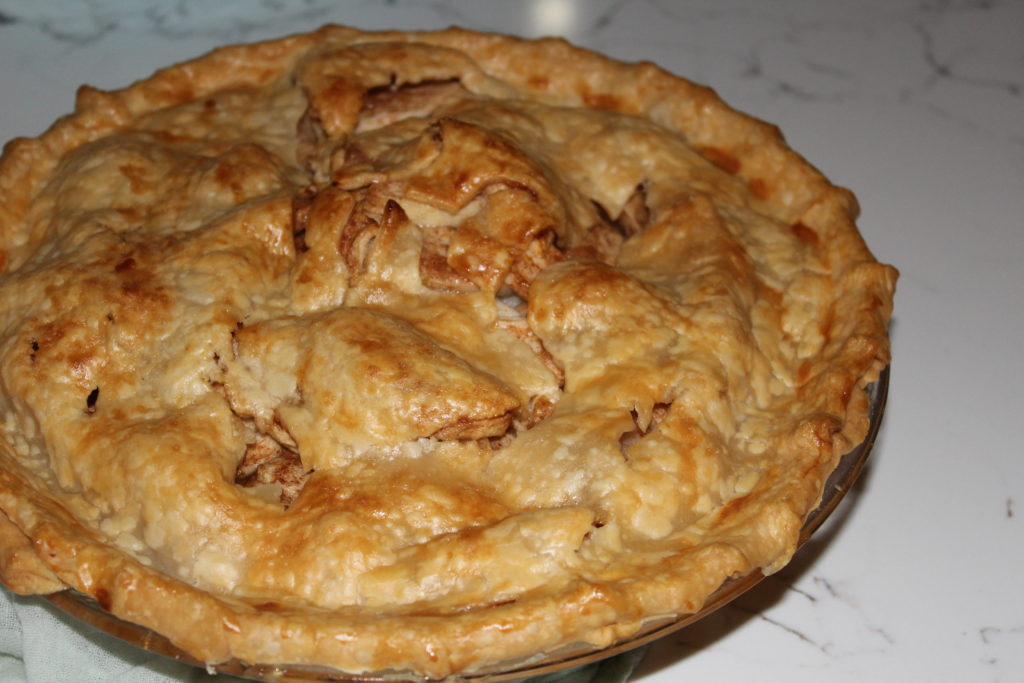
Top with second crust, cut slits to vent, brush with egg wash, and sprinkle the top with some natural, raw sugar.

Finally, cook at 425° for 15 minutes, reduce the temperature to 350° and cook for an additional 30-40 minutes or until bubbly and browned.

Serve warm, with a scoop of vanilla ice cream and enjoy.


Mixed Fruit Cobbler with Sugared Almonds

If you’re looking for a delicious, crowd-pleasing dessert, then you’ve just found it. Summertime desserts should be easy, feed many and be pretty quick to pull together. Other than the fruit, these ingredients are mostly pantry staples, that take no time to measure out and assemble. So, please don’t be deterred by the list of ingredients and give it a try.

First, regarding the fruit, you can do innumerable combinations of your favorites. Here, I have used blueberries, peaches and nectarines. However, if you look closely at the pictures, I also threw in a few strawberries that I had. So, a great way to use up some random, leftover items. The one thing I would caution against, is just using one fruit…a combination of two or more is definitely preferred and is just more flavorful.

Additionally, feel free to mix up the amounts of each fruit to your preference or availability. If you like, try just blueberries and nectarines, a terrific combo and the nectarines don’t have to be peeled. So, that’s a big plus in my world. Additionally, add in some raspberries or mango, either would be wonderful. Finally, just don’t be afraid to be creative or practical with this.

INGREDIENTS
24 oz. blueberries
2 peaches, peeled and sliced
2 nectarines, sliced
2/3 cup sugar
2 1/2 Tbs. cornstarch
3 Tbs. lemon juice
1/8 tsp. kosher salt

TOPPING INGREDIENTS
1 cup flour
1/4 cup sugar
2 Tbs. cornstarch
1/2 tsp. baking powder
1/8 tsp. kosher salt
6 Tbs. cold butter, diced
1/2 cup half and half
1/3 cup sliced almonds
3 Tbs. turbinado sugar (raw sugar)
1 Tbs. egg white

DIRECTIONS
Preheat oven to 350º
Combine fruit in a 13×9 baking dish coated with cooking spray. Mix the 2/3 cup sugar, 2 1/2 Tbs. cornstarch, lemon juice and 1/8 tsp. kosher salt and then, sprinkle over the fruit and gently toss to combine.

For the topping, combine the flour, 1/4 cup of sugar, 2 Tbs. cornstarch, baking powder and 1/8 teaspoon of salt and stir to combine well. Cut the butter into the flour mixture until the mixture looks like coarse cornmeal. Then, add the half and half, gently mix with a fork, just until combined and moist. Next, drop by spoonfuls, evenly over the fruit mixture.

Finally, for the topping, combine the almonds, turbinado sugar and egg white. Toss to mix well and evenly sprinkle over the top and bake for about 50 minutes or until the topping is nicely browned. Serve with vanilla ice cream. This makes enough for about 10 people.


Ginger Molasses Cookies

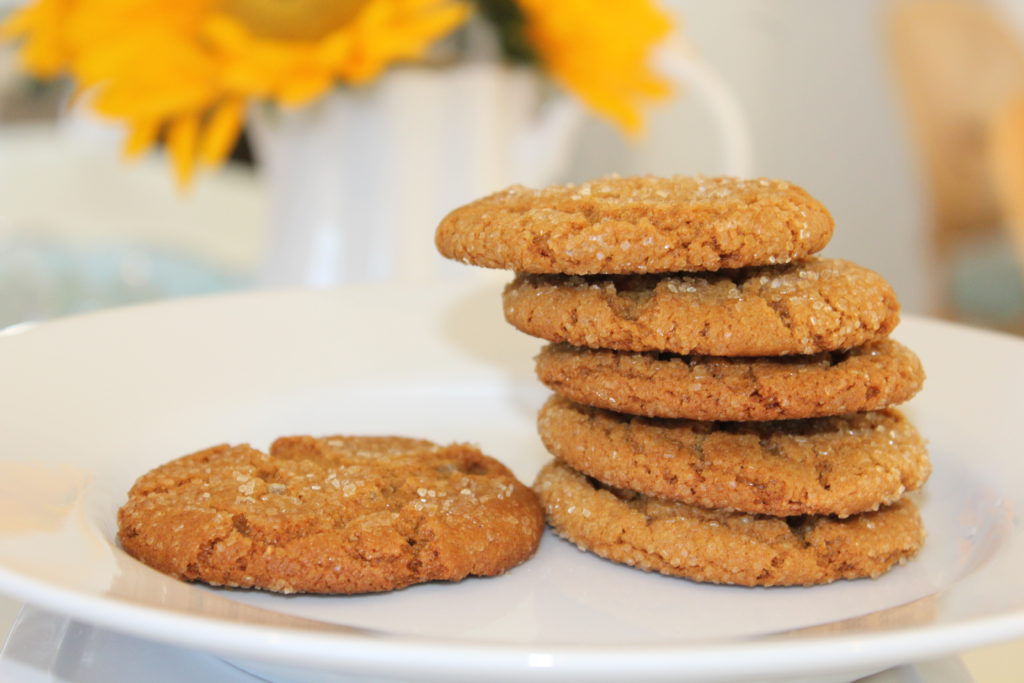
This is the quintessential cookie that signifies fall is in full swing and the holidays are soon to follow. One of my all-time favorites, tough to stop at one and it just makes a cup of coffee taste that much better. Easy, reliable, and oh so satisfying.

INGREDIENTS
3/4 cup shortening, I use Crisco
1 cup sugar
1 egg
1/4 cup molasses
2 cups flour
1 tsp. each cinnamon, ginger, ground cloves
2 tsp. baking soda
turbinado raw cane sugar, for rolling

DIRECTIONS
Preheat oven 375º
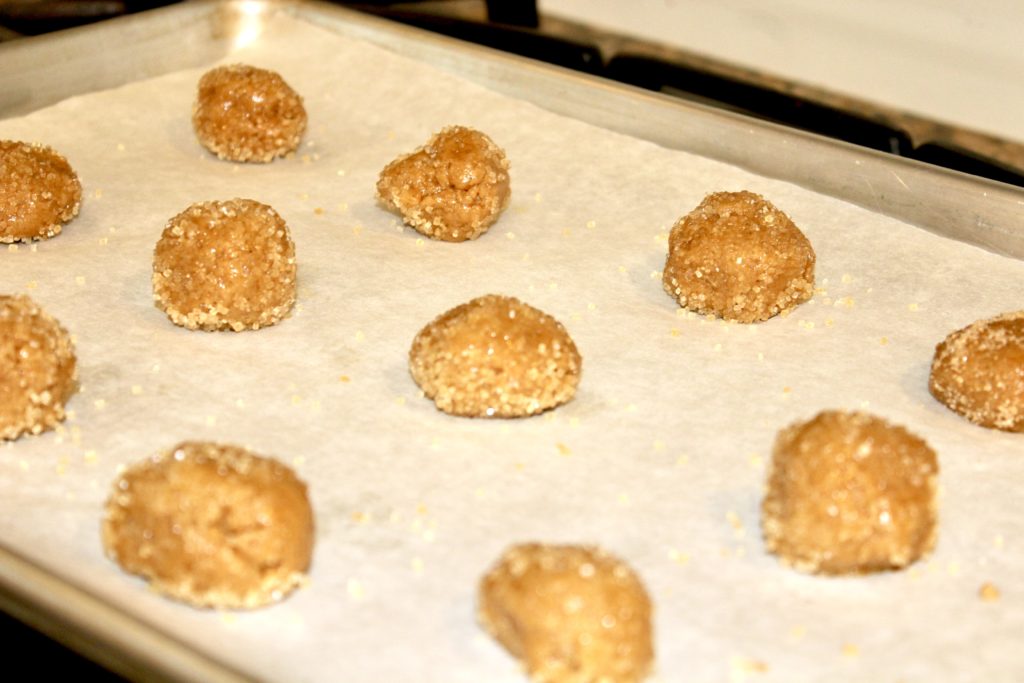
First, cream the shortening, sugar, egg, and molasses, until well combined and fluffy. Meanwhile, combine the dry ingredients and whisk them together. Next, add the dry ingredients to the sugar mixture and fully incorporate. Finally, take a small scoop of dough and roll into a ball, then dip and roll in the turbinado sugar to fully coat. Bake on an ungreased cookie sheet for about 10 minutes. Do keep a close eye on them, all ovens are different and that could affect the timing on these.

oven-ready

NOTES
If you don’t have turbinado sugar, not to worry, you could use regular sugar with similar results. The turbinado sugar just adds a little extra crunch that is a nice addition. Also, to add a bit more zip in the cookies, I often chop a bit of crystallized ginger and add it to the batter. Undoubtedly, whenever I do, I get rave reviews.

TIPS
Although many of you may already do this, I want to share this secret anyway. For all of you that have not tried this, I think it is a definite game-changer. This little trick comes in very handy when I’m baking with the little ones and I don’t want three dozen cookies in the house because, truth be told, I can’t stop eating them!

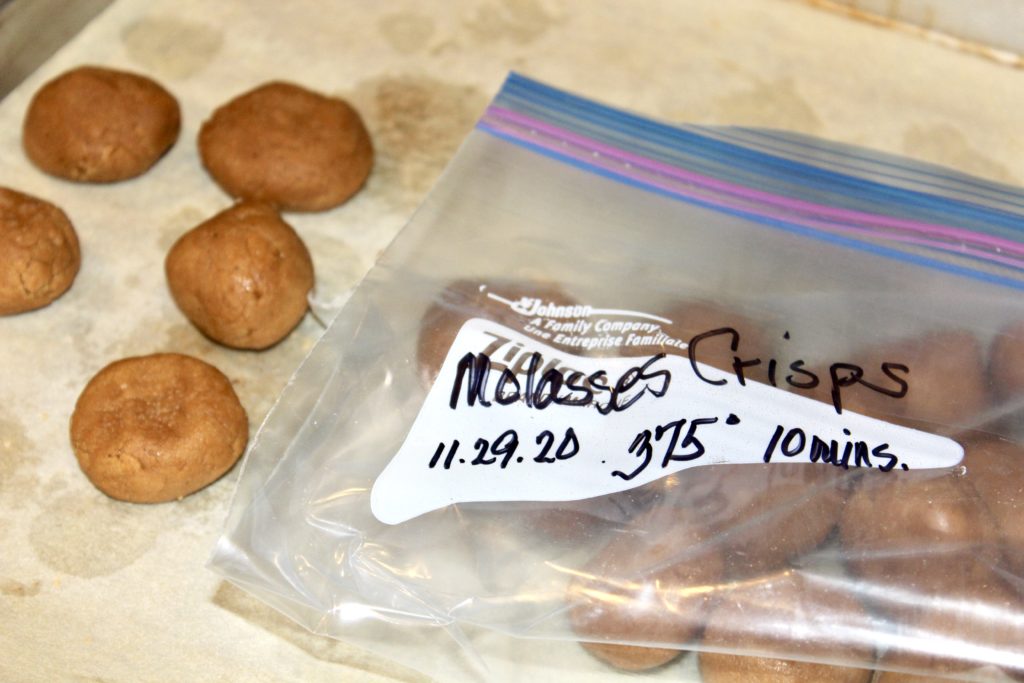
So, here it is. I make the cookie batter, cook what I want…maybe just one sheet pan full, for a small get together or just enough for me and my helpers. Then, I scoop the remainder of the dough, make dough balls and place them onto a sheet pan. Put as many on the pan as you can fit, then pop them into the freezer.

Then, after about 30 minutes in the freezer, pull them out, remove from the sheet pan and place them in a reclosable plastic bag. Make sure to mark the cookie name, cooking instructions, and the date. That way, you can pull them out, at a moment’s notice, you don’t even need to thaw them first and bake however many you want. I do this with all of my cookie batters, it’s a great way to keep us from eating two dozen in short order! Additionally, it is nice to have a selection of two or three to pick from at any given time.


Foolproof Apple Tarts

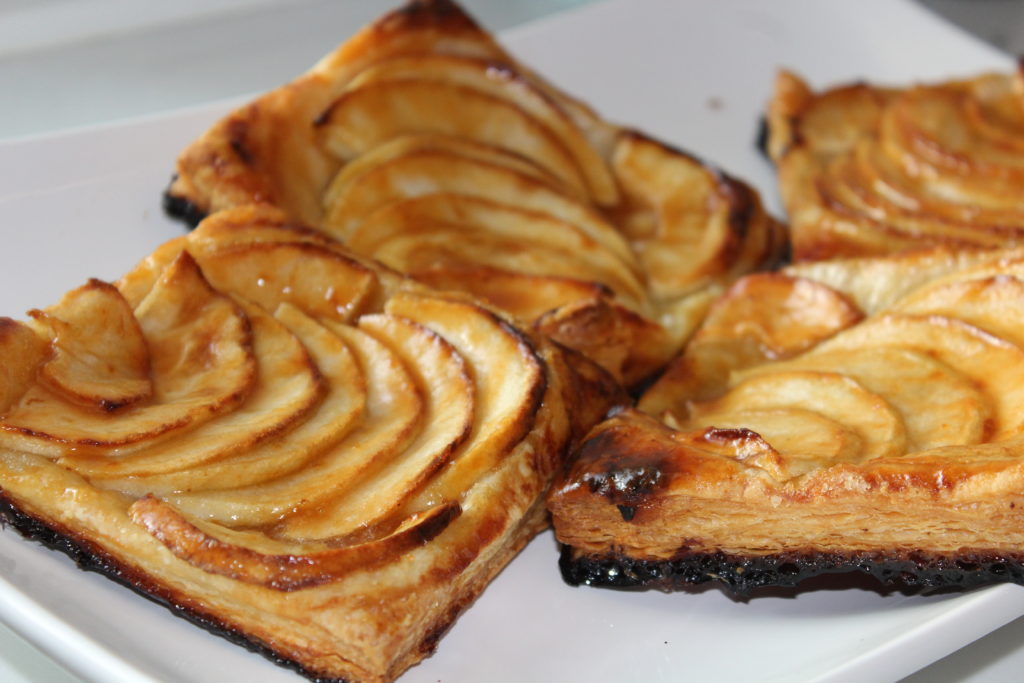
Fall is my favorite season, here in New England, and beautiful days, cooler nights are a sure sign that fall has arrived. This is about the time I shift to more cozy, heartwarming comfort foods. And, it wouldn’t be fall without apples on the menu. Although I have a soft spot for apple pie and who doesn’t? I love the simplicity and no-fail aspect of these tarts. They are a wonderfully satisfying dessert that requires very little time and effort. That’s a definite win, win for me.

INGREDIENTS
1 package frozen puff pastry (I use Pepperidge Farm)
4 Granny Smith apples
1/4 to 1/3 cup sugar
4 tablespoons (1/2 stick) cold unsalted butter, diced
1/4 cup apricot jelly or jam
1 Tbs. water or Calvados, if you have it

DIRECTIONS
Preheat oven to 400º.
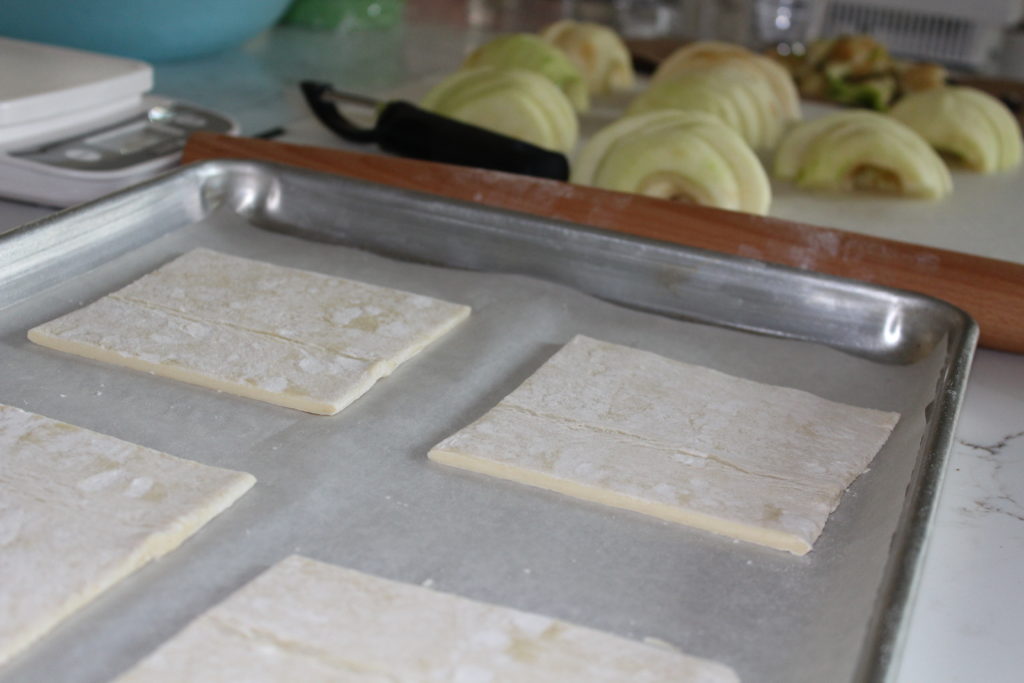
First, thaw the puff pastry, unfold and then place each sheet on a parchment-lined sheet pan. Then, cut each of the two sheets, into four squares.

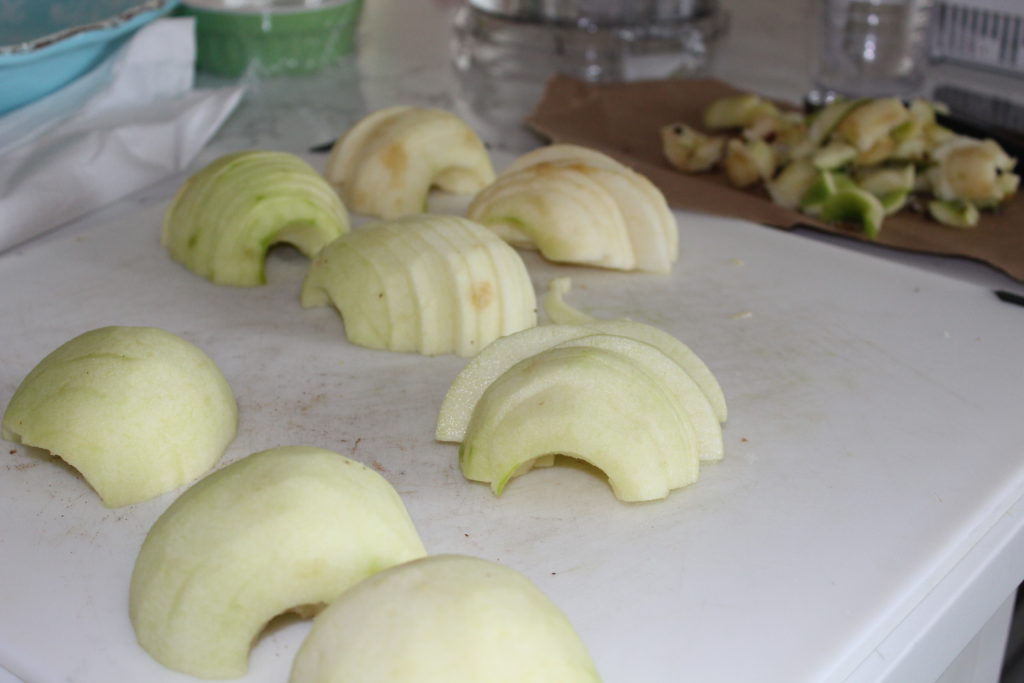
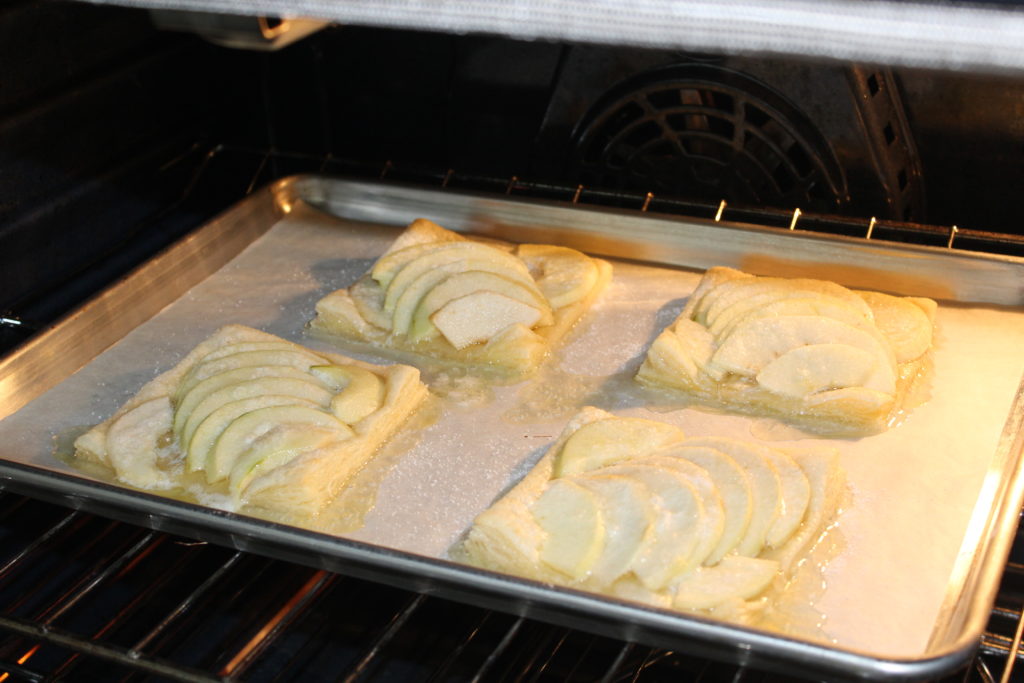
Next, peel and core the apples, cut them in half through the cut-away, core area, and slice them crosswise into ¼-inch slices. Then, place overlapping slices of apples diagonally down the middle of the tart and fill in with smaller pieces on the sides, until the pastry is covered. Finally, sprinkle with the sugar and dot with the butter.

Bake for 40 to 45 minutes. You will know they’re done when the pastry is browned and the apple edges are lightly browned. Rotate the pan once during cooking. Don’t panic when the apple juices burn in the pan (they always do), the tart will be fine!

Meanwhile, combine the apricot jelly and water in a small microwaveable bowl and heat until bubbly. Then, brush the apples and the pastry completely with the jelly mixture. Loosen the tarts with a metal spatula so they don’t stick to the parchment and allow to cool. Serve warm or at room temperature.

NOTES
A nice addition to these would be toasted, slivered almonds sprinkled on top. Another would be adding a pinch of cinnamon to the sugar, before sprinkling on top. Additionally, you might want a scoop of vanilla ice cream when serving them hot from the oven!


Salted Caramel Nuts

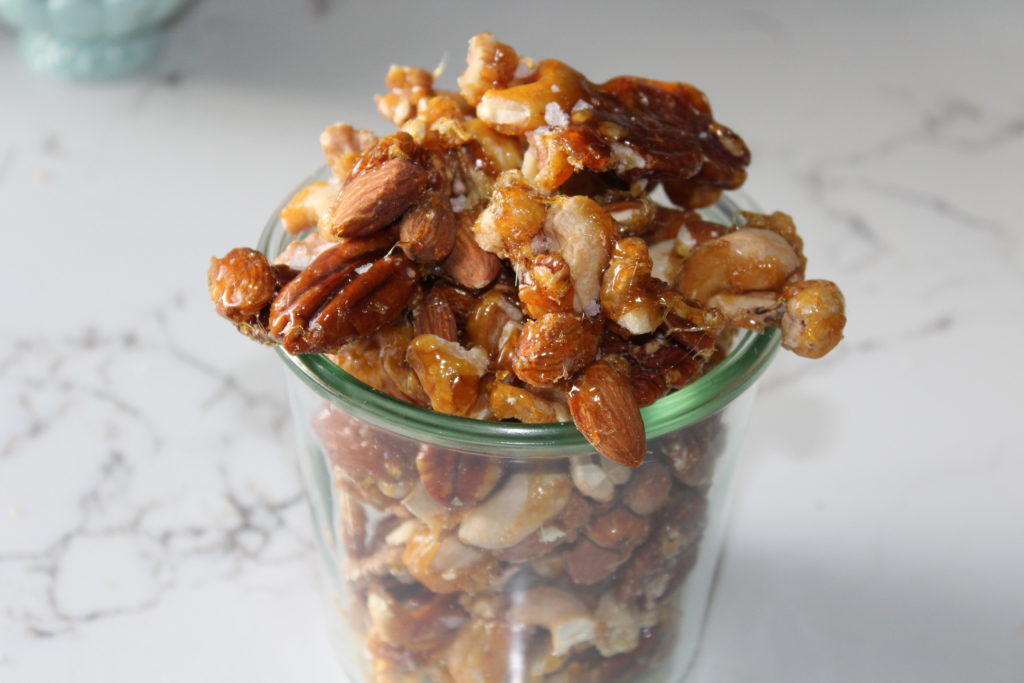
This is another, straight up, yummy, Ina Garten recipe. These are great as a snack or as an appetizer with cocktails. Alternatively, you could serve them alongside, or crumbled over, ice cream, for an irresistible dessert, that never disappoints. Another option is neatly packaging them as a wonderful hostess gift. 

INGREDIENTS
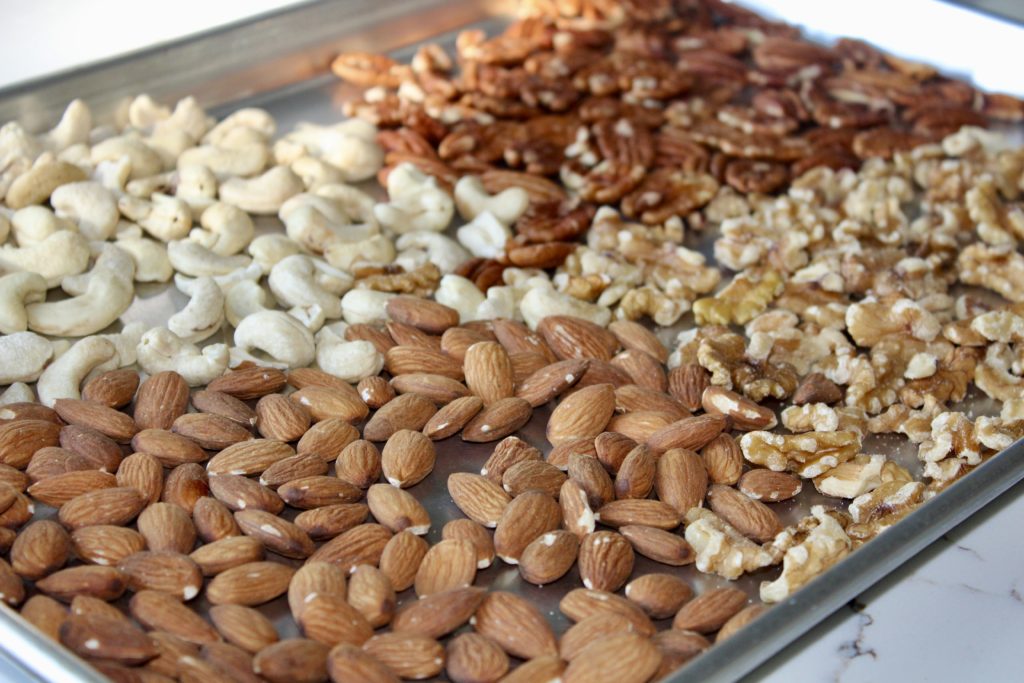
1 cup whole roasted cashews
1 cup whole large pecan halves
1 cup whole unsalted almonds
1 cup whole walnut halves
1½ cups sugar
1/4 cup water
2 tsp. pure vanilla extract
2 tsp. kosher salt
1 tsp. fleur de sel 

Preheat the oven to 350º degrees.

DIRECTIONS
First, combine the nuts on a sheet pan, spread them out, and roast them for about 7-9 minutes or until they become fragrant. Do keep a close eye on them, because all ovens vary a bit and you don’t want them to burn. Remove from the oven and set them aside, to cool.

When the nuts have cooled, place the sugar and the water in a medium sauté pan and mix with a fork until all of the sugar is moistened. Then, cook over medium-high heat, until the sugar melts. Once the sugar fully melts, don’t stir the caramel, just swirl the pan, to keep it moving. Don’t worry, the mixture may look as though it’s crystallizing, that’s normal.

Then, continue to cook for 5 to 10 minutes, until the mixture becomes a clear golden brown, swirling the pan, constantly at the end. Be very careful, the caramel is insanely hot! Take the mixture off the heat, then, working quickly, add the vanilla (it will bubble up!) and swirl the pan to combine. Working quickly, (the caramel will continue to cook in the pan) add the nuts and the kosher salt. Then, toss the nuts, until the nuts are completely coated.

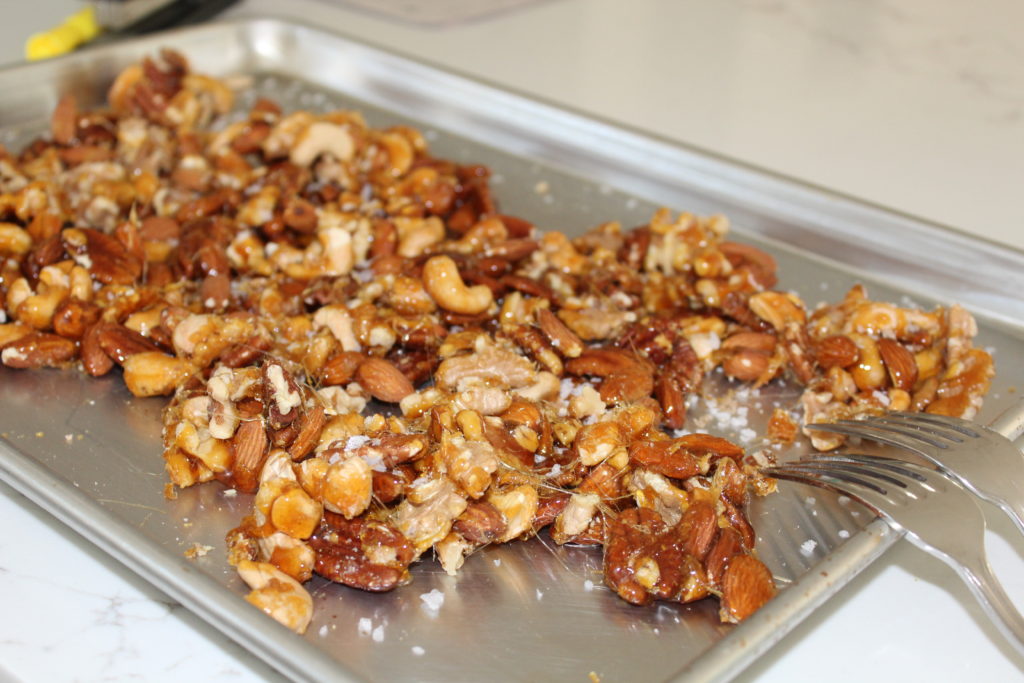
Finally, line a sheet pan with parchment paper and pour the the whole mixture onto the pan. Spread the nuts out in one layer, pulling them apart with two forks. Sprinkle with the fleur de sel and set aside to cool. When they’re completely cooled, carefully break the nuts into large clusters with your hands, trying not to break the nuts too much. Consider yourself warned, these are hard to resist!


Mocha Chocolate Chip Cookies

Meet your new go-to cookie recipe. With three minor tweaks to the classic Toll House cookie recipe, these changes deliver major impact in the flavor department. The addition of espresso powder, along with more brown sugar than white, and double the vanilla extract, the flavor of these cookies is elevated to rock star status for me. Without a doubt, these are one of my all time favorites.

INGREDIENTS
2 sticks butter, at room temperature
1 cup brown sugar
1/2 cup granulated sugar
2 eggs
2 tsp. vanilla
1 tsp. instant coffee or espresso powder
2 1/4 cups all-purpose flour
1 tsp. baking soda
1 tsp. salt
12 oz. semi-sweet chocolate pieces
fleur de sal or Maldon salt, for finishing

DIRECTIONS
Preheat the oven to 375°.
First, beat the sugars and butter in mixing bowl until light and fluffy, about 3-4 minutes. Next, add the espresso powder and vanilla. Then, blend in the eggs, one at a time, and mix well. Add the combined flour, baking soda and salt; mix well to combine.

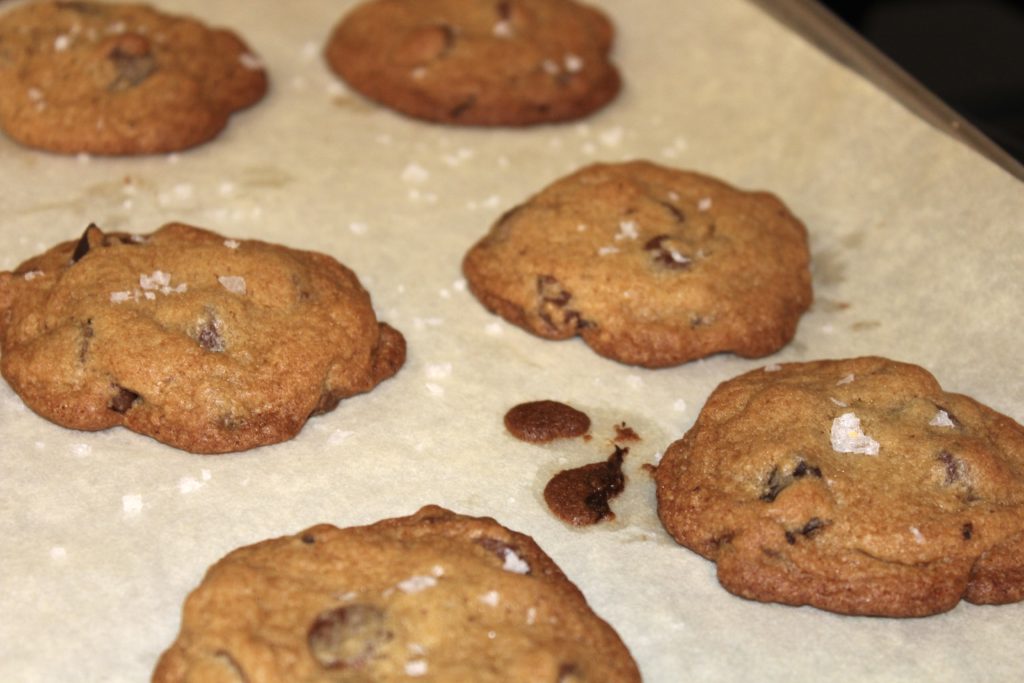
Finally, stir in the chocolate chips and scoop spoonfuls onto a non-greased (or parchment lined) cookie sheet and bake for 10-12 minutes, until golden brown. When done, remove them from the oven and immediately sprinkle a pinch of the finishing salt on each cookie. Allow to cool briefly and then try and resist these!

chocolate chip cookies

NOTES
Obviously, the addition of a cup of walnuts or pecans is always an excellent option. Because I have some that do not like nuts (crazy, I know), I often add nuts to half the dough and then everyone is happy!

To elevate this even further, you can try a really good baking chocolate, in bar form, then roughly chopped. Aside from the flavor which is a step up, the texture is a nice departure with the chunks instead of the morsels. Either way, you can’t go wrong.


Blueberry Galette

This is for all of you non-bakers. I understand the aversion to baking pies, worrying how they will turn out, fear of failure and all that stress. Well, that is what makes this recipe so appealing, it comes together in minutes, with virtually no stress. Doesn’t hurt that it’s delicious and a definite crowd pleaser.

Although I give you a crust recipe here (scroll to the bottom), you can certainly make it even easier, with excellent results, by using a good, store-bought pie crust. My only caution…do not bother with the frozen crusts that come in a tin foil pan.

FILLING INGREDIENTS
12 oz. blueberries
1 Tbs. corn starch
1/4 tsp. cinnamon
1/4 cup sugar
1 1/2 tsp. fresh lemon juice
zest of half a lemon
turbinado sugar, for sprinkling

ASSEMBLY
Preheat oven to 375º.
In a large bowl, combine the blueberries, cornstarch, lemon juice, zest, cinnamon and sugar. Then, toss well to combine and coat the berries. Roll out the crust (store bought or homemade…see below) on a lightly floured surface, to about a 12″ round. Transfer the crust to a parchment lined baking sheet.

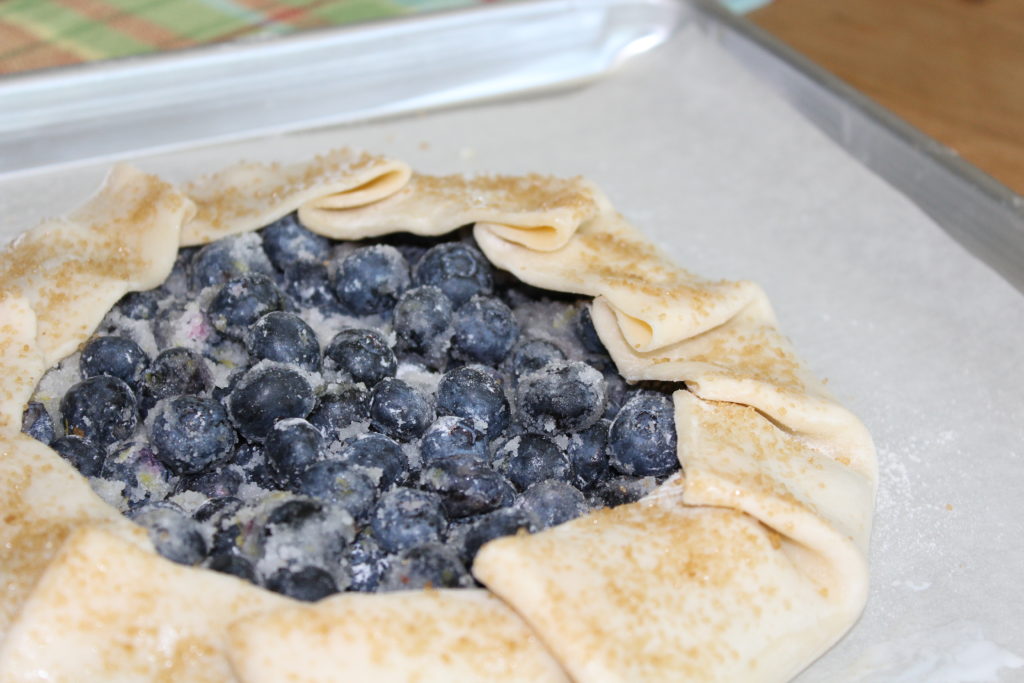
Next, mound the blueberry mixture in the middle of the crust, leaving about a 2″ border. Then, fold the edges over the blueberry mixture, overlapping slightly. Brush the edges of the crust with some milk and sprinkle with the turbinado sugar.

oven ready
…oven ready

Finally, bake the galette for about 45 minutes or until the crust is a deep brown and the filling is bubbling. Make sure to check on it, all ovens vary and it may take a little more or less time. Cool a bit before serving. This can also be done earlier in the day, then briefly reheat in the oven, before serving. Make sure to top with some good vanilla ice cream!

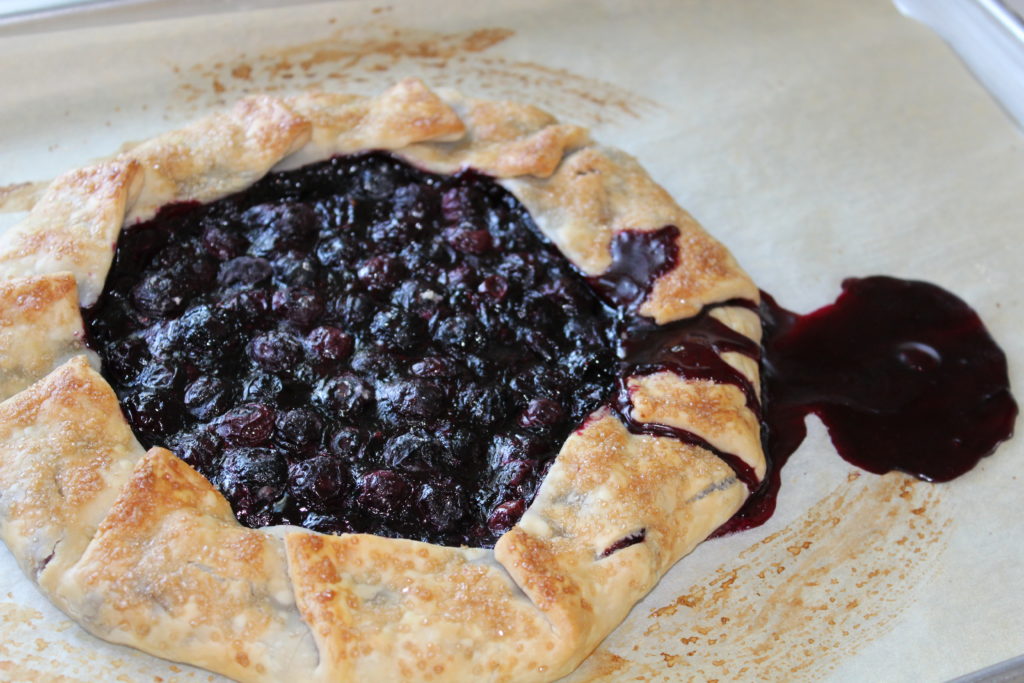
...and this is why you use parchment!
…and this is why you use parchment!

Here is the crust recipe, for those of you that wish to go to the next level and make your own. I don’t think you’ll be disappointed!

CRUST INGREDIENTS
1/2 cup pecans
1 cup plus 2 Tbs. all-purpose flour
2 tsp. sugar
1/2 tsp. kosher salt
1/4 tsp. cinnamon
1 stick (8 oz.) butter, chilled and diced

CRUST
Preheat oven to 350º.
Toast the pecans, in a single layer, on a sheet pan, occasionally tossing, until fragrant and slightly browned, about 10-15 minutes. When pecans have cooled, pulse them in a food processor until the texture of coarse meal.

Add the flour, sugar, salt, cinnamon and pulse to combine. Then, add the butter and again, pulse until the mixture is resembles coarse meal, leaving a few larger, pea-size pieces. Transfer the mixture to a large bowl and drizzle with 4 Tbs. of ice water. Mix well, until it comes together, adding another tablespoon of water, if needed. Gently pat the dough into a small disk, wrap in plastic and chill for an hour or more. This can be done a couple of days prior to using.


Vanishing Oatmeal Cookies

You will be surprised at how good these cookies are, they are so much better than just any oatmeal cookie. They are called “Vanishing Oatmeal Cookies” for a very good reason. Whether hot out of the oven or cooled and a bit crispy, with a cup of coffee or tea, these are very hard to resist.

Now, I must tell you that I didn’t come up with that name for these on my own. These are adapted from and I believe, improved upon, a Quaker Oats recipe of the same name.

INGREDIENTS
2 sticks butter
1 cup brown sugar
1/4 cup granulated sugar
2 eggs
1 tsp. vanilla
1-1/2 cups flour
1 tsp. baking soda
1/2 tsp. salt
1 tsp. cinnamon
3 cups oatmeal
1 cup dried cranberries

DIRECTIONS
Preheat oven to 375º
Beat sugars and butter until smooth. Then add the eggs, vanilla and mix well. Then, add the next four ingredients and mix well again. Next, add the oatmeal and cranberries and stir until well combined. Drop by teaspoonful on an ungreased sheet pan and bake for 10-12 minutes or until browned to your liking. Cool for a minute or two on the sheet pan and then move to a rack to cool.

NOTES
If you prefer, you can certainly make these into bars, rather than cookies. put in 13″ x 9″ metal pan and bake for 30-35 minutes.

TIPS
Also, I want to share a secret, maybe you already do this. However, I’m sharing for all of you that have not tried this and I think it is a game-changer. This little trick comes in very handy when I’m baking with the little ones and don’t want to have 3 dozen cookies in the house, because I can’t stop eating them!.

So, here it is. I make the cookie batter, cook what I want…maybe just one sheet pan full, for a small get together or just enough for me and my helpers. Then, I scoop out the remainder of the dough onto a sheet pan. Put as many on the pan as you can fit, then pop them into the freezer.
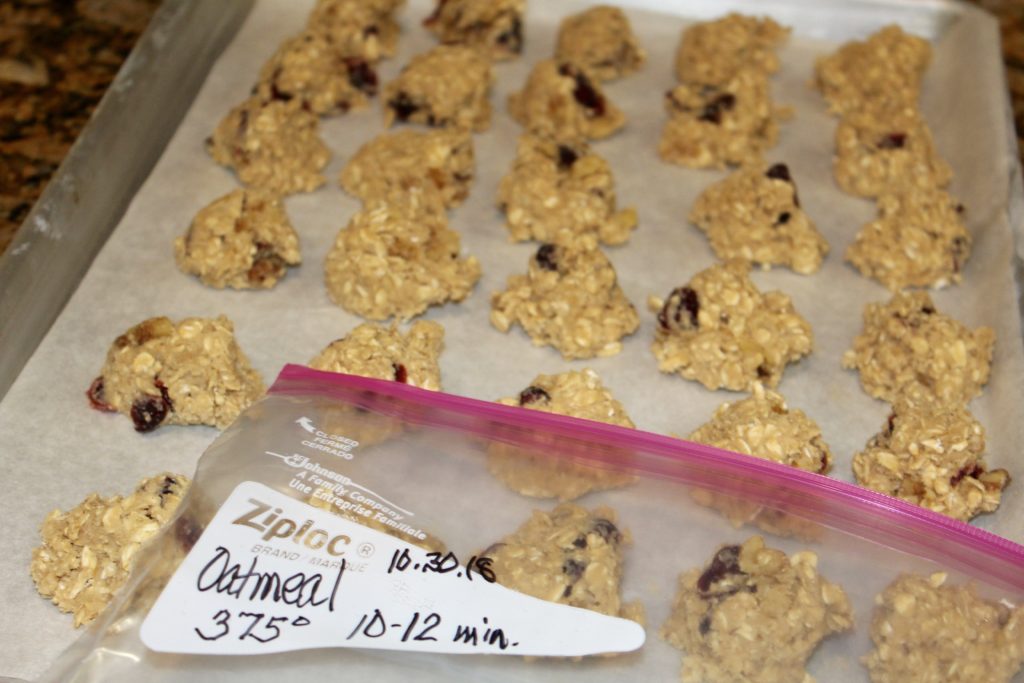
oatmeal cookies

Finally, after about 30 minutes in the freezer, pull them out, remove from the sheet pan and place them in a zippered plastic bag. Make sure to mark the cookie name, cooking instructions, and the date. That way, you can pull them out, at a moment’s notice and bake however many you want. I do this with all of my cookie batters, it’s a good way to keep us from eating two dozen in short order! Additionally, it is nice to have a selection of two or three to pick from at any given time.