Buttercrunch

Well, it’s that time of year again and it certainly sneaks up on us every year…well it sneaks up on me anyway. With Thanksgiving upon us, the major holidays follow very quickly! With that in mind, I thought I would share my go to holiday hostess gift.

Now, don’t freak out or dismiss this because it requires a candy thermometer. It is not that scary and the payoff is well worth it. Although not difficult, this is one of those recipes that does require your full attention. Stay close by and don’t get distracted. That being said, the toffee portion of the recipe, takes only about 15 minutes and about 20 minutes overall.

Because I do so much of this over the holidays, I buy a 3 pound bag of walnuts, chop them all, in batches, in the food processor and store them in an airtight container. That way, when I am ready to make a batch, the nuts are ready to go and the whole process takes about 20 minutes. Other than the cooling and packaging of course. I hope you try it and let me know how you make out.

INGREDIENTS
2 sticks butter
1 cup sugar
1 Tbs. Karo Light syrup
2 Tbs. water
12 oz. semi-sweet chocolate bits
1 1/2 cups nuts, ground (use food processor because if they are too large, it doesn’t spread as nicely)

DIRECTIONS
First, put the chocolate in a double boiler, on very low heat and let it be while it’s melting. I don’t even stir it until I am ready to use it. Meanwhile, add the first 4 ingredients to a saucepan. Bring to a boil with medium-high heat and cook to hard crack (300°). Yes, a candy thermometer is a definite must here. Although, once you have made this a number of times, you will be able to eyeball the color of the toffee and know when it is ready.

Stir frequently and DO NOT leave the kitchen! I can’t tell you how many batches I have ruined because I answered the phone, got sidetracked and ended up with a mess that had to be tossed. You should keep a steady eye on this, checking for color (you want a nice deep amber color), lowering the heat if needed, but making sure it is bubbling constantly.

Once the mixture hits 300º, remove from the heat and immediately add 1 cup of the chopped nuts. Stir quickly, but carefully, to combine and pour onto a greased sheet pan. I actually use a silicone baking pad. So if you have one, by all means use that, but it is not essential. Be very careful, this is molten sugar and it is insanely hot. Tilt the pan back and forth to spread the toffee mixture, don’t worry if it doesn’t fill the whole sheet pan. Then, let it set for about five minutes, to cool a bit and set slightly.

By now, your chocolate should be fully melted. Stir it until very smooth and pour the chocolate onto the toffee, spreading it evenly and to the edges with a spatula or offset spatula. Then, immediately sprinkle with the remaining (generous) 1/2 cup of nuts. You want to make sure the nuts go on the toffee before the chocolate starts to cool. Otherwise the nuts won’t stick to the chocolate.

Let cool completely and break into pieces. If using as hostess gifts, package in small tins, candy box, or a cellophane candy bags and wrap with a ribbon.


Almond Biscotti

This is a wonderful and delicious classic, adapted from Maria’s Pastry Shop in Boston’s North End.

INGREDIENTS
1 cup whole unblanched almonds
1 1/4 cup flour
1 1/4 cup confectionery sugar
1 tsp. baking powder
2 eggs, lightly beaten
1 egg white, for egg wash
1 tsp. cinnamon
1/2 tsp. orange zest

DIRECTIONS
Preheat oven to 350°
First, spread the almonds on a sheet pan and toast for 8-10 minutes. Then, when the almonds are cool, coarsely chop them.

Next, combine the flour, sugar, baking powder, and almonds in a large bowl. Meanwhile, in another small bowl, mix the eggs, cinnamon, and the zest, stir to combine. Pour the egg mixture into the center of the flour mixture and gradually mix them, just enough to make a dough. The dough will be very sticky and wet. However, if it is too moist, add a little sugar and flour in equal proportions.

Then, on a lightly floured board, shape the dough into a long log. The shape should be similar to a baguette, about 17“ by 3” and then lay it on a parchment-lined sheet pan. Alternatively, if you find it easier to handle, you could make two long loaves.

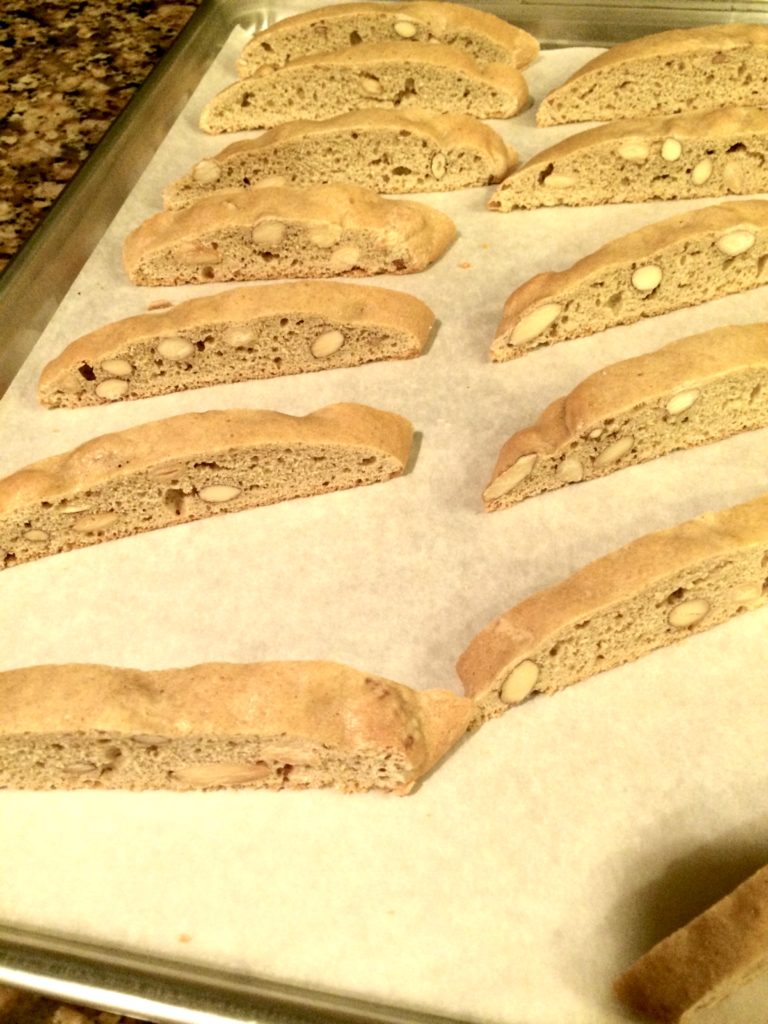
Beat the egg white with a tablespoon of water, brush the log and then bake for about 25 minutes, until lightly browned. Remove the log from the oven and let it cool for 20 minutes. Then, while still slightly warm, cut the log into 1/2″ diagonal slices. I find that a serrated bread knife works best for slicing.

Finally, lay the slices out at room temperature or place them back in the turned-off oven, to dry out. Let them cool completely and store them in tightly covered tins. Consequently, the end result is a very crunchy traditional biscotti. However, if you prefer them a little less crunchy, then don’t let them dry out quite as much.

NOTES
Although I am more of a purist and prefer them as is, I will admit that dipping them in chocolate is a nice option. Try a selection of dark chocolate, white chocolate, and milk chocolate. This varied combination makes for a more interesting and festive dessert platter. Additionally, you can package these up nicely for a great hostess gift.


Dark Chocolate Fudge Sauce

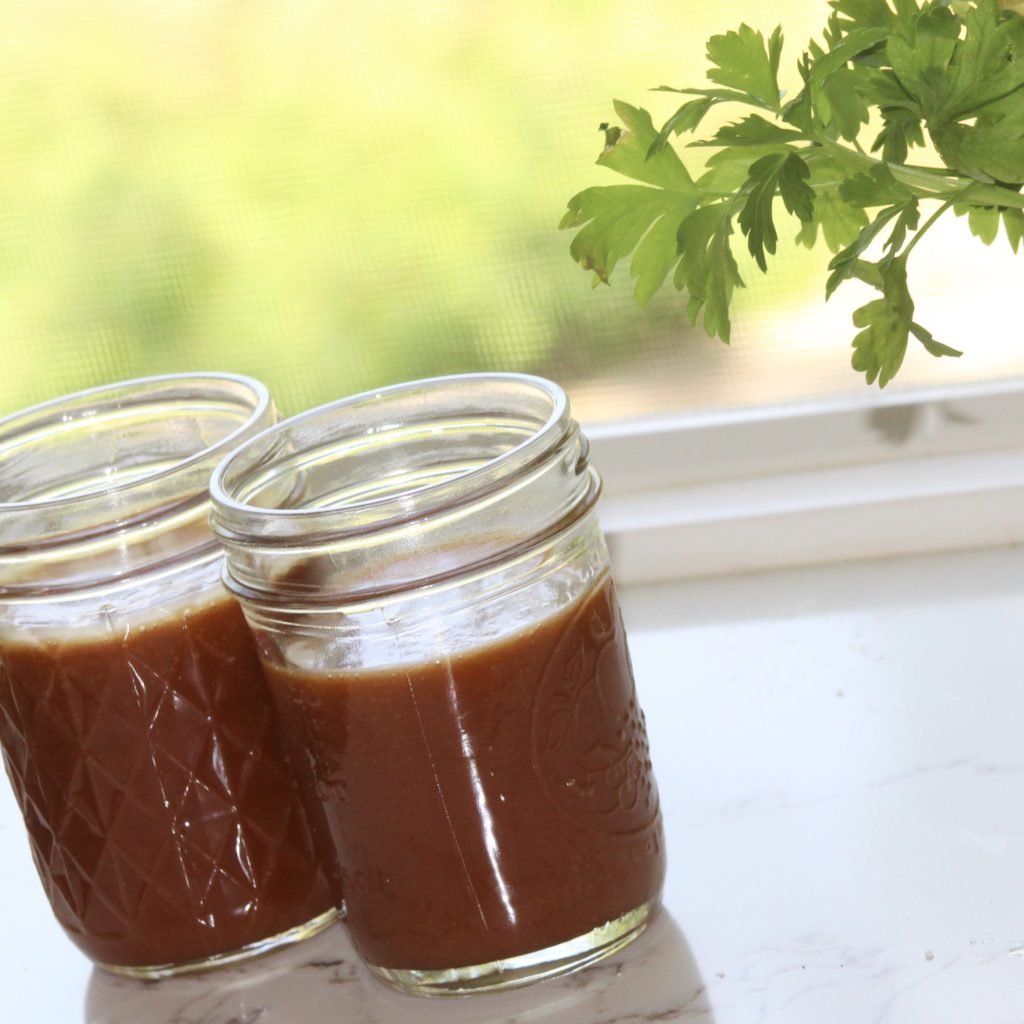
Pretty simple recipe for such a rich and creamy fudge sauce and reheats beautifully. I keep it in ball canning jars and reheat right in the jar. This makes enough to fill two 8 oz. jars, with a bit left over.

INGREDIENTS
1 1/4 cups sugar
2/3 cup whole milk
1/4 tsp. salt
1/3 cup unsweetened cocoa powder
3 oz. unsweetened chocolate, chopped fine
4 Tbs. unsalted butter, chopped
1 tsp. pure vanilla extract

DIRECTIONS
First, heat the sugar, milk, and salt in a  saucepan over medium-low heat, gently whisking, until sugar has dissolved and liquid starts to bubble around edges of saucepan, 5 to 6 minutes. Next, reduce heat to low, add cocoa, and whisk until smooth.

Then, remove the saucepan from the heat, stir in chocolate, and let stand for a couple of minutes, to allow the chocolate pieces to melt. Next, whisk sauce until smooth and chocolate is fully melted. Add butter and whisk until fully incorporated and sauce thickens slightly. Finally, whisk in the  vanilla and serve. Sauce can be refrigerated for up to 1 month. Gently reheat sauce in microwave until soft enough to pour.


Molten Chocolate Cake

A definite crowd pleaser and this couldn’t be easier. You get great return on your efforts with this one and all the preparation is done ahead of time. Pop these in the oven as you serve dinner and they are done 20 minutes later to rave reviews!

INGREDIENTS
2 tablespoons unsweetened cocoa powder
1/4 cup sugar
2 ounces bittersweet (not unsweetened) or semisweet chocolate, chopped
1/4 cup (1/2 stick) butter, cut into small pieces
2 large egg yolks
1 large egg
2 teaspoons all purpose flour
confectionery  sugar, for garnishing
fresh mint

DIRECTIONS
Butter two 3/4-cup ramekins or custard cups. Whisk cocoa and sugar in small bowl to blend. Stir chocolate and butter in heavy, small saucepan over low heat until chocolate melts and mixture is smooth. Remove from heat; whisk in cocoa mixture. Whisk in egg yolks, then whole egg and flour. Divide batter between prepared ramekins. (Can be made 1 day ahead.) Cover separately and chill.

Preheat oven to 350°F. Bake cakes uncovered until edges are set but center is still shiny and tester inserted into the center comes out with some wet batter attached, about 20 minutes. DO NOT overcook, you are definitely better off erring on the under-done side. You want these to be oozing chocolate when you take that first bite.

Run a knife around cake edges to loosen, turn out onto plates. Sift confectionery sugar over, add a scoop of vanilla ice cream on the side and garnish with mint.


Fresh Fruit Tart

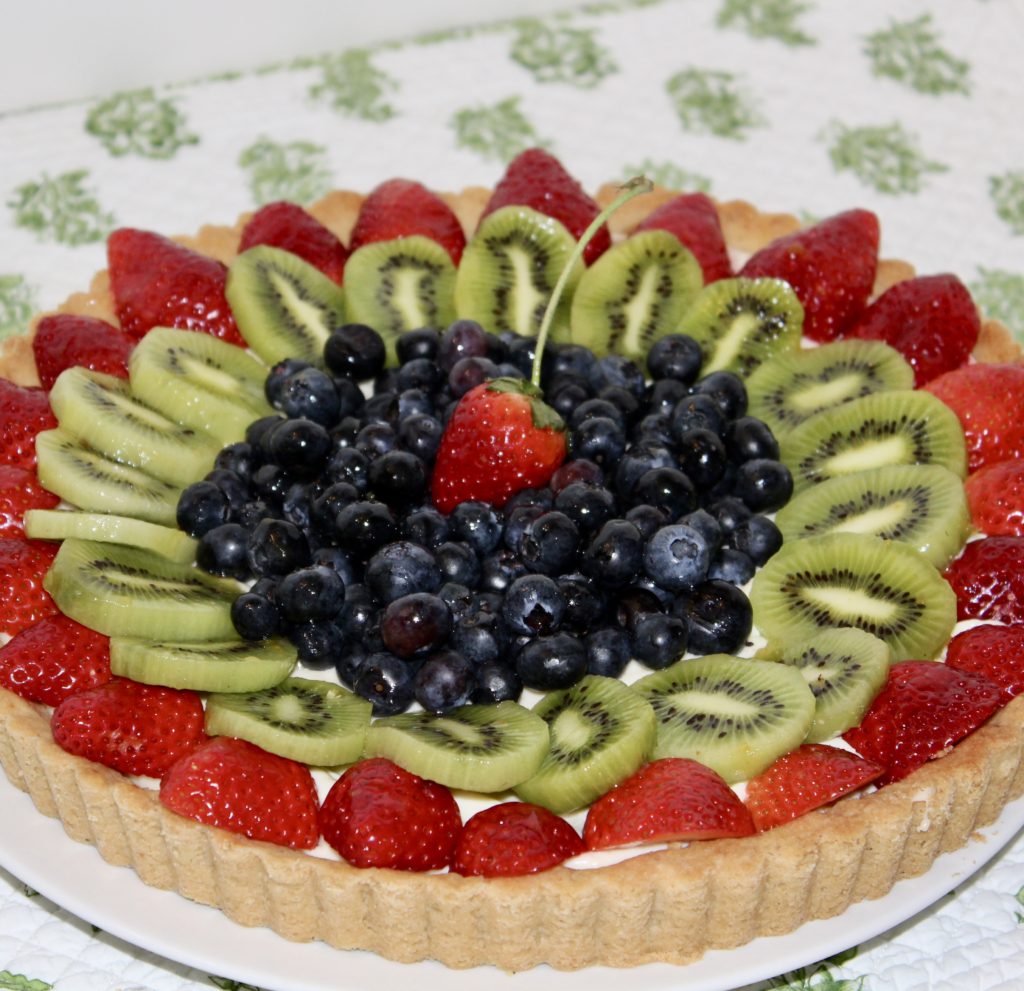
If you want a show-stopping dessert and one that is also delicious, this is the one. Not only is it relatively easy to make, but no one will believe that you made it yourself! Also, feel free to use whatever fruits are your favorite or whatever you have on-hand. You can’t go wrong.

TART PASTRY
1 1/2 cups flour (do not use self-rising)
1/4 cup walnuts or pecans, toasted & finely ground
1/4 cup, packed light or dark brown sugar
2/3 cup butter, softened
1 egg

PASTRY DIRECTIONS
Preheat oven to 400º
Combine all ingredients in a food processor, until a ball forms. Although I use a food processor for this, you could just as easily use a mixer. Press the dough firmly and evenly against the bottom and sides of a 9″ or 10″ tart pan, with removable bottom. Then poke it all over, with a fork; this prevents it from puffing up while cooking. Bake for 10-12 minutes or until light brown. Set aside to cool.

LEMON FILLING & FRUIT
1/2 cup lemon curd, Trader Joe’s is a good one
8 oz. cream cheese, room temperature
pint of strawberries
large handful of blueberries
3-4 kiwis, depending on their size

FILLING DIRECTIONS
While the crust is baking, beat the lemon curd and cream cheese, until very smooth. Then, spread evenly over the cooled crust and chill for about an hour or until firm. Arrange a selection of berries and sliced fruit over the lemon mixture. My favorite combination is strawberries, kiwi, and blueberries, for both flavor and color combination. However, you can certainly try any combination you prefer.

fruit tart

GLAZE
2 Tbs. apricot jam, jelly or preserves
1-2 tsp. water

Heat the jam and water in a microwave for about 10-15 seconds until melted, mix well, and brush over the fruit. You don’t need to go heavy with this, just a light coating will do. The jam glaze gives the fruit a nice, shiny, professional look. Alternatively, you could just use a light dusting of confectioners’ sugar. However, the shine that the glaze imparts really does makes it look professionally done.


Classic Sugar Cookies

Without a doubt, the best tasting sugar cookies out there!  I know, I know, everyone says that, but I promise you, my assertion is legit. Don’t you find that most sugar cookies taste rather bland? Well, these are decidedly not bland and I assure you, they do not disappoint. Please try them at least once and I don’t think you’ll ever revert to your old recipe. This one is a slight adaption from an old Betty Crocker cookbook that dates back literally decades…to 1969, a true relic!

My little ones love to decorate these for whatever the season or holiday. Whether it is just tinted sugar or a little fancier with royal icing, we all agree that they are the best tasting sugar cookies around. I hope you agree and don’t be shy about letting me know, either way.

INGREDIENTS
1 1/2 cups powdered sugar
1 cup butter, softened
1 teaspoon pure vanilla
1/2 teaspoon pure almond extract
1 egg
2 1/2 cups all-purpose flour
1 teaspoon baking soda
1 teaspoon cream of tartar
tinted garnishing sugar

DIRECTIONS
Mix powdered sugar, butter, vanilla, almond extract and egg in large bowl. Mix flour, baking soda and cream of tartar together and then add to bowl and combine until smooth. Wrap mixture in plastic wrap and refrigerate for 2 hours.

Preheat oven to 375ºF.
Divide dough in half. Roll each half 1/4 inch thick on lightly floured surface. Cut into desired shapes with 2- to 2 1/2-inch cookie cutters. Sprinkle with granulated sugar. Place on parchment lined cookie sheet and bake 7 to 8 minutes or until edges are light brown. Remove from cookie sheet. Cool on wire rack.
Alternatively, don’t use the tinted sugar, but let cool and then use royal icing to decorate.


Salted Caramel Sauce

Decadently delicious recipe, incredibly easy to make, and also very difficult to resist. Try this with coffee ice cream and salted pecans, it’s a  wonderful combination!

INGREDIENTS
1 cup granulated sugar
6 Tbs. salted butter, room temperature, cut into 6 pieces
1/2 cup heavy cream
1 tsp. fleur de sel (or any coarse sea salt)

DIRECTIONS
Heat granulated sugar in a medium saucepan over medium heat, stirring constantly with a high heat resistant rubber spatula or wooden spoon. Sugar will form clumps and eventually melt into a thick brown, amber colored liquid as you continue to stir, be careful not to burn.

Once sugar is completely melted, immediately add the butter; be careful in this step because the caramel will bubble rapidly when the butter is added.

Stir the butter into the caramel until it is completely melted, about 2-3 minutes; a whisk helps if you find the butter is separating from the sugar.

Very slowly, drizzle in 1/2 cup of heavy cream while stirring (since the heavy cream is colder than the caramel, the mixture will rapidly bubble and/or splatter when added). Allow the mixture to boil for 1 minute, it will rise in the pan as it boils.

Remove from heat and stir in the salt, allow to cool down a bit before using. This fills two 8 ounce canning jars and makes wonderful hostess gifts. The canning jar also makes reheating easy since it can go right in the microwave.

Note: At first glance, this may seem daunting, but it really is pretty quick. Read through the whole recipe before starting and once you start it only takes about 10-15 minutes total.