Basil Mint Pesto

Just in time for your next barbecue. Although this is not a traditional pesto, it is simple, delicious, and versatile. That’s a great combination, it’s a snap to make and a great reason to always have it on hand. Given it’s versatility, it can help you put a meal together in no time. Think grilled cheese, think pizza, think flavor booster for a good soup or a wonderful pasta salad (shown below). You can definitely freeze this, but I dare say that you won’t need to.

INGREDIENTS
1/2 cup walnuts
1/2 cup fresh basil, 
1/2 cup fresh mint 
1/2 cup freshly grated Parmesan, plus more for garnish 
1 tablespoon red wine vinegar
small garlic clove, grated 
Pinch of crushed red pepper
1/2 cup extra virgin olive oil
kosher salt and fresh ground pepper  

DIRECTIONS
First, lightly toast the walnuts in a dry skillet for a few minutes, until fragrant and let cool slightly. Next, put the walnuts, basil, mint, parmesan, vinegar and crushed red pepper into your food processor. Pulse until the ingredients are combined but still chunky. Then add in the olive oil and pulse briefly to combine. Finally, taste and season as needed, with kosher salt and fresh ground pepper. The parmesan is a bit salty on its own, so be careful with how much salt you add. That’s it, your done!

basil mint pesto

NOTES
The options for using this are too numerous to list. Although the most obvious one is as a sauce over pasta, don’t stop there. Try it over grilled fish, drizzled over a tomato salad or as a spread on a sandwich or grilled cheese. Store in an airtight container. Also, take note, that this doesn’t make a huge quantity, so double it if you wish. Personally, `I find this a more manageable quantity.


Summer Salads

Summer is in full swing and I thought I would share some of my favorite, go to, salads. These are usually done in the morning, so you can enjoy the day. And, I actually prefer making it early because the flavors improve with a few hours of marinating. Whether you serve these as a stand alone lunch or as a side for a barbecue, it matters not…either way, they will be a hit.

Also, feel free to be creative and flexible with the vegetables. A little more of this or less of that, is not going to matter. My only caution is, do not go lightly on the herbs, they make a huge difference in the final dish. Additionally, a final squeeze of lemon or lime juice (whichever is used in the recipe) is always a welcome addition.


Sweet Potato Oven Fries

Looking for a quick, healthy side dish? This just might do the trick. I love the simplicity of this, the preparation is about as minimal as could be and the tasty reward is significant. Try this as a yummy side with any grilled meat or poultry. However, my favorite is alongside a nice juicy grilled steak.

INGREDIENTS
2-3 sweet potatoes
olive oil
kosher salt
fresh ground black pepper
cayenne pepper, to taste
1-2 Tbs. pure maple syrup

DIRECTIONS
Preheat oven to 425º
First, wash and scrub the potatoes. Next, cut the potatoes in half, lengthwise and then cut each half into three or four lengthwise wedges. Place the wedges on a rimmed baking sheet, sprinkle lightly with the olive oil. Then add the salt, black pepper, cayenne pepper, maple syrup and toss to coat thoroughly.

Place into the preheated oven and roast for about 20-30 minutes, turning once or twice to ensure even browning. Because all ovens are different, check for doneness with a fork, it should be easily inserted. If it feels too firm, leave them in a bit longer. That’s it…serve immediately.

NOTES
Although this is my favorite, feel free to be more adventurous and use different spices or fresh herbs. You could replace the maple syrup with a tablespoon or two of brown sugar. I have tried this with both fresh rosemary and fresh thyme and loved it.


Panzanella Salad

Looks can be deceiving and although this looks tasty, it doesn’t do justice to how tasty it actually is. One of the easiest and best ways to use those end of season tomatoes, it’s healthy as can be and comes together in no time. Use it as a side salad or enjoy it as a stand alone lunch…either way, you’ll be smiling and incredibly satisfied with this simple creation.

INGREDIENTS
1/2 thin baguette
1/4 cup extra virgin olive oil, plus more for drizzling
kosher salt & fresh ground pepper
1 shallot, thinly sliced
3 Tbs. red wine vinegar
1 small garlic clove, finely minced
1-2 lbs. fresh cherry tomatoes, halved
1 english cucumber, quartet and sliced into chunks
2 Tbs. capers
1/4 cup basil, julienned
1/4 cup mint, chopped

Start by slicing the shallot and marinating it in the vinegar for about 10 minutes. Then, remove the shallots, with a slotted spoon and set them aside in a large bowl, reserve the vinegar for the dressing.

Next, preheat your grill to medium and slice the bread in half lengthwise. Grill the bread on both sides, until nicely browned, this should only take 3-4 minutes per side. Immediately after removing from the grill, drizzle the warm bread with a bit of extra virgin olive oil and season lightly with kosher salt and fresh ground pepper. When cool enough to handle, cut them into 1″ chunks.

Add the garlic, capers and olive oil to the reserved vinegar, season with kosher salt and fresh ground pepper, then whisk to combine well. Alternatively, you can use a small mason jar and just shake it until fully combined.

Meanwhile, place the tomatoes and cucumbers in a bowl. Next, add the bread chunks, shallots, basil and mint, then toss to combine. Add part of the dressing, and again, toss well to combine, taste for seasoning and serve. I usually hold back some of the dressing because I prefer a slightly “less dressed” salad. You can always add more if it’s too dry for your taste.

NOTES
You can get creative with this and still have great results. The amounts can certainly be modified, use what you have. You want more tomatoes, do it! You want to use the whole baguette, do it! Add toasted pine nuts, do it! Add more or different herbs, do it! Those are all good options, don’t worry about the taste, the basics here are good and it will be delicious.


Lime Cilantro Slaw

Perfect for pairing with Baby Back Ribs or Pulled Pork Perfection. This is a wonderful, light, and refreshing departure from the usual coleslaw recipes. Have no fear, even if you don’t like mayonnaise-based slaw, you will love this. Yes, there is some, however, it is nearly undetectable, thanks to the lime juice and I promise, you will not be disappointed.

INGREDIENTS
3 Tbs. mayonnaise
1/2 small clove garlic, grated or mash (see below)
Kosher salt and fresh ground pepper
1 medium lime, zested and juiced
1 package of slaw mix
3-4 scallions, thinly sliced, use white and green parts
3-4 Tbs. chopped fresh cilantro leaves

DIRECTIONS
First, chop the garlic, sprinkle it with a pinch of salt, and mash it into a paste with the side of a chef’s knife. Alternatively, you could just grate the garlic. Then, in a small bowl, combine the mayonnaise lime zest, the lime juice and the garlic mash. Whisk to combine completely and set aside for 15- 20 minutes, to blend the flavors.

Finally, in a medium bowl, combine the slaw mix, scallions, and cilantro. Pour the dressing over the mixture and stir to combine completely. Season with 1/4 tsp. salt and several grinds of pepper or to taste. This is best done early in the day or the day before, because the longer this sits, the better the flavor.

Serve this slaw at your next barbecue with Baby Back Ribs, some corn bread and baked beans. It’s a winning combination!

grilled baby back ribs
Don’t miss this recipe, it’s a definite keeper! Perfect pairing with the Lime Cilantro Slaw.


Lemon Dill Potato Salad

Barbecue season is upon us and I don’t know about you, but I am always looking for a good salad that covers two requirements and this one fits both beautifully. A vegetable and a starch, combined in one pretty little package! It’s great for a crowd and refreshingly delicious as well. Trust me, this will be a hit at your next barbecue.

INGREDIENTS
Dressing
1 tsp. lemon zest
1-1/2 Tbs. lemon juice
1-1/2 Tbs. white wine vinegar
1/2 tsp. dijon mustard
1/2 tsp. honey
1/4 tsp. kosher salt
1/2 tsp. fresh ground pepper
3 Tbs. extra virgin olive oil
2 Tbs. chopped fresh dill
Salad
1-1/2 lbs. fingerling potatoes, cut larger ones in half
1 bay leaf
2 cloves garlic, smashed and peeled
12 oz. haricots verts (very thin green beans)
about a half pint of cherry tomatoes
1 large shallot, finely chopped
2 Tbs. extra virgin olive oil
dill sprigs and lemon slices (optional garnishes)

DIRECTIONS
Dressing
Combine the first seven dressing ingredients in a small bowl. Next, while whisking constantly, drizzle in the olive oil, until the mixture is emulsified. Then, whisk in the dill and set the dressing aside.

Salad
Place the potatoes, bay leaf and garlic in a pot, add cold water to cover slightly. Bring to a boil then, reduce the heat and simmer until the potatoes are just tender, 8-10 minutes, depending on the size of your potatoes. With a slotted spoon, remove them from the water and transfer to a large bowl. Discard the bay leaf and garlic, but keep the water to cook the green beans. While the potatoes are still hot, add about 3 tablespoons of the dressing and toss to combine.

Next, return the pot of water to a boil, add the green beans and cook for about 2 minutes or just until crisp tender. With a slotted spoon, transfer the beans to a bowl of ice water, to stop them from continuing to cook.

Sauté the shallots in the olive oil for a minute or two, then add to the potatoes. Drain the green beans, pat dry and add to the potatoes and shallots. Add the tomatoes and most of the remaining dressing. I like to hold some back, if not serving immediately. Then, when ready to serve, if it seems a bit dry, you can add more to moisten and freshen it up. Garnish with the dill and lemon slices and serve.

NOTES
Variations abound with this basic recipe. Try small red bliss potatoes, sugar snap peas or fresh corn. Try some fresh basil and parsley, the difference is always surprising and delicious. Play around with ingredients, use what you have available, you won’t be disappointed.


Mango Salsa

I just love this recipe, it’s clean, tasty and easy! Additionally, it’s quite versatile. Use it as a dip with tortilla chips, a yummy condiment with fresh grilled fish or as a simple side with grilled chicken. And, truth be told, I’ve been known to have just a small bowl of this as a snack. It really is a great recipe, as I said…healthy, tasty and easy, you just can’t go wrong with this one!

INGREDIENTS
1 mango, peeled and diced
1/2 cup peeled, seeded, diced english cucumber
1 Tbs. finely chopped jalapeño
1/3 cup diced red onion
juice & zest of 1 lime
1/3 cup roughly chopped cilantro

mango salsa

DIRECTIONS
Combine all ingredients, add salt & pepper to taste. Serve cold with either tortilla chips or as a side/topping for your favorite fish. If you prefer your salsa with a bit more kick, keep the jalapeño seeds, if not, discard the seeds. Also, if your lime doesn’t seem juicy enough, feel free to add more if it seems too dry.


Herbed Couscous Salad with Corn and Grilled Halloumi

Plan on serving this for your next barbecue, it is a snap to do earlier in the day and that also gives it time to develop more flavor. Although this goes well with nearly any meat, fish or poultry, it’s also very satisfying as a stand alone lunch.

INGREDIENTS
1 cup walnuts
1 cup Israeli couscous, also known as pearl couscous
4 ears corn, husked
2 Tbs. olive oil
fresh ground pepper
8 oz. halloumi cheese, sliced 3/4″ chunks (see notes below)
3-4 scallions, thinly sliced (green & white parts)
1/2 cup coarsely chopped, flat-leaf parsley
1/4 cup basil, julienned
1/4 cup mint leaves, chopped
juice of 1 lemon
zest of 1 lemon
2 Tbs. white wine vinegar
1/4 cup olive oil

DIRECTIONS
Lightly toast the walnuts in a 350º, preheated oven or in a dry skillet, on the stove. Make sure to stay close and keep an eye on them when toasting. Trust me from experience, they can burn in an instant! Then, remove from the heat, let them cool a bit, roughly chop them and set aside.

Next, cook the couscous according to the package directions. Meanwhile, add the vinegar, lemon juice, lemon zest, remaining 1/4 cup of oil, a pinch of salt and some fresh ground pepper, to a small bowl and whisk to combine.

When the couscous is ready, drain it into a bowl, (do not rinse it) and immediately pour most of the dressing over it and stir to combine. I like to hold some back, if not serving immediately. The warm couscous will absorb the dressing and thus will have more flavor. Meanwhile, preheat your grill to medium high heat (you can definitely do this inside on a grill pan, if you prefer). Rub the corn with a tablespoon of the oil and sprinkle with some salt and pepper. Grill the corn, turning occasionally, until slightly charred and tender. That should take about 8-10 minutes, then set aside to cool.

Next, brush the cheese with 1 tablespoon of oil and grill for about 4-5 minutes per side. You are looking for a bit of char on each side, then remove from heat to cool.

Cut the kernels off the cob and transfer them the couscous. Next, add the scallions, parsley, basil, mint and walnuts. Cut or tear, bites size pieces of the halloumi and add them to the bowl as well. Finally, add the remaining dressing and toss well to combine, making sure everything is evenly coated. Sprinkle with a bit more chopped mint or basil before serving.

herbed couscous salad
Adding tomatoes is always a nice option and it adds some nice color.

NOTES
Halloumi cheese can be found in most natural food stores, Greek markets and some supermarkets. You may find a marinated version and that works well too. If you are using a marinated version, there is no need to add oil before grilling.

Additionally, I have intentionally not added much salt because the halloumi cheese is a bit salty on its own. So, I suggest preparing the whole dish and then tasting for any additional seasoning.

Also, don’t skimp on the fresh herbs, they elevate the flavors immensely. Similarly, don’t be afraid to add more lemon juice or vinegar if it seems a bit dry.


Roasted Peppers and Tomatoes Baked with Capers and Herbs

This incredibly versatile recipe is adapted from Local Flavors, Cooking and Eating from America’s Farmers’ Markets, by Deborah Madison and although I think I have the original, first printed in 2002, you can get the updated version from 2012. Check out her other cookbooks here, they are definitely worth investigating.

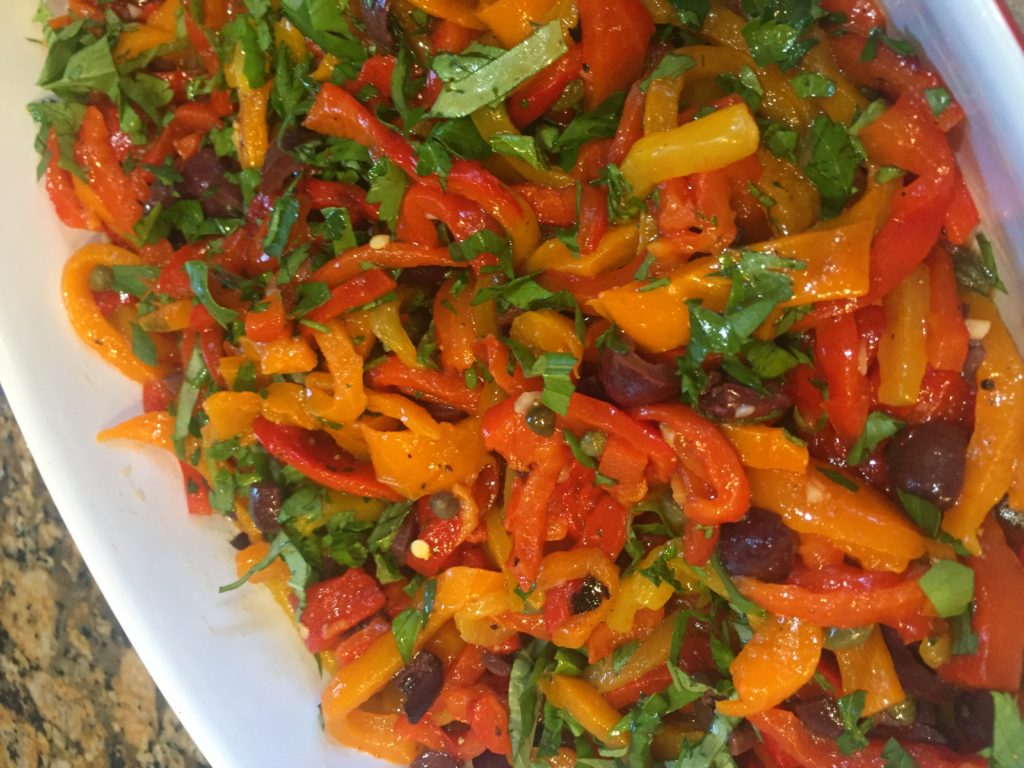
Although you certainly can use just one color, I prefer to use a combination of red, orange and yellow peppers, because, it really makes for a prettier dish. You can use this as a simple salad at room temperature, just make sure that you serve it with fresh from the oven crostini. The bread allows you to get every last bit of the juices, which are amazing.

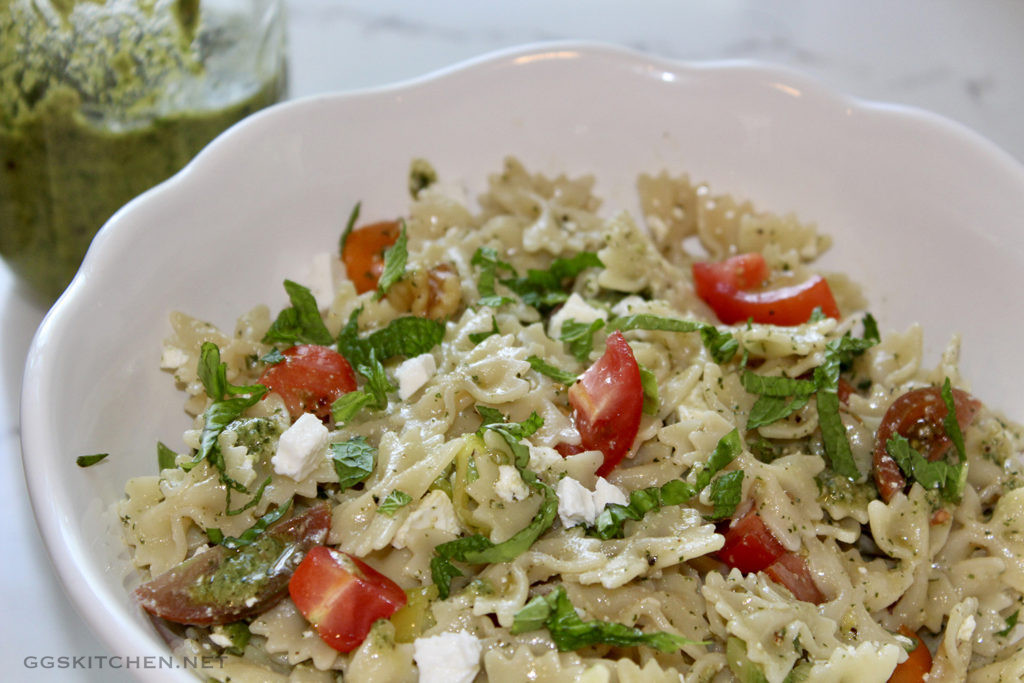
Additionally, you can use it as a topping on crostini with some plain or marinated goat cheese (see below), add it to a frittata or as an incredible addition to almost any sandwich or panini.  I have also used this as a pasta dish and been thrilled with the outcome. Whichever way you choose to use it, trust me, you will not be disappointed.

Oh, I almost forgot to mention pizza…this is an ideal addition to a grilled pizza, with some marinated goat cheese as well. The options are endless with this dish and every one of them is outstanding. Give it a try and let me know how you like it.

Did I forget to mention that it is even better the next day? Well it is. While using it immediately after preparing is terrific, it’s also delicious cold and straight from the fridge. I have a son-in-law who, while visiting, loves nothing more than to attack the leftovers in the refrigerator the next morning. This will be perfect for him and I find myself doing the same thing! Vegetables in the morning can’t be bad, right?

INGREDIENTS
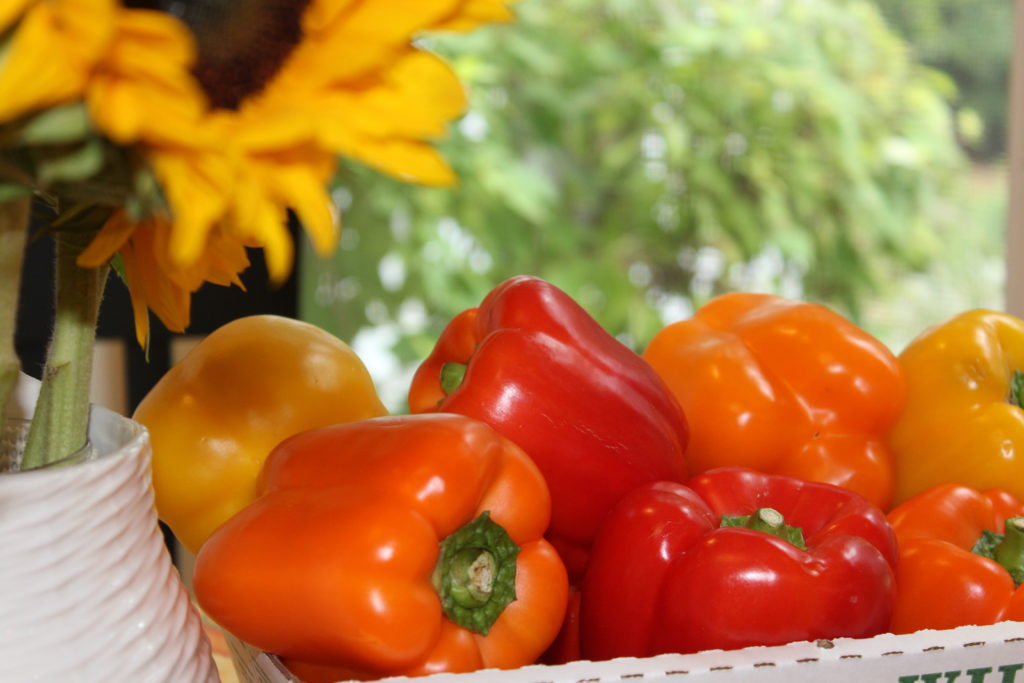
4-6 bell peppers, red, orange and yellow
1 large beefsteak tomato or 3-4 roma tomatoes
2 smaller yellow tomatoes
a handful flat-leaf parsley, chopped
12 or more large basil leaves, julienned
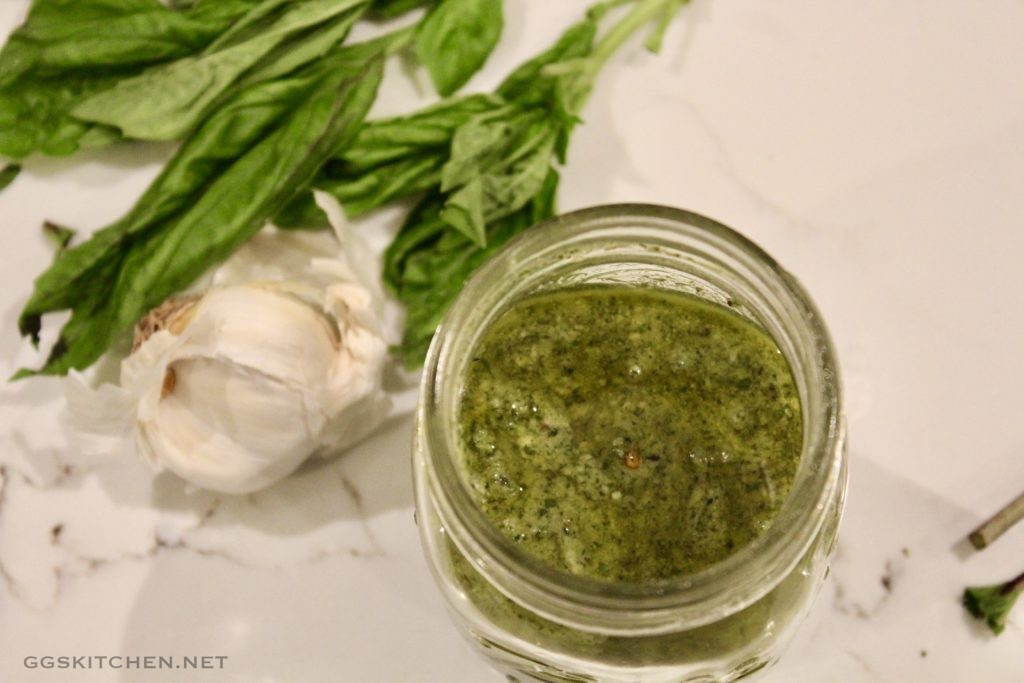
1 plump garlic clove, finely chopped
2 Tbs. capers
12 Nicoise olives, Kalamata if not available, pitted and halved
3 Tbs. extra virgin olive oil, plus extra for drizzling
kosher salt and fresh ground pepper

DIRECTIONS
First, halve and seed the peppers, (see notes below). Next, roast the peppers, either under the broiler, rotating often, in a 425º oven, or on a grill, until blistered and well charred. Then, put them in a bowl, cover and let cool. Once cool enough to handle, wipe off the blackened skin with a paper towel and cut into strips.

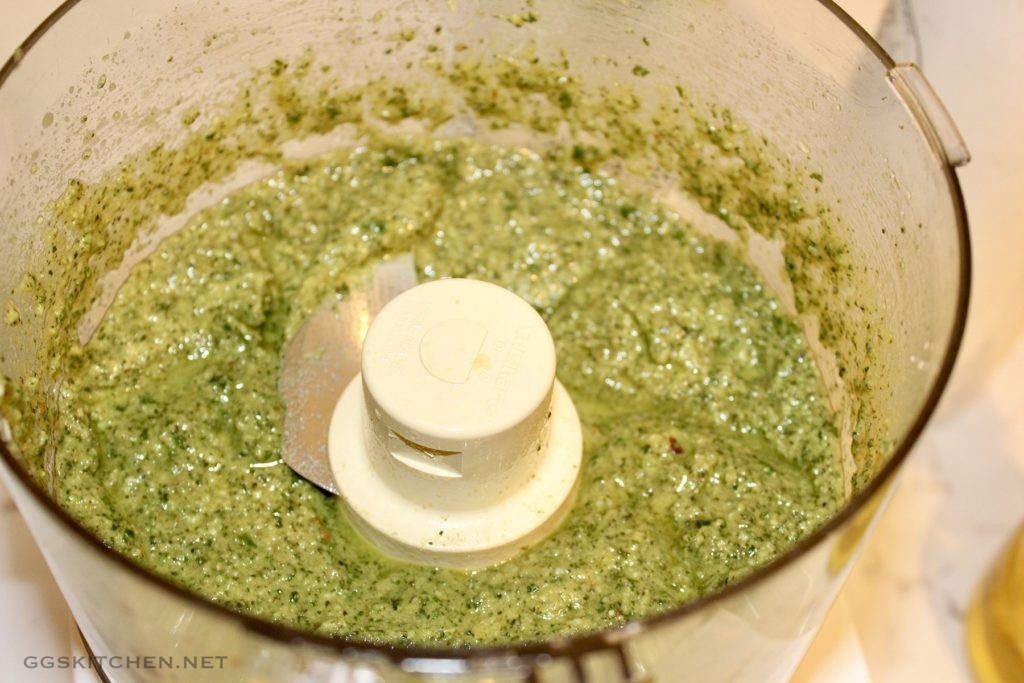
Meanwhile, prepare the other ingredients. Score the ends of each tomato, drop them in boiling water for about 20 seconds. Then, remove the skins, halve them, gently squeeze out the seeds and slice into strips. Next, in a bowl, combine the parsley, basil, garlic, capers, olives tomatoes, peppers and olive oil. Finally, season with 3/4 tsp. kosher salt and some fresh ground pepper, to taste. Gently toss to combine all ingredients.

Preheat oven to 400º. Now, in a lightly oiled baking dish, combine the tomato and pepper mixtures. Then, cover and bake for about 20-30 minutes.

While it looks and smells amazing, do let it sit and cool before serving. The cooling to room temperature definitely enhances the flavors significantly. As a result, this a great make ahead dish, that can be done well ahead of serving.

NOTES
Although the picture, (near the top of this post) of the roasted peppers clearly shows that I had roasted them whole. I have since decided that it is so much easier to slice the peppers, into large pieces and then seed them before roasting. That way, it is far easier to peel the skins off and you don’t have to deal with the slippery seeds and membranes.


Corn, Cherry Tomato, Arugula and Blue Cheese Salad

Adapted from a vintage Bon Appetit magazine. An all-time summer favorite, especially when the native corn is available.

INGREDIENTS
2 3/4 cups fresh cooked corn kernels
1 pint basket cherry tomatoes, halved
4 celery stalks, chopped
1/2 red onion, chopped or thinly sliced half moons
1-2 ounces arugula leaves
2 Tbs. balsamic vinegar
1/4 cup olive oil
1 cup crumbled blue cheese (about 4 oz.)

DIRECTIONS
Combine first 5 ingredients in large bowl. Next, in a smaller bowl, add the vinegar and gradually drizzle in the oil, whisking as you go. Season to taste, with kosher salt and fresh ground pepper. Add 3/4 cup blue cheese. Pour dressing over salad and toss to coat. Garnish with remaining 1/4 cup cheese. Can be prepared 4 hours ahead. Cover and chill.

NOTES
As many of you know, I don’t always put exact amounts, when doing a salad. I feel the amounts for each component can vary so much depending on individual likes and dislikes. Here too, the ingredients can be modified to your preference. If it looks like too much blue cheese, cut the amount. The same goes for the other ingredients, the one thing I would stick to is mixing the dressing. Although you certainly can double or triple the dressing, I would keep the same proportions.