Spring Pea Salad
Looking for a wonderful salad/vegetable to kick off spring? Well, you’ve just found it and this is as beautiful as it is tasty. This is a mildly tweaked version of a Cook’s Country recipe, from 2020. I think it’s a wonderful cross between a salad and a vegetable. The two of the three vegetables are quickly blanched to enhance the green and still maintain their crunch. Add in some sliced radishes, fresh mint and a light, refreshing dressing and you have a match made in heaven! Try pairing this beauty with almost any grilled meat, however my personal preference is grilled lamb chops. Not only do the veggies go well with lamb, but the mint does as well. It really is a wonderfully refreshing combination that is a true crowd pleaser. An added bonus, it can be made well ahead and still maintain its wonderful crunch. Just don’t fully dress it until ready to serve.
INGREDIENTS
Dressing
1 garlic clove, minced
2 Tbs. lemon juice
1/4 cup extra-virgin olive oil
1⁄4 cup plain Greek yogurt
2 tsp. Dijon mustard
1⁄4 tsp. pepper
Veggies
4 oz. sugar snap peas, strings removed
6-9 oz. English peas (about 3⁄4 cup)
4 oz. snow peas, strings removed
1 Tbs. extra virgin olive oil
1 tsp. lemon juice
pinch kosher salt
2 oz. baby arugula (about 2 cups)
5-6 radishes, sliced into thin half moons
1/2 cup fresh mint, roughly chopped
DIRECTIONS
First, in a small bowl, whisk the garlic and lemon juice, set aside to mellow for about 15 minutes. Then, add the remaining dressing ingredients to the garlic, lemon mixture, whisk to combine and set aside.
Meanwhile, in a medium saucepan, bring 1 quart of water to a boil. Then, make an ice bath, for the blanched veggies, by filling a large bowl with ice and water, then place a colander in that bowl.
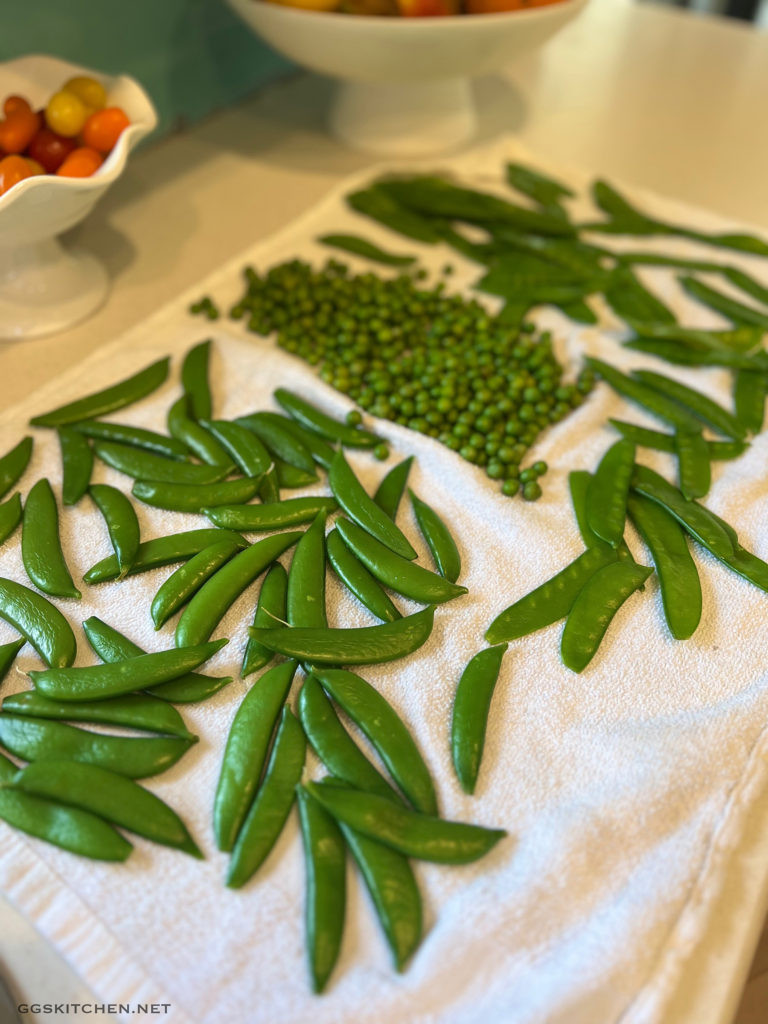
Once the water starts to boil, add 1 tablespoon of salt to the water. Then add the snap peas and cook just until bright green, but still crisp, no more than a minute. Using a skimmer or a slotted spoon, transfer snap peas to colander set in the ice bath. Swish them around for about a minute, until fully cooled and place on a clean kitchen towel to dry. Next add the English peas to the boiling water and do the same. Transfer to the colander, then to the towel for drying. Repeat this with the snow peas as well, however leave those in only long enough to brighten the color, about 10-12 seconds. If they stay in too long, they will not stay crisp. The sugar snap peas should be cut on the bias, into 1/2″ pieces. The snow peas should also be sliced on the bias, but very thinly. Don’t fuss over cutting them exactly, they will still be delicious even if they’re not perfect.
When all the peas are blanched, cooled, and dry, transfer to a large bowl and add the radishes and arugula. Finally, when ready to serve, add a teaspoon of lemon juice, a pinch of salt, the 1 tablespoon of extra virgin olive oil and toss to combine. Then, spread a portion of the dressing over the bottom of a large shallow bowl or serving platter. I like my salad lightly dressed, so I don’t use all of the dressing at once. You can always add more, but you can’t take it away! Then, place the arugula mixture on top of the dressing. Serve immediately, and make sure to scoop up some of the dressing when you do. Plating the salad this way, tossed with the lemon juice and olive oil, on top of the creamy dressing maintains the vibrant colors.
Plating the salad—tossed first with lemon juice and olive oil—on top of the creamy dressing ensures that it stays vibrant.
NOTES
If you can’t find fresh English peas, you can definitely substitute 3⁄4 cup of thawed frozen peas and there is no need to blanch those. Definitely don’t use canned, they would be too soft. Also, if your local market happens to carry Pero Family Farms vegetables, you’re in luck. They have each of the three fresh peas in small bags, they’re the perfect size needed for this recipe.
Additionally, you can obviously increase or decrease the amount of each vegetable, depending on your tastes or availability in your area. Although I do strongly recommend a combination, since it just makes it a more interesting salad.