Here is a terrific, week-night meal, that definitely does not disappoint. Additionally, it is also quite suitable as a company worthy meal. So, what’s not to love about a quick, healthy, one pan meal, that honestly, comes together in minutes?! Conveniently, you can also prepare this earlier in the day and pop it in the oven when ready.
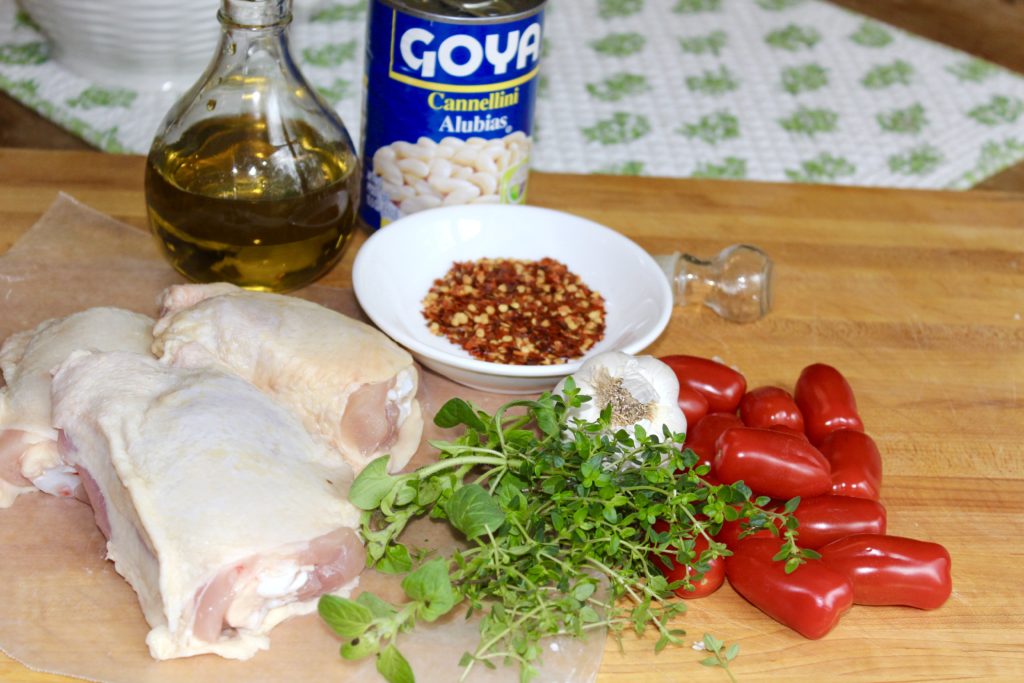
INGREDIENTS 2 15.5-ounce cans cannellini beans or any small white bean, rinsed 1 pint grape tomatoes 4 sprigs fresh thyme, plus more for garnish 4 sprigs fresh rosemary, optional 2 garlic cloves, smashed 1/4 tsp. crushed red pepper 2 Tbs. olive oil kosher salt and fresh ground black pepper 8 bone-in, skin-on chicken thighs
This is all you need!
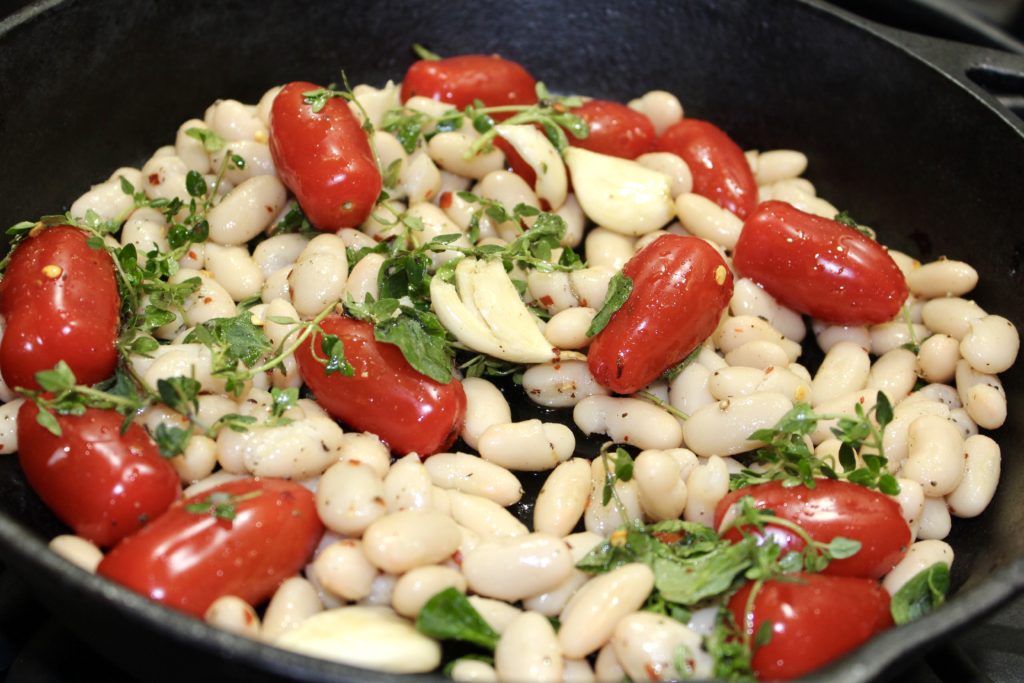
DIRECTIONS Preheat oven to 425º. First, combine the beans, tomatoes, thyme, rosemary, garlic, one tablespoon of the olive oil, 1/2 teaspoon of salt and 1/4 teaspoon of the pepper. Stir to fully combine and coat the beans and tomatoes. Pour the mixture into a large cast iron skillet or any large baking dish.
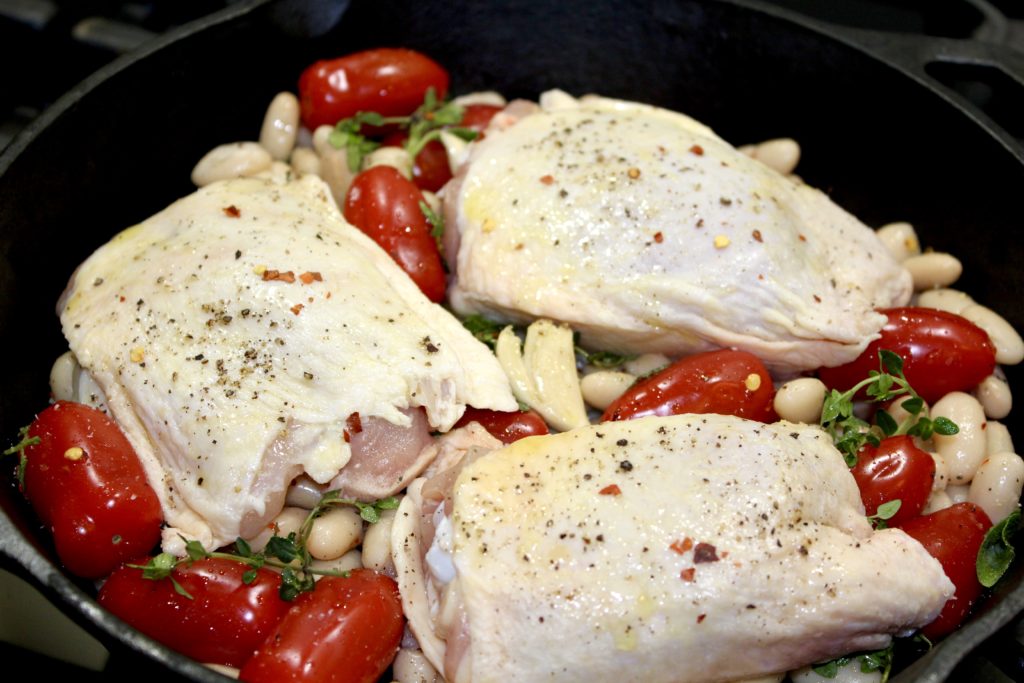
Next, pat the chicken dry and then place the pieces on top of the bean mixture, skin-side up. Then, rub the chicken with the remaining tablespoon of oil and season with kosher salt and fresh ground black pepper. Additionally, if you like a bit more of a kick, sprinkle the chicken with a pinch more of the crushed red pepper.
Finally, roast the chicken until it is golden brown and cooked through. That should be approximately 35 to 45 minutes, depending on the size of your chicken thighs. If the top of the chicken doesn’t brown as much as you would like, put them under the broiler for a minute or two, until you get the browning that you like.
NOTES Just an aside, the herbs can be swapped out, depending on what you have on hand. The one staple that I rely on with this recipe is thyme, and rosemary would be my second choice. Even if you don’t have the fresh herbs, still make it without them and I assure you that it will still be delicious. However, with the fresh herbs, it is a bit better.
Heirloom Tomato, Goat Cheese Tart
Love this tart and especially love the way it presents. It’s just so pretty, mouthwatering and the best news is how easy it comes together. You definitely get a big return on your efforts here. I use heirloom tomatoes, in a variety of colors because it has greater visual appeal. However, use whatever is available and you will not be disappointed. Additionally, if you’re feeling energetic, you could make your own marinated goat cheese and I do think that elevates things substantially.
I like to use a rectangular tart pan, however a round one works just as well and would obviously be a larger tart and serve more people. This is one recipe that I would not suggest doing ahead, because the pastry gets soggy if it sits too long. Pulling it out of the oven shortly before serving it would be best.
INGREDIENTS 1 package puff pastry sheets several heirloom tomatoes, depending on the size of your tart pan 1 log herbed goat cheese or marinated goat cheese, room temperature fresh basil, julienned for garnish kosher salt and fresh ground pepper 1 egg
DIRECTIONS Preheat oven to 400º Defrost the puff pastry, per package directions. Gently roll out the dough to fit your tart pan. See notes below. Next, spread a thin layer of the goat cheese on the pastry. Then place 1/4″ slices of your tomatoes in a slightly overlapping layer. If you have a bit more of the cheese, put a few dollops on top of the tomatoes. Add a tablespoon of water to the egg and whisk well. Brush the egg wash over the pastry edge, which gives the crust a nice color. Finally, sprinkle the tomatoes with kosher salt, freshly ground pepper and a drizzle of good olive oil.
Bake for 15-20 minutes. If the crust is browning too quickly, turn the oven down to 375º. When crust is golden brown and the tomatoes are slightly bubbly, remove from the oven. Let the tart sit for about five minutes, sprinkle with the basil, then cut and serve.
NOTES You will most likely have to cut and paste a piece or two of the pastry to fit your pan. For my rectangular pan, I used only one sheet and needed to cut and paste a small section. Don’t try to roll too thinly to fit, just cut what you need to fill the spot and lightly press to seal together.
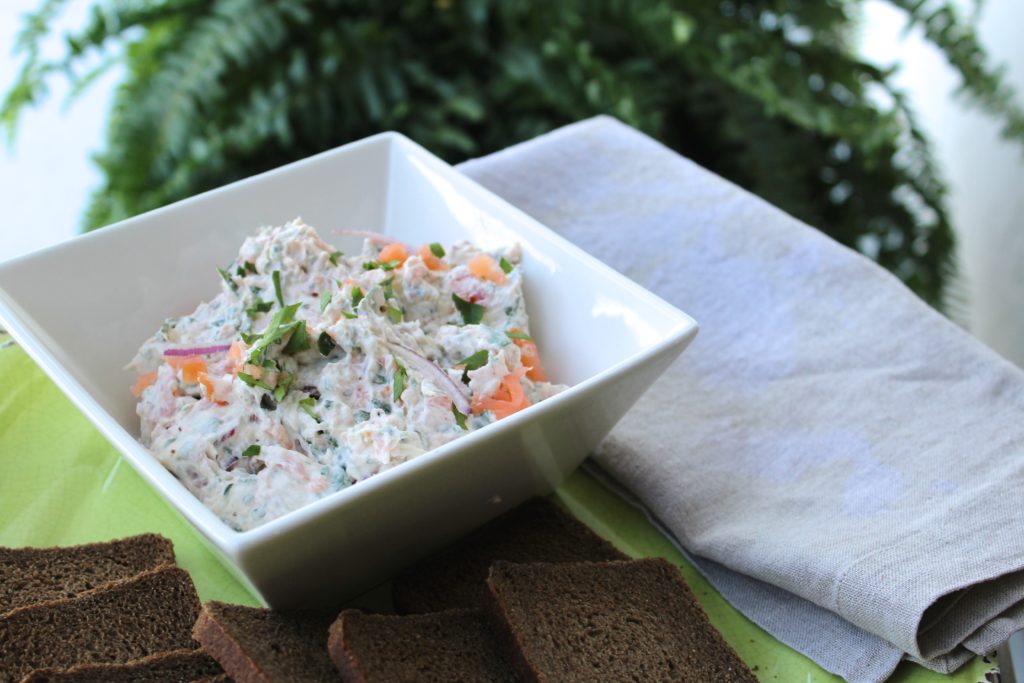
Salmon Cucumber Cups
If you’re looking for a healthy, tasty and easy appetizer, this should be your new go to recipe. This comes together in minutes and can be served as an actual spread with crackers or as a dip. However, if you’re feeling “fancy” and looking to impress a bit, you could use it in cucumber cups, as shown in the photo above. They make a great presentation, they’re an easy, no mess, finger food and are definitely a healthy, low carb option.
DIRECTIONS Combine all ingredients, mix well and serve with pumpernickel squares, crackers or some nice crunchy crostini.
CUCUMBER CUPS 1-2 English cucumbers Cut the cucumber into 1″ pieces, then, using a melon baller (a 1/2 teaspoon measuring spoon works well too) , scoop out the center of the cucumber to form a ‘cup’ for the salmon. Lightly salt the cucumber cups and turn upside down on a paper towel for 10-15 minutes. Finally, when fully drained, fill the ‘cups’ with the salmon spread, arrange on your platter and serve with a little garnish of dill fronds.
Bolognese Ragu
This is a wonderful, authentic Italian bolognese sauce, adapted from a recipe by the legendary Marcella Hazan. This just might be the last bolognese recipe you will make, unless of course, you try my Bellagio Lasagne! Actually I prefer this recipe here, when serving with linguine or tagliatelle. However, when making lasagne, I prefer the Bellagio Ragu Sauce. You will just have to try both, decide for yourself and make sure to let me know.
INGREDIENTS 3 Tbs. olive oil 5 Tbs. butter 4 Tbs. each onion, carrot, celery, finely chopped 3/4 lb. lean ground beef 2 oz. pancetta, finely diced 1 cup dry white wine 1/2 cup whole milk 1/4 tsp. freshly grated nutmeg 2 cups canned whole, peeled, San Marzano tomatoes, with their juices, coarsely chopped 1/2 cup freshly grated Parmesan cheese 1 lb. taglietelle, linguine or rigatoni
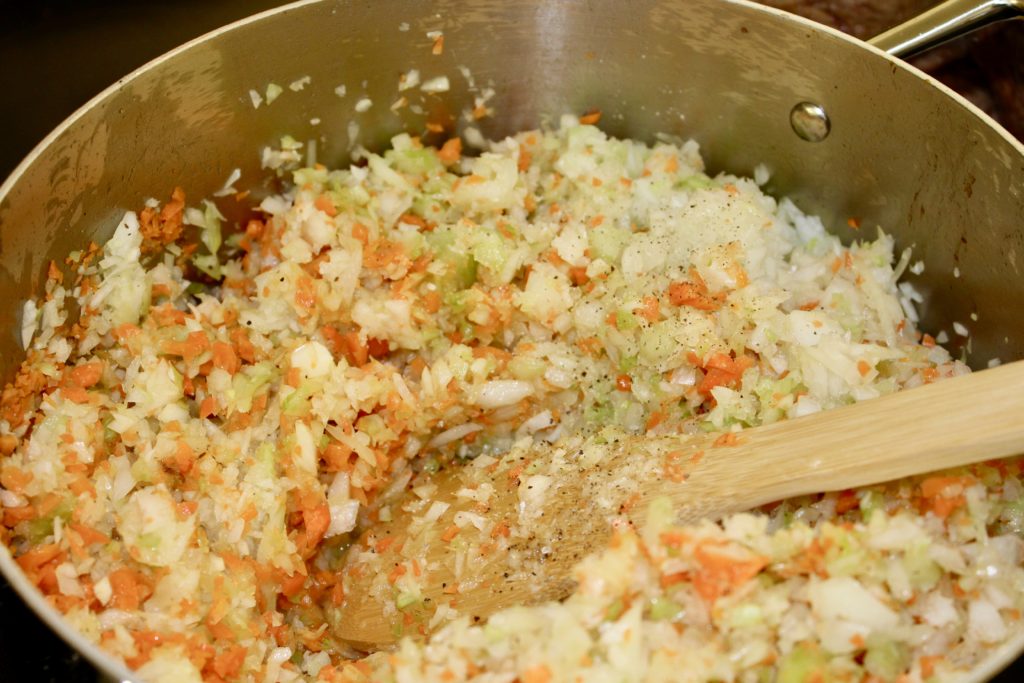
DIRECTIONS First, heat the olive oil and 3 Tbs. of the butter in a Dutch oven over, medium-high heat. Then, add all of the onions and sauté, until they have turned a light golden color. Next, add the carrots and celery, and continue sautéing for an additional 5-10 minutes.
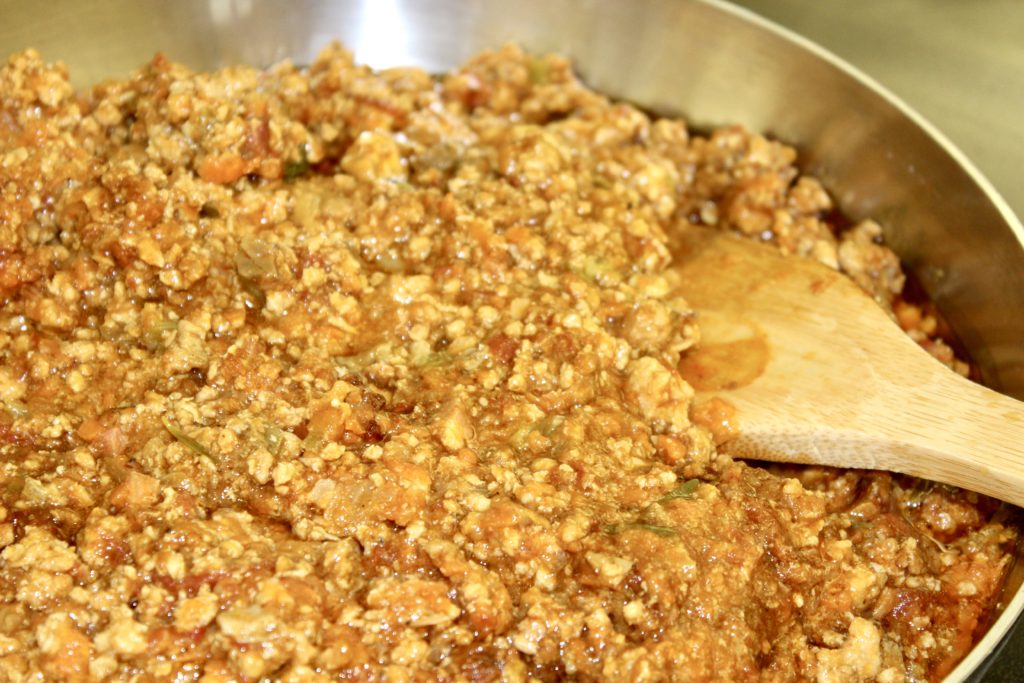
Then, add the pancetta and ground beef, breaking it up with a wooden spoon and sauté for a bit. When the meat is fully browned, add the wine and simmer, stirring occasionally, until it has totally evaporated. Add the milk and the nutmeg; continue to cook, occasionally stirring the sauce, until most of the milk has evaporated.
Finally, add the tomatoes and stir, once it comes to a boil, turn the heat to low. Simmer uncovered for two to three hours, stirring occasionally.
When ready to serve, reheat the sauce and cook the pasta in large pot of boiling, salted, water for about 10-12 minutes or until al dente. Make sure to check your package directions since the timing can differ significantly, from brand to brand. Drain the pasta and toss with the remaining butter. Then, add the sauce, toss to mix well and add the freshly grated cheese to taste.
NOTE: Although very rare in my house, if you have any leftovers, this sauce freezes quite well.
Braised Short Ribs
This is the ultimate comfort food. You will be swooning with the aroma that permeates the house. And because the bulk of the work is done ahead of time, it also happens to be a perfect dish for entertaining. You really can’t go wrong, it is a very forgiving recipe and well worth your efforts. Trust me, this will become an instant favorite for anyone that tries it!
INGREDIENTS 12 beef short ribs 1/2 cup flour, seasoned with kosher salt & fresh ground pepper 1/4 cup olive oil 3 large onions, chopped 1 lbs. carrots, chopped 5 stalks celery, chopped 6 shallots, whole or cut in half if large, peeled 2 cups of good red wine Fresh sprigs rosemary Fresh sprigs thyme 4-6 cups of beef or chicken stock 1 Tbs. brown sugar
DIRECTIONS Preheat the oven to 325º. First, pat the ribs dry, with a paper towel, and rub them with a dusting of flour that has been seasoned with salt and pepper. Meanwhile, preheat a Dutch oven (or other heavy, covered ovenproof pan), with some of the oil. Then, brown the ribs on all sides at medium-high heat, for about 7-8 minutes. Remove them to a plate, add the additional oil and continue to brown the remaining ribs. Most importantly, do not to crowd the pan and do take the time for multiple batches, to ensure adequate browning. Then, put the browned ribs aside.
Next, with a little oil, add the onions, carrots, celery and shallots to the pan. Season with salt, fresh ground pepper and sauté, on medium-high heat, until browned and translucent. Then, add the wine to the vegetables and simmer for 10-15 minutes, to reduce the liquid.
Once the liquid has reduced, tie the rosemary and thyme together with kitchen twine, and add it to the pot. Finally, place the ribs on top of the vegetables and herbs, and add enough stock to cover the ribs by an inch or two.
Then, roast in the oven for about two hours. After the two hours, test the meat for doneness, by piercing the meat with a fork or paring knife and it should give easily, but still not quite done. Remove the ribs to a plate, and let the sauce cool a bit. When the sauce is cooled enough that the fat has come to the top, skim the fat off. However, if you’re cooking this the day before serving, the fat will have congealed and therefore, you can more easily lift the fat off. After defatting the sauce, use an immersion blender (if you prefer a chunky sauce, you can omit this step) to smooth the sauce. Then, add the brown sugar and put the ribs back into the pot. Cover and continue cooking for about another hour.
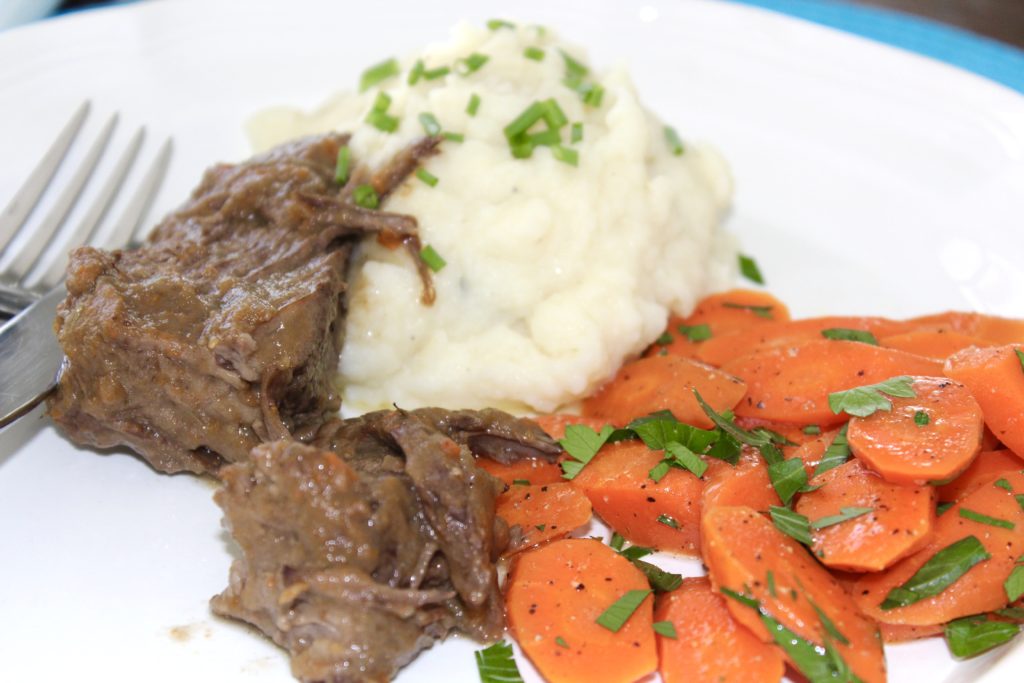
When ready to serve, plate the ribs, one to two per person, depending on size and spoon the sauce over the ribs. This is perfect with horseradish mashed potatoes, sautéd carrots, and some additional sauce on the side. Sprinkle with chopped parsley or chives, to add some color.
NOTE: If you have the time, this is actually best if done the day before serving. That gives the flavors more time to meld and makes the job of defatting the sauce much easier.
Should you have any leftovers, this makes a terrific pasta dish. Simply shred the remaining meat over penne, ziti, or rigatoni, and add some of the sauce (you will have much more sauce than meat), to get the consistency you prefer and mix well. Serve with a nice salad and some crusty bread. It will be one of the best leftover meals you’ve ever created, I promise!
Bellagio Lasagne Bolognese
So, where do I start with this recipe? We are in love with, some might say a bit obsessed with, bolognese sauce. Finding, trying, and tweaking new recipes that look promising. To date, my favorite, for serving with tagliatelle or linguine, is an adaption of Marcella Hazan’s Bolognese Sauce. Now, don’t get me wrong, that is still a definite favorite.
However, when we went to Italy and continued our search for bolognese perfection; literally ordering it in each new spot we visited. I even took a class in Bologna on how to make it. The next stop was Bellagio and voilà, perfection! At a spot fit for a king, we had a late lunch at the Grand Hotel Villa Serbelloni, overlooking Lake Como. Maybe it was the combination of the breathtaking setting or the late lunch. (Yes, I was starving and could have eaten anything and it would have tasted good). Regardless, one bite of this lasagne bolognese and I was done with my search. This was the most mouthwatering, delectable version I had ever eaten.
View from the Grand Hotel Villa Serbelloni
Totally smitten and unable to stop thinking about how incredible that dish was, I did what any crazed foodie would do…I went online and emailed the chef directly and begged, with all I could muster, for him to share the recipe. Guess what? It worked!
Interestingly, the return email was in English. Although, when I opened the recipe attachment, it was all in Italian. Yikes! Thank goodness for Google Translate. So, here it is, with some minor adaptions. I hope you try it and please let me know what you think.
Bellagio Bolognese Sauce 1/3 cup extra virgin olive oil, split 3-4 Tbs. butter, split 1 large onion, finely chopped 4 carrots, finely chopped 4 celery stalks, finely chopped 1 lb. ground beef or ground veal 1 lb. ground pork 1/4 lb. pancetta, finely chopped in food processor 1 cup of white wine (I typically use a chardonnay) 1 Tbs. tomato paste 7 oz. whole, peeled, canned San Marzano tomatoes, crushed 3/4 oz. dried mushrooms kosher salt & fresh ground pepper 3-4 sprigs each of rosemary & sage 2 cloves garlic, smashed, not chopped 1 1/2 cups, freshly grated parmesan reggiano cheese, for assembly
DIRECTIONS First, chop the onion, celery and carrots, sauté them with a little butter and two tablespoons of the olive oil. Then, add the meat and season with salt and pepper. Brown the meat until all the liquid evaporates. Then, add the white wine and simmer until that evaporates. Meanwhile, rehydrate the mushrooms, in a bowl, with about 1/2 cup of boiling water. Remove and drain, when they are totally soft, usually about 15-20 minutes and finely mince. Next, add the tomato paste, the tomatoes and the minced mushrooms..
Simmer the sauce for about two hours, stirring occasionally. Then, take the remainder of the olive oil and sauté the rosemary, sage and garlic cloves for about 3-5 minutes, being careful not to brown the garlic. Remove and discard the herbs and garlic. Then, add the infused oil to the sauce. Stir to combine and remove from heat.
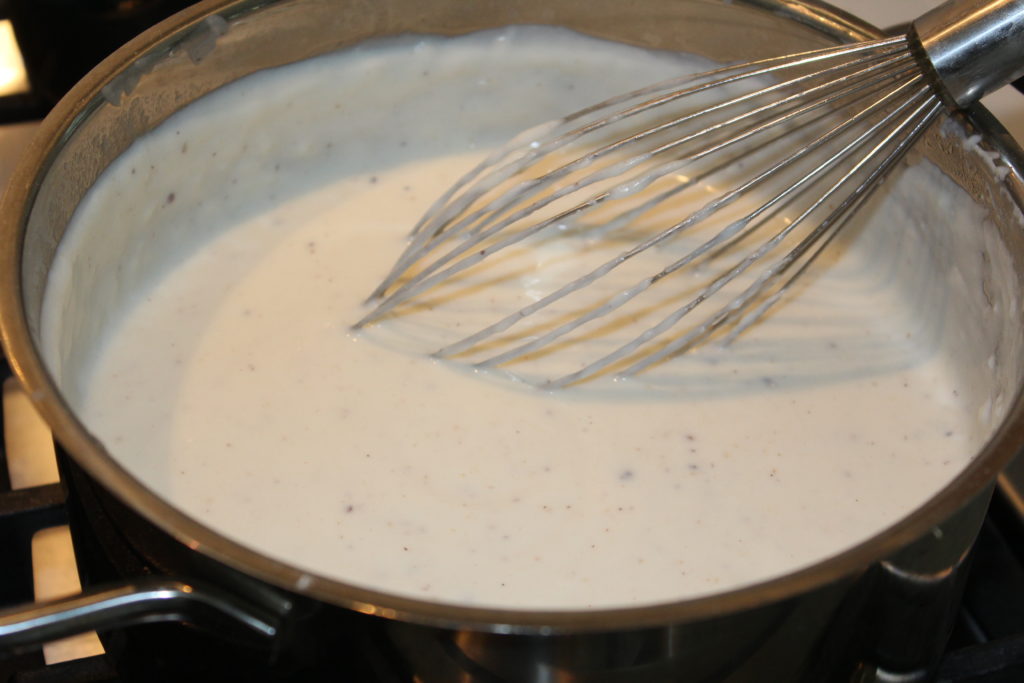
DIRECTIONS First, melt the butter in a saucepan and then add the flour, salt and pepper, and stir to combine. This will initially lump up and get very thick, but continue stirring until smooth, for approximately 3-4 minutes. Then, add the nutmeg, the heated milk and again stir, to combine and continue until the sauce thickens a bit. Simmer for about 20 minutes on very low heat.
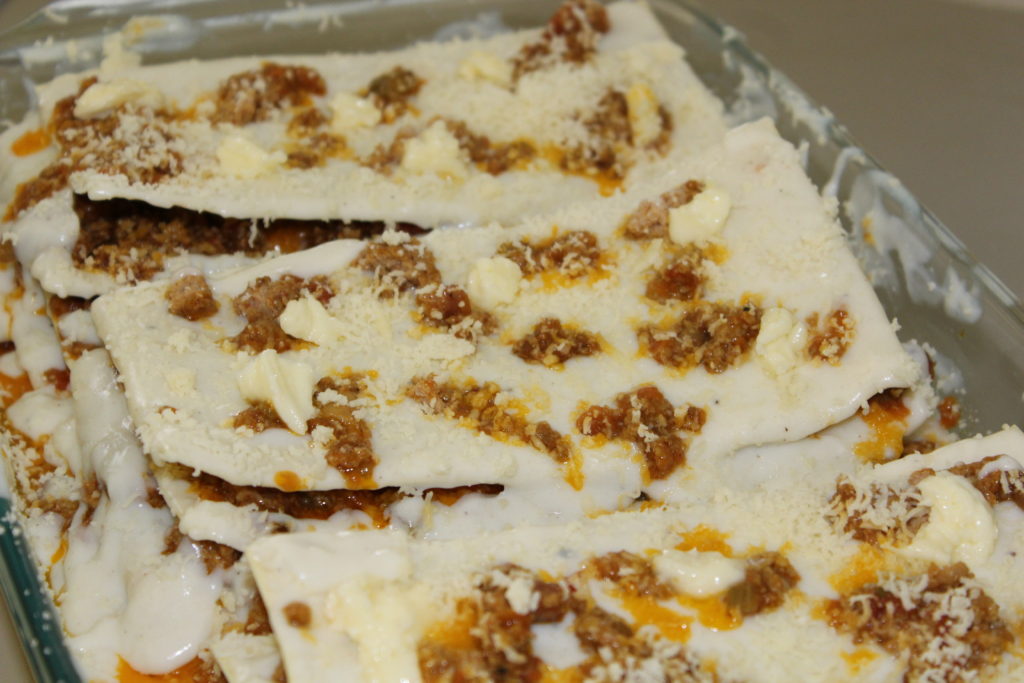
LASAGNE ASSEMBLY Preheat oven to 400º You will need one box of lasagne noodles. I use Barilla Oven-Ready Lasagne, because they are truly, oven-ready. Trader Joe’s also has a similar product that also works great. There is no need to pre-boil them and that to me, is a huge convenience and it doesn’t hurt that they are also quite light.
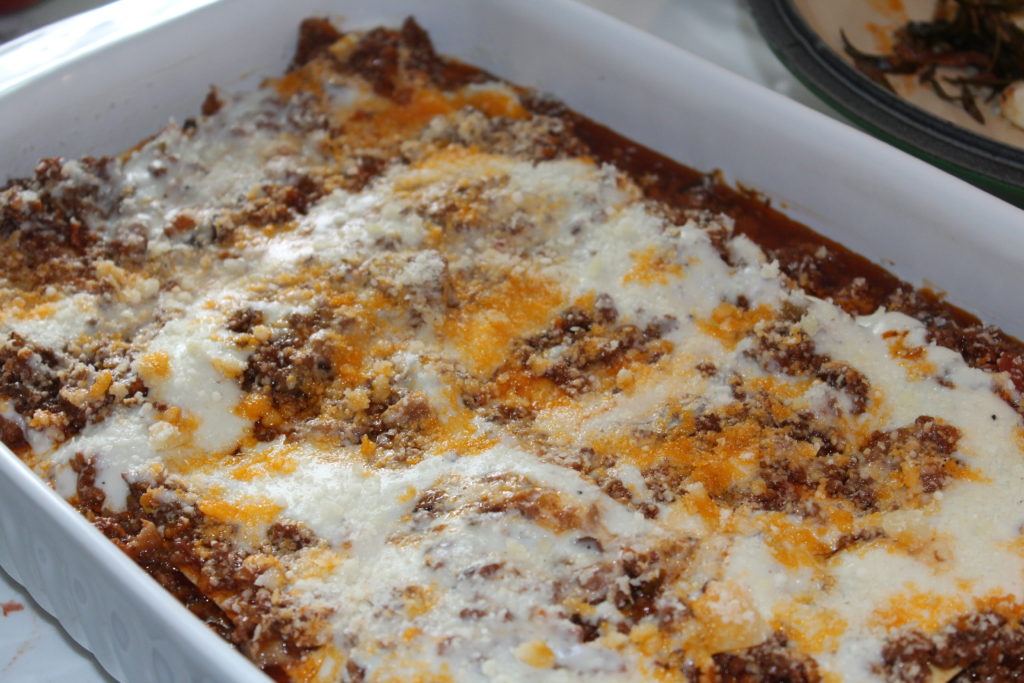
Next, butter an ovenproof dish, add a small amount of the béchamel sauce to sparsely cover the bottom of the dish. Then, place the lasagne noodles across the dish, then béchamel, then sauce and finally the grated parmesan. Repeat the above process, until you have 4-5 layers. When you put the last layer of noodles on top, cover that well with the béchamel and “stain” it with a few sparse dollops of the sauce, a light layer of parmesan cheese and a few dollops of butter.
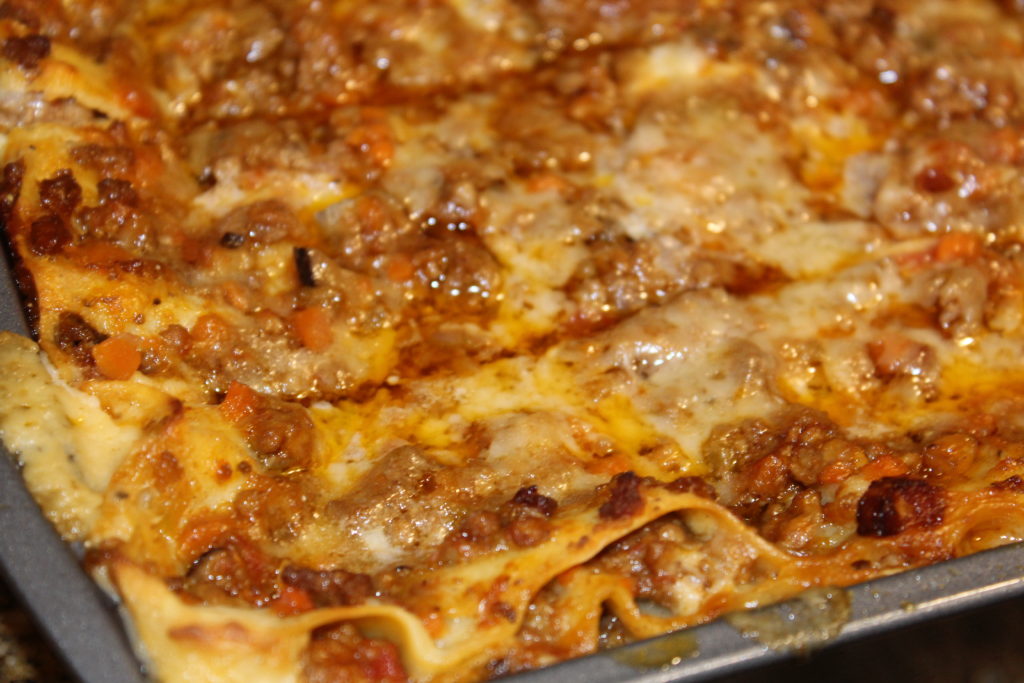
Finally, cover and bake for about 20 minutes, remove the cover and continue baking for another 20 minutes or until bubbly and slightly browned on the edges. Then, remove from the oven and let sit for 10-15 minutes, before slicing and plating. Serve with a green salad and some crusty bread.
NOTES This can be made well ahead of time. I actually try to do the sauce one or two days in advance, it enhances the sauce and makes assembly day much easier and less time consuming. You can assemble the day before serving and keep refrigerated. However, it also freezes beautifully. I have actually frozen it assembled and I have frozen both the bolognese and the béchamel sauces, separately. I was a bit worried about how the béchamel would survive the freezing, but it came out great. When it thawed, it did separate, but I just reheated it, whisked it vigorously and honestly, I couldn’t tell the difference.
Roasted Tri-Colored Baby Carrots
Whether for your family or for company, this is a terrific choice for a simple and very tasty vegetable. I love the way these carrots look, they couldn’t be easier to prepare. Therefore, I predict that they will quickly become a definite go to, no-fail, staple in your rotation.
INGREDIENTS
1 lb. bag of tricolor carrots, Trader Joe’s is a good source
olive oil
1 Tbs. real maple syrup
fresh thyme sprigs
kosher salt
fresh ground pepper
DIRECTIONS
Preheat oven to 400º
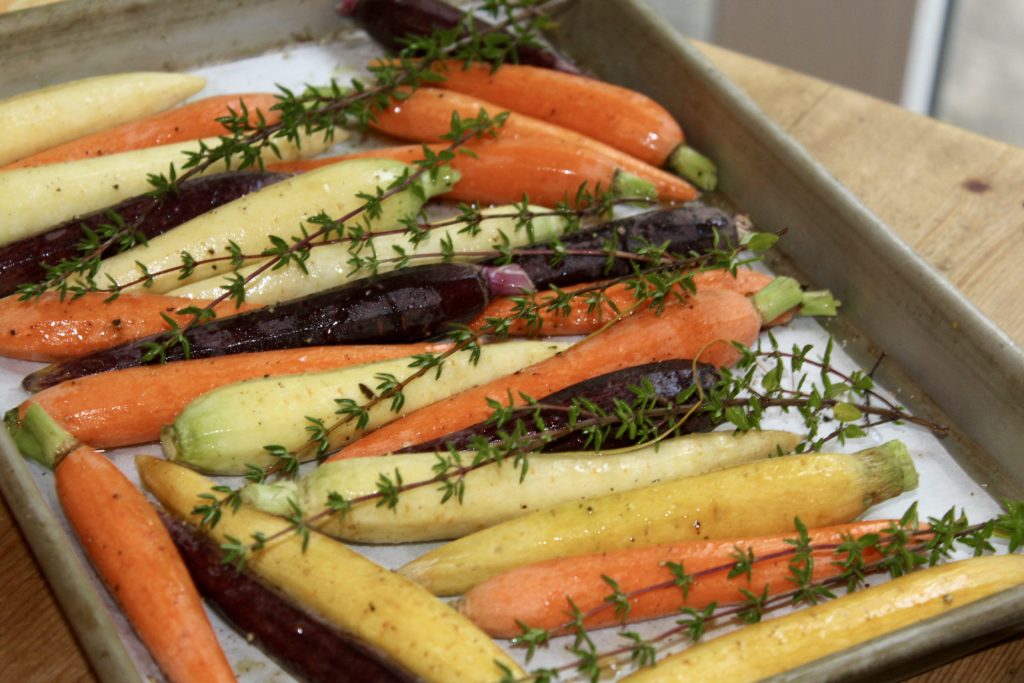
First, peel and trim the carrots. However, if you are lucky enough to find the ones with the green ends on, don’t cut them off. Those ends add some nice visual interest and texture to the dish. Then, place the carrots on a sheet pan, drizzle with the olive oil and the maple syrup. Add the salt, pepper, fresh thyme sprigs and toss all together to fully coat the carrots.
Spread the carrots out to ensure that they have room to roast properly, rather than just steam.
Then, bake for about 30 minutes or until mostly tender and slightly browned. This may be done ahead of serving time. Finally, when ready to finish and serve, transfer the carrots to an oven proof serving dish. Then, return them to the oven for an additional 8- 12 minutes, until fully tender and hot. Lastly, remove them from the oven, sprinkle with some flaky salt and serve.
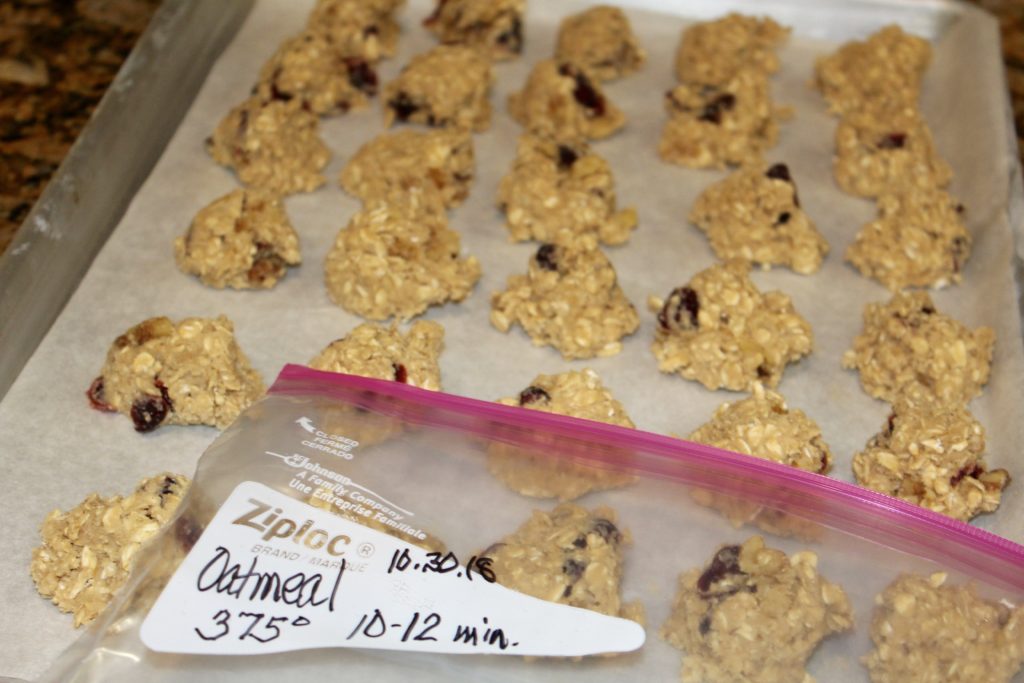
Vanishing Oatmeal Cookies
You will be surprised at how good these cookies are, they are so much better than just any oatmeal cookie. They are called “Vanishing Oatmeal Cookies” for a very good reason. Whether hot out of the oven or cooled and a bit crispy, with a cup of coffee or tea, these are very hard to resist.
Now, I must tell you that I didn’t come up with that name for these on my own. These are adapted from and I believe, improved upon, a Quaker Oats recipe of the same name.
INGREDIENTS 2 sticks butter 1 cup brown sugar 1/4 cup granulated sugar 2 eggs 1 tsp. vanilla 1-1/2 cups flour 1 tsp. baking soda 1/2 tsp. salt 1 tsp. cinnamon 3 cups oatmeal 1 cup dried cranberries
DIRECTIONS Preheat oven to 375º Beat sugars and butter until smooth. Then add the eggs, vanilla and mix well. Then, add the next four ingredients and mix well again. Next, add the oatmeal and cranberries and stir until well combined. Drop by teaspoonful on an ungreased sheet pan and bake for 10-12 minutes or until browned to your liking. Cool for a minute or two on the sheet pan and then move to a rack to cool.
NOTES If you prefer, you can certainly make these into bars, rather than cookies. put in 13″ x 9″ metal pan and bake for 30-35 minutes.
TIPS Also, I want to share a secret, maybe you already do this. However, I’m sharing for all of you that have not tried this and I think it is a game-changer. This little trick comes in very handy when I’m baking with the little ones and don’t want to have 3 dozen cookies in the house, because I can’t stop eating them!.
So, here it is. I make the cookie batter, cook what I want…maybe just one sheet pan full, for a small get together or just enough for me and my helpers. Then, I scoop out the remainder of the dough onto a sheet pan. Put as many on the pan as you can fit, then pop them into the freezer.
Then, after about 30 minutes in the freezer, pull them out, remove from the sheet pan and place them in a zippered plastic bag. Make sure to mark the cookie name, cooking instructions, and the date. That way, you can pull them out, at a moment’s notice and bake however many you want. I do this with all of my cookie batters, it’s a good way to keep us from eating two dozen in short order! Additionally, it is nice to have a selection of two or three to pick from at any given time.
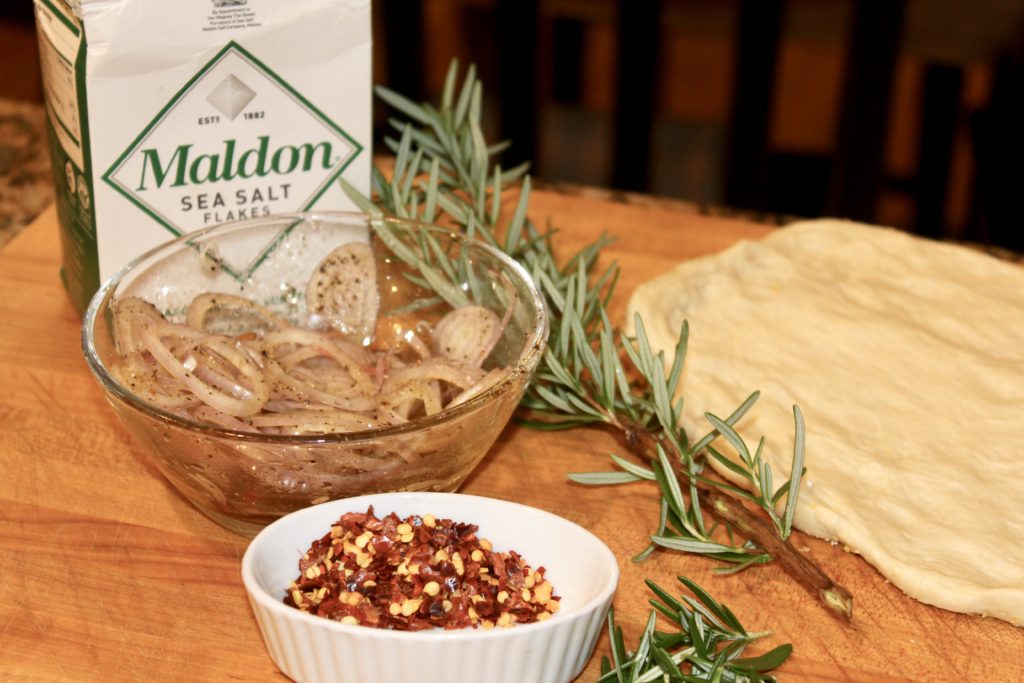
Focaccia aka Tuscan Pizza
Focaccia is really just a scaled down version of pizza. Although I would define this more as a flavored flatbread, you can call it what you wish. However, please, do yourself a favor and just try this! The toppings on a focaccia are not the main focus, though they do impart wonderful and essential flavorings. The highlight here is on the simplicity of the bread itself. And isn’t that what we all love about authentic Italian food? Using the best ingredients you can find, use very few of them and then produce an insanely tasty product. Well, my friends, this recipe hits that spot. I think you will fall in love, with your first bite.
To keep things really simple, you could go to a good pizza spot and buy their dough. Alternatively, you can use my pizza dough recipe, which is super quick, easy and reliable. Please note, that this is not a big, fluffy, piece of bread. Therefore, there are many options when serving. For example, it is wonderful as a stand-alone snack or served alongside a meal. Additionally, and my personal favorite, I prefer it sliced thinly and served as an appetizer, with cocktails.
INGREDIENTS
1 round of dough
4-5 small shallots, thinly sliced
8-10 kalamata olives, pitted and halved
3-4 sprigs fresh rosemary, stripped from stems
1/2 tsp. each, kosher salt and fresh ground pepper
pinch of crushed red pepper
5 Tbs. extra virgin olive oil
1/2 tsp. Maldon salt
DIRECTIONS
Preheat oven to 425º
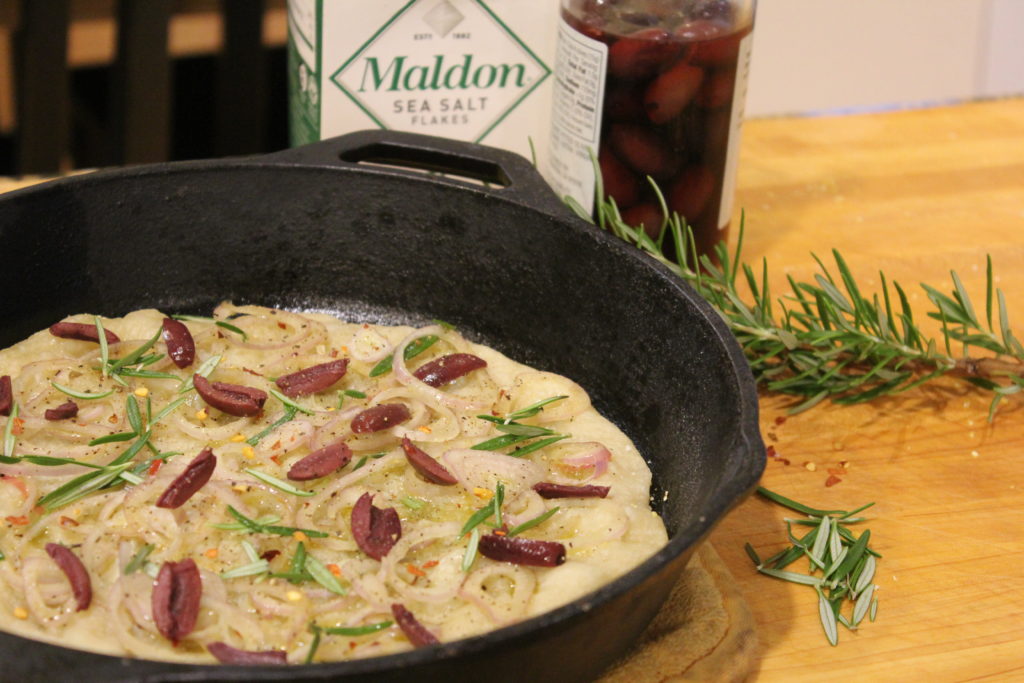
In a small bowl, combine the shallots, rosemary, 3 1/2 tablespoons of the oil, salt and pepper. Mix well, breaking up the shallot rings and set aside. Meanwhile, preheat a 12″ cast iron skillet (or any heavy, ovenproof skillet) either on top of the stove or in the preheating oven. Next, roll out the pizza dough to approximately a 10″ round.
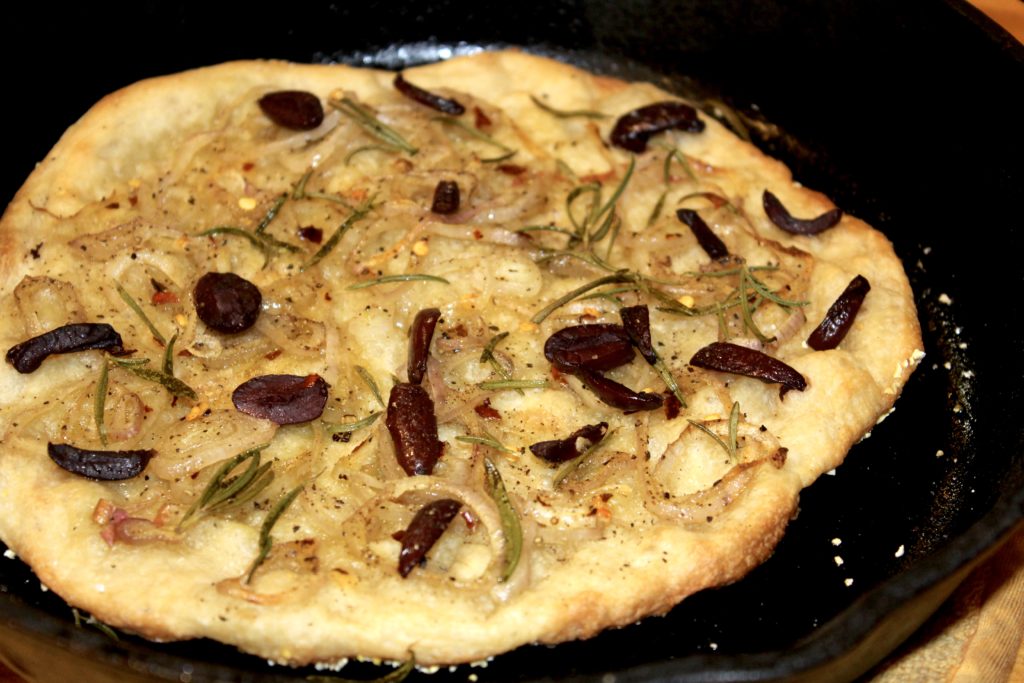
Then, when the skillet is hot, remove from the heat and add the remaining 1-1/2 tablespoons of oil. When the oil is shimmering, carefully lay the rolled-out dough in the pan. Finally, using your fingertips, make multiple indentations in the dough and spread the shallot mixture on top. Bake in the upper third of the oven for about 20-25 minutes or until browned on top. Finally, remove from the oven, immediately add a sprinkling of the Maldon salt and let cool for about ten minutes, before slicing.
Buttercrunch
Well, it’s that time of year again and it certainly sneaks up on us every year…well it sneaks up on me anyway. With Thanksgiving upon us, the major holidays follow very quickly! With that in mind, I thought I would share my go to holiday hostess gift.
Now, don’t freak out or dismiss this because it requires a candy thermometer. It is not that scary and the payoff is well worth it. Although not difficult, this is one of those recipes that does require your full attention. Stay close by and don’t get distracted. That being said, the toffee portion of the recipe, takes only about 15 minutes and about 20 minutes overall.
Because I do so much of this over the holidays, I buy a 3 pound bag of walnuts, chop them all, in batches, in the food processor and store them in an airtight container. That way, when I am ready to make a batch, the nuts are ready to go and the whole process takes about 20 minutes. Other than the cooling and packaging of course. I hope you try it and let me know how you make out.
INGREDIENTS
2 sticks butter
1 cup sugar
1 Tbs. Karo Light syrup
2 Tbs. water
12 oz. semi-sweet chocolate bits
1 1/2 cups nuts, ground (use food processor because if they are too large, it doesn’t spread as nicely)
DIRECTIONS
First, put the chocolate in a double boiler, on very low heat and let it be while it’s melting. I don’t even stir it until I am ready to use it. Meanwhile, add the first 4 ingredients to a saucepan. Bring to a boil with medium-high heat and cook to hard crack (300°). Yes, a candy thermometer is a definite must here. Although, once you have made this a number of times, you will be able to eyeball the color of the toffee and know when it is ready.
Stir frequently and DO NOT leave the kitchen! I can’t tell you how many batches I have ruined because I answered the phone, got sidetracked and ended up with a mess that had to be tossed. You should keep a steady eye on this, checking for color (you want a nice deep amber color), lowering the heat if needed, but making sure it is bubbling constantly.
Once the mixture hits 300º, remove from the heat and immediately add 1 cup of the chopped nuts. Stir quickly, but carefully, to combine and pour onto a greased sheet pan. I actually use a silicone baking pad. So if you have one, by all means use that, but it is not essential. Be very careful, this is molten sugar and it is insanely hot. Tilt the pan back and forth to spread the toffee mixture, don’t worry if it doesn’t fill the whole sheet pan. Then, let it set for about five minutes, to cool a bit and set slightly.
By now, your chocolate should be fully melted. Stir it until very smooth and pour the chocolate onto the toffee, spreading it evenly and to the edges with a spatula or offset spatula. Then, immediately sprinkle with the remaining (generous) 1/2 cup of nuts. You want to make sure the nuts go on the toffee before the chocolate starts to cool. Otherwise the nuts won’t stick to the chocolate.
Let cool completely and break into pieces. If using as hostess gifts, package in small tins, candy box, or a cellophane candy bags and wrap with a ribbon.