Marinara Pizza Sauce

Use for the topping on grilled pizza, as a simple sauce over pasta or as the sauce for chicken parmesan. This freezes quite well, with no loss in texture or flavor.

INGREDIENTS
3 cloves garlic, sliced, not chopped
1/4 cup extra virgin olive oil
pinch crushed red pepper
28 oz. can San Marzano whole tomatoes
fresh basil branches, 4-6

DIRECTIONS
First, sauté garlic briefly, at medium heat in the olive oil. Then, add the crushed red pepper (more if you really like a kick) to the garlic oil and simmer for a minute or two.

Next, break the tomatoes up with a wooden spoon or by squeezing with clean hands. Alternatively, if you have an immersion blender, that works quite well also. Add the crushed tomatoes to the garlic oil and then add the basil branches as well. The basil will infuse the sauce and then, when finished simmering, take the branches out.

Simmer for about 10-15 minutes or longer if you have the time.


Tomato, Basil and White Bean Salad

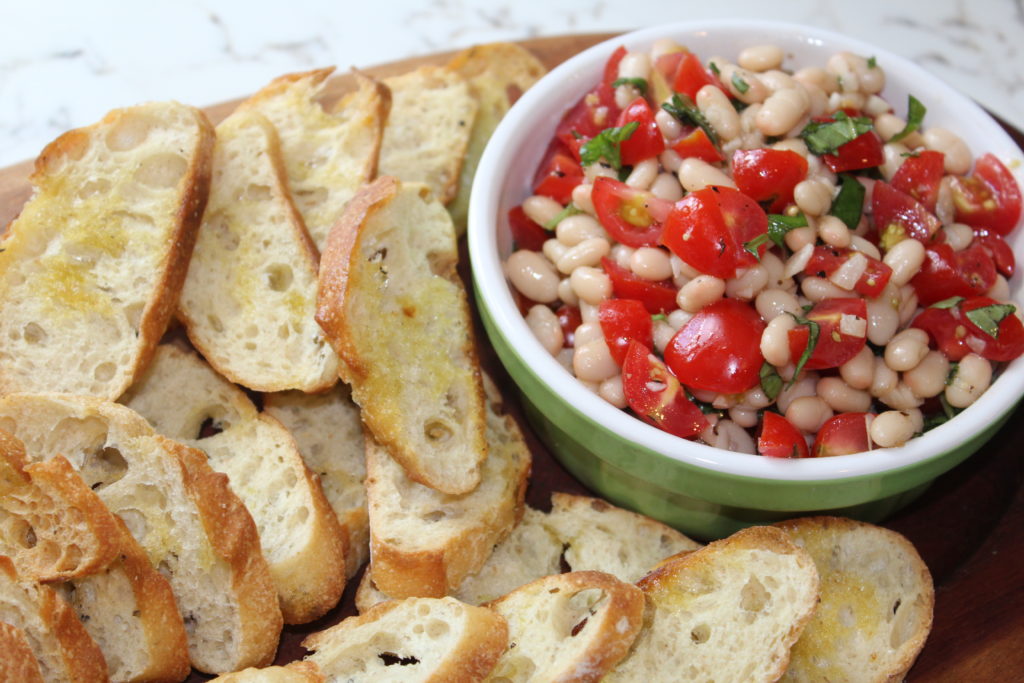
Super quick, incredibly tasty, versatile (use as an appetizer with crostini or a side dish) and eye catching as well. Definitely a winning combination, that never disappoints!

INGREDIENTS
1 can navy beans or other small beans, drained, rinsed
1/2 lb. plum or cherry tomatoes, cut into small dice
1/2 tsp. kosher salt
freshly ground pepper
1/4 cup extra virgin olive oil
2 small cloves garlic, minced
generous portion of basil, julienned

DIRECTIONS
First, combine the beans and the tomatoes in a bowl. Then, season them with kosher salt, fresh ground pepper and set aside.

Next, heat the oil in a skillet, over medium heat. Add the garlic and stir until fragrant, but not browned, for about 1-2 minutes. You are just looking to infuse the oil with the garlic flavor.

Pour the warm garlic oil over the bean, tomato mixture and let stand for about 30 minutes. This will allow the flavors to meld. Finally, add the basil, toss to combine and serve with homemade crostini or crackers and serve as an appetizer. However, this can be served as a yummy side dish. It pairs quite well with any grilled meat or poultry dish. In addition, this can be kept at room temperature for several hours.

At first glance, this seems too simple to be so good. However, trust me, this really is amazingly tasty and it will soon become a favorite.


Fresh Fruit Tart

If you want a show-stopping dessert and one that is also delicious, this is the one. Not only is it relatively easy to make, but no one will believe that you made it yourself! Also, feel free to use whatever fruits are your favorite or whatever you have on-hand. You can’t go wrong.

TART PASTRY
1 1/2 cups flour (do not use self-rising)
1/4 cup walnuts or pecans, toasted & finely ground
1/4 cup, packed light or dark brown sugar
2/3 cup butter, softened
1 egg

PASTRY DIRECTIONS
Preheat oven to 400º
Combine all ingredients in a food processor, until a ball forms. Although I use a food processor for this, you could just as easily use a mixer. Press the dough firmly and evenly against the bottom and sides of a 9″ or 10″ tart pan, with removable bottom. Then poke it all over, with a fork; this prevents it from puffing up while cooking. Bake for 10-12 minutes or until light brown. Set aside to cool.

LEMON FILLING & FRUIT
1/2 cup lemon curd, Trader Joe’s is a good one
8 oz. cream cheese, room temperature
pint of strawberries
large handful of blueberries
3-4 kiwis, depending on their size

FILLING DIRECTIONS
While the crust is baking, beat the lemon curd and cream cheese, until very smooth. Then, spread evenly over the cooled crust and chill for about an hour or until firm. Arrange a selection of berries and sliced fruit over the lemon mixture. My favorite combination is strawberries, kiwi, and blueberries, for both flavor and color combination. However, you can certainly try any combination you prefer.
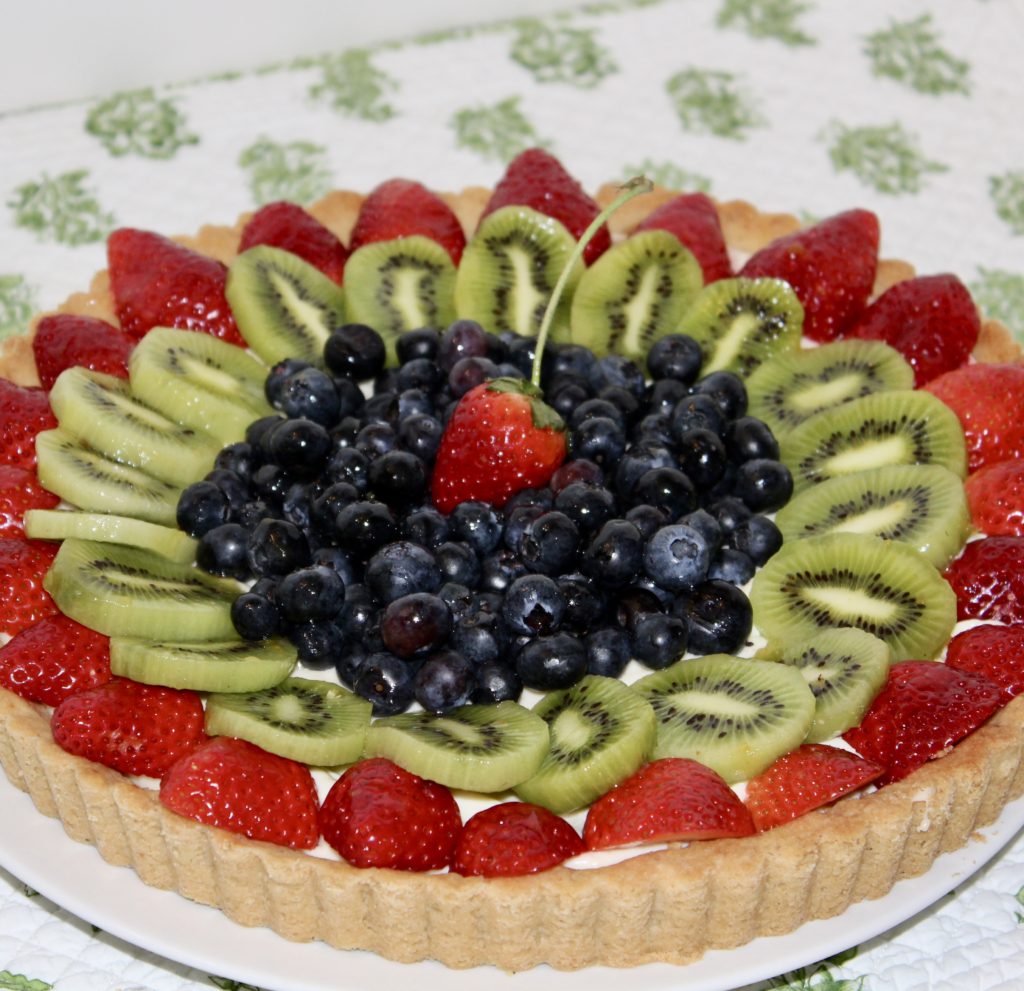
fruit tart

GLAZE
2 Tbs. apricot jam, jelly or preserves
1-2 tsp. water

Heat the jam and water in a microwave for about 10-15 seconds until melted, mix well, and brush over the fruit. You don’t need to go heavy with this, just a light coating will do. The jam glaze gives the fruit a nice, shiny, professional look. Alternatively, you could just use a light dusting of confectioners’ sugar. However, the shine that the glaze imparts really does makes it look professionally done.


Baby Back Ribs

This is an instant favorite. A definite crowd pleaser and all the preparation is done ahead of time, which makes it a hostess favorite as well.

My granddaughter proclaimed more than once, when out at a restaurant having ribs, “these aren’t as good as GG’s!” She is now old enough to help me with the preparation and other than the actual grilling, she has done it all. BTW, those front teeth have finally reappeared.

She is rather proud of how well she applied the spice rub.

Grilling is the adult job and then it is time for her to apply the bbq sauce.

After doing a great job slathering the ribs with all that tasty sauce, we wrap the racks in parchment, then in the heavy-duty foil, and pop them in the oven for a bit. The aroma permeating the house makes it torture until it is time for the actual consumption. I hope you agree that these are better than anything you have had in a restaurant!

BBQ SAUCE
18 oz. jar of good bbq sauce, Bullseye is a good one
1/4 cup of molasses, preferably Grandma’s Original unsulphured
1 to 2 Tbs. cayenne pepper (depending on how hot you like it!)
2 Tbs. Hungarian or smoked paprika
1 Tbs. dry mustard
Combine the above ingredients and mix well to combine.

RIBS
Two racks of baby back ribs.
First, rinse and dry the ribs. Then, rub them with olive oil and cover the ribs quite heavily with your favorite spice rub. Brown the ribs for 5-7 minutes per side on a preheated grill. Next, lay out sheets of heavy-duty foil with parchment paper on top (1 for each rack of ribs).
Then, when finished browning the ribs, bring inside and place each rack on the parchment sheets. Slather the sauce on the ribs, don’t skimp here, you want good sauce coverage on both sides of the ribs. Next, wrap and seal the parchment around the ribs and then wrap the heavy-duty tin foil around that, making sure that you have sealed it well.

Finally, put the ribs in a large roasting pan with a rack (I use my turkey roaster) and add a little water to the bottom of the pan to keep things moist. 

Bake at 325º for 2 to 3 hours, they should be “fall off the bone” tender. Serve with coleslaw, baked beans, and cornbread.


Greek Chicken Kebabs

This is a delicious, light version of the Greek classic and a barbecue favorite that is sure to please.

INGREDIENTS
1 1/2 lb. skinless boneless chicken breast halves, cut into 2″ pieces
4 Tbs. extra-virgin olive oil
1/2 cup greek yogurt
4 garlic cloves, crushed
1 tsp. each dried mint, dried oregano
1 tsp. each kosher salt, fresh ground pepper
2 Tbs. fresh lemon juice
1 bunch fresh mint
1 red onion, cut into 1-inch pieces
8 12-inch metal skewers

DIRECTIONS
First, mix the two tablespoons oil, yogurt, garlic, mint, oregano, salt, and pepper in medium bowl. Then, add the chicken pieces, toss well to coat the chicken and marinate for about 30 minutes. Although with most marinades, longer is better, this one is not the case. The yogurt in this will start to break down the chicken and then it gets a bit mushy, however it will still taste good. The mushiness just makes it more difficult to work with.

Next, whisk the remaining two tablespoons oil and lemon juice in small bowl to blend. Meanwhile, preheat the barbecue to medium-high heat.

For the skewers, pull the mint leaves from the stems. Then, alternate the chicken, the onions, and the mint leaves on skewers; baste with the lemon-oil mixture and sprinkle with kosher salt and fresh ground pepper.

Then, grill the chicken, until it is just cooked through. While grilling, occasionally turn and baste the chicken, with the lemon-oil mixture. The grilling goes rather quickly and should only take about 9-12 minutes, depending on the size of your chicken pieces. Finally, when done to your liking, remove the chicken from the grill, and sprinkle with some additional, chopped fresh mint.

Additionally, you might like the Greek Orzo Salad, which goes quite well with the kebabs.


Grilled Vegetable Platter

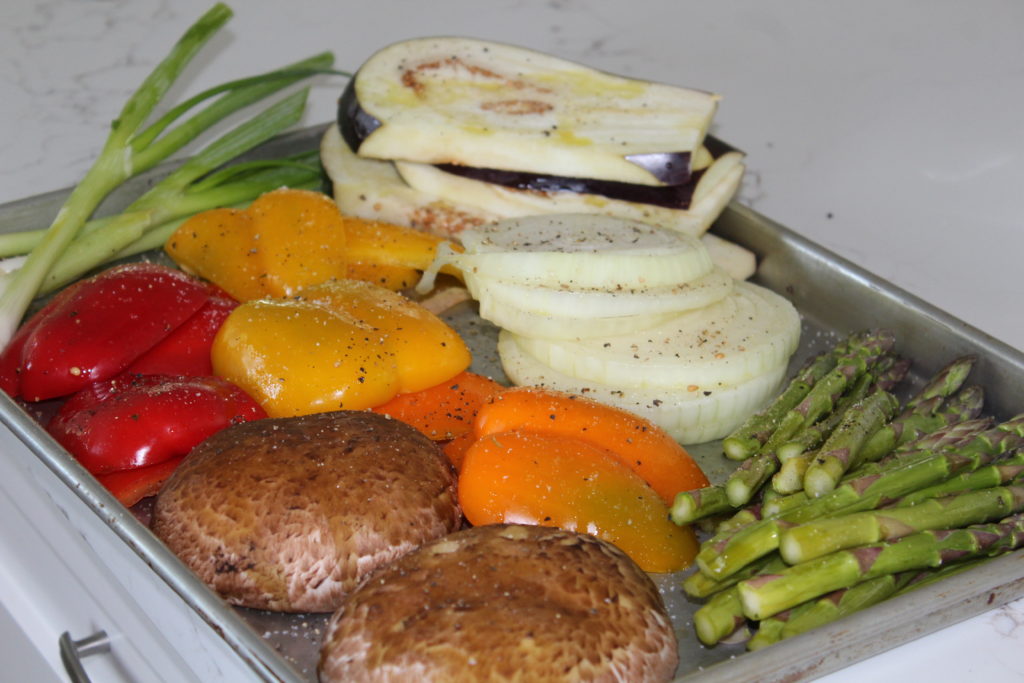
This is a wonderful summer vegetable and a great do-ahead dish for a crowd. I love serving this, because it is a terrific way to highlight summer’s bounty and everyone loves it. However, do take care to choose an array of colorful vegetables for an attractive presentation.

INGREDIENTS
1 red bell pepper, cored and sliced
1 yellow bell pepper, cored and sliced
1 fennel bulb, cored and cut into wedges
1 bunch asparagus, ends trimmed
1 medium zucchini, sliced lengthwise
1 large vidalia onion, peeled and cut into thick slices
1 small eggplant, cut into thick slices
1/4 cup extra virgin olive oil
1 Tbs. balsamic vinegar
1 garlic clove, peeled & crushed
fresh sprigs of rosemary
fresh sprigs thyme
kosher salt and fresh ground pepper, to taste

DIRECTIONS
First, whisk the olive oil, balsamic vinegar, salt, pepper and garlic in a small bowl. Add a few sprigs of the thyme and rosemary and set aside to let the flavors meld while preparing the vegetables.

ready for the grill
…ready for the grill!

Then, brush the olive oil mixture on the vegetables and grill on medium high (depends on how hot your grill gets) for about 4-7 minutes per side. The peppers and onions will take a bit longer than the eggplant.

Beware and be sure to stay close by, because the veggies can go from perfect to charred in no time!

Finally, arrange on a platter, add a garnish of fresh thyme and rosemary sprigs. Cover with tinfoil and leave at room temperature until you’re ready to serve. This can stay on the counter for several hours, but if you are not serving for six or more hours, I would refrigerate it and take out up to an hour before serving to bring to room temperature.


Kale Salad with Quinoa, Feta, Apple & Dried Cranberries

This is a huge hit every time it’s served. Can easily be done the day before and won’t wilt.

SALAD INGREDIENTS
1/3 cup white quinoa
1/2 cup water
6 cups kale, stems removed, finely sliced, see Notes below
1 large apple, finely sliced (Braeburn, Pink Lady, Fuji)
1/4 cup dried cranberries
1/4 cup walnuts, toasted, coarsely chopped
1/4 cup feta, crumbled

DRESSING INGREDIENTS
3 Tbs. cider vinegar
3 Tbs. extra virgin olive oil
1 clove garlic, minced
1 Tbs maple syrup
2 tsp dijon mustard
1/2 tsp curry powder
salt & pepper to taste

DIRECTIONS
Rinse and drain the quinoa, add the water, bring to a boil, cover, reduce the heat, simmer for about 15 minutes until the water is absorbed. Turn the heat off and let sit, covered, for 5 minutes.

Meanwhile, toast the walnuts at 350º for 6-8 minutes, set aside to cool.
Combine the sliced apple, kale, quinoa, dried cranberries, walnuts and feta together.

Next, mix the vinegar, oil, garlic, maple syrup, dijon, curry, salt and pepper. Finally, whisk well to combine and pour over salad to taste. Let sit for a few minutes to let the flavors meld. This is also great the next day!

NOTES
An alternative to slicing the kale, you can pulse it, in batches, in a food processor to make smaller pieces. Also, once you have sliced/chopped the kale, massage it with your hands. This helps to tenderize and break down the kale which can be rather “chewy”.


Herbed Farro Salad

Quick, delicious and very healthy. The ingredient amounts can vary depending on your preferences or what you have on hand.

INGREDIENTS
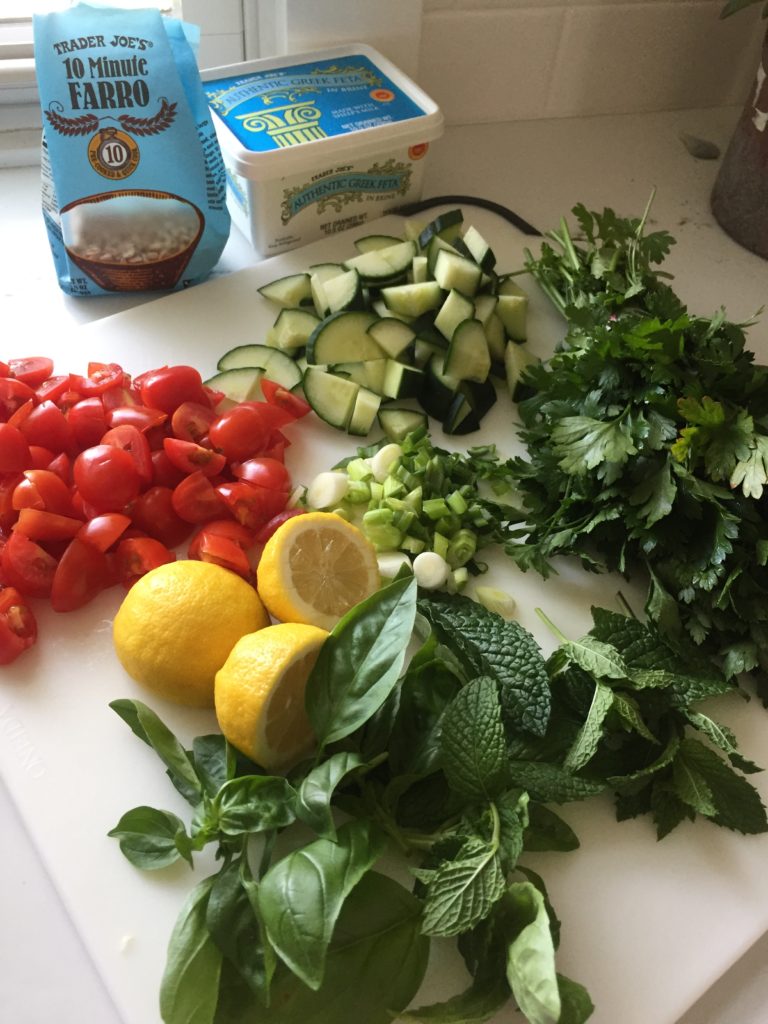
1/3 cup farro, cooked
juice & zest of a lemon
1 bunch flat leaf parsley, chopped
1/4 cup fresh mint, chopped
handful fresh basil, chopped
1 cup of chopped tomatoes
4-5 scallions, chopped
1/3 english cucumber, quartered then chopped
5 oz. feta, preferably in brine
kosher salt & fresh ground pepper, to taste
1/4 cup (or less) extra virgin olive oil
1 cup arugula, or more to extend servings

DIRECTIONS
First, cook the farro, according to the package directions. When cooked and tender, transfer to a large bowl. Then, immediately pour the lemon juice over the farro while it’s still warm. Let the mixture sit until somewhat cooled or a bit longer, this allows the farro to absorb the lemon. Add the next 7 ingredients to the bowl, mix well and then add salt & pepper to taste. Refrigerate for an hour or two to fully marinate. When about ready to serve, add the olive oil, toss well, taste and adjust seasonings. It should taste very lemony, if it doesn’t add more lemon juice. Make a bed of the arugula and spread the marinated salad over it, serve immediately. This looks terrific in a long oval or oblong serving dish, as shown in my photo.

This is great as a hearty lunch or a wonderful side dish. Especially good for a crowd at your next barbecue.

NOTES
The ingredient amounts can vary depending on your preferences or what you have on hand. Toasted walnuts are also a nice addition.


Summer Vegetable Ceviche

I stumbled upon this recipe several summers ago and I’m so pleased that I did. Without fail, every time I make this, someone asks for the recipe. It is an incredibly versatile recipe that highlights the very best of summer. It’s refreshing, light, healthy and great the next day too. Feel free to adjust the  vegetable amounts to your own liking. And absolutely feel free to swap out what you do or do not have.

INGREDIENTS
1/4 cup extra virgin olive oil
zest of 1 lime
1/3 cup lime juice
1 -2 scallions, sliced
1 jalapeño, seeded & finely chopped
1/4 red onion, very thinly sliced
1 small shallot, thinly sliced
1 cup edamame, cooked & shelled (see notes below)
2 ears FRESH corn, blanched & sliced off the cob
2 nectarines, thinly sliced
1 avocado, cubed
1 orange bell pepper, thinly sliced
pint heirloom cherry tomatoes, halved or quartered, depending on size
1/2 cup roughly chopped cilantro (see notes below)

DIRECTIONS
First, combine the olive oil, lime zest, and lime juice. Then, add the scallions, jalapeño, shallot and red onion; season with salt and pepper.

Next, gently fold in the vegetables to combine and then refrigerate the mixture, for at least 2 hours. Finally, add the cilantro just before serving and serve over a bed of arugula.

NOTES
Regarding the edamame. Since first writing this post, I have discovered fresh and frozen versions of edamame, that have already been shelled. This takes some of the tediousness out of the prep work and I highly recommend using them if you they’re available in your area. Trader Joe’s has them in their frozen section and also, check in your produce section for the fresh version; they are vacuum sealed and in a small box.

Also, if by chance, you or your guests, don’t like cilantro, have no fear because other fresh herbs are a great alternative. I just recently brought this to a friend’s house and because I knew two of the guests, did not like cilantro, I had to modify the herbs. Therefore, I used a combination of parsley, basil and mint, with wonderful results.