Summer is in full swing and I thought I would share some of my favorite, go to, salads. These are usually done in the morning, so you can enjoy the day. And, I actually prefer making it early because the flavors improve with a few hours of marinating. Whether you serve these as a stand alone lunch or as a side for a barbecue, it matters not…either way, they will be a hit.
Also, feel free to be creative and flexible with the vegetables. A little more of this or less of that, is not going to matter. My only caution is, do not go lightly on the herbs, they make a huge difference in the final dish. Additionally, a final squeeze of lemon or lime juice (whichever is used in the recipe) is always a welcome addition.
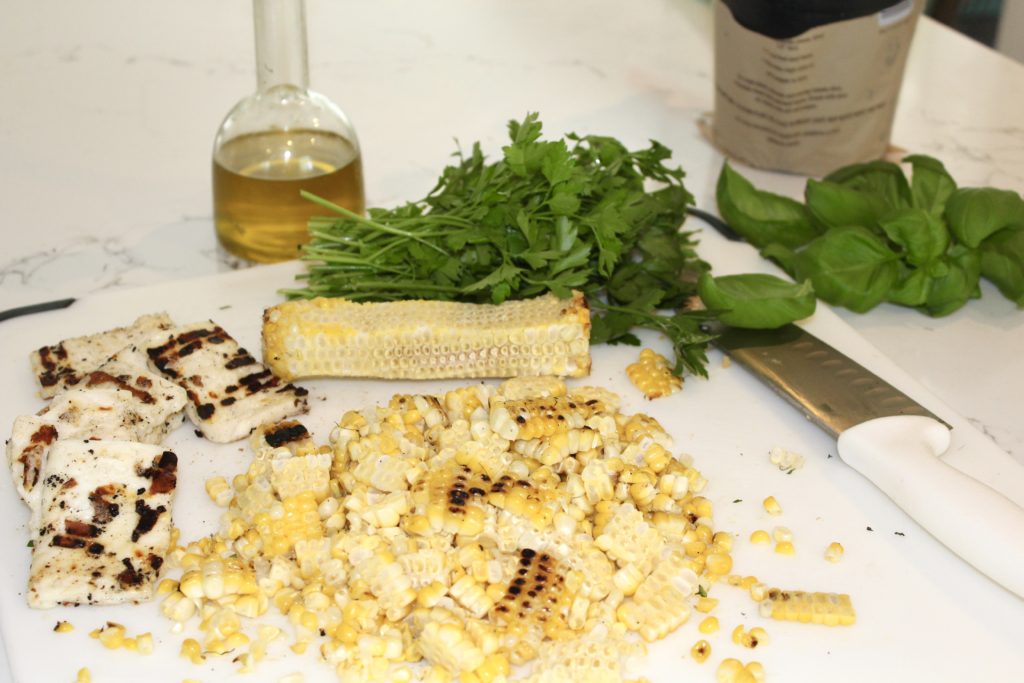
Herbed Couscous Salad with Corn and Grilled Halloumi
Plan on serving this for your next barbecue, it is a snap to do earlier in the day and that also gives it time to develop more flavor. Although this goes well with nearly any meat, fish or poultry, it’s also very satisfying as a stand alone lunch.
INGREDIENTS 1 cup walnuts 1 cup Israeli couscous, also known as pearl couscous 4 ears corn, husked 2 Tbs. olive oil fresh ground pepper 8 oz. halloumi cheese, sliced 3/4″ chunks (see notes below) 3-4 scallions, thinly sliced (green & white parts) 1/2 cup coarsely chopped, flat-leaf parsley 1/4 cup basil, julienned 1/4 cup mint leaves, chopped juice of 1 lemon zest of 1 lemon 2 Tbs. white wine vinegar 1/4 cup olive oil
DIRECTIONS Lightly toast the walnuts in a 350º, preheated oven or in a dry skillet, on the stove. Make sure to stay close and keep an eye on them when toasting. Trust me from experience, they can burn in an instant! Then, remove from the heat, let them cool a bit, roughly chop them and set aside.
Next, cook the couscous according to the package directions. Meanwhile, add the vinegar, lemon juice, lemon zest, remaining 1/4 cup of oil, a pinch of salt and some fresh ground pepper, to a small bowl and whisk to combine.
When the couscous is ready, drain it into a bowl, (do not rinse it) and immediately pour most of the dressing over it and stir to combine. I like to hold some back, if not serving immediately. The warm couscous will absorb the dressing and thus will have more flavor. Meanwhile, preheat your grill to medium high heat (you can definitely do this inside on a grill pan, if you prefer). Rub the corn with a tablespoon of the oil and sprinkle with some salt and pepper. Grill the corn, turning occasionally, until slightly charred and tender. That should take about 8-10 minutes, then set aside to cool.
Next, brush the cheese with 1 tablespoon of oil and grill for about 4-5 minutes per side. You are looking for a bit of char on each side, then remove from heat to cool.
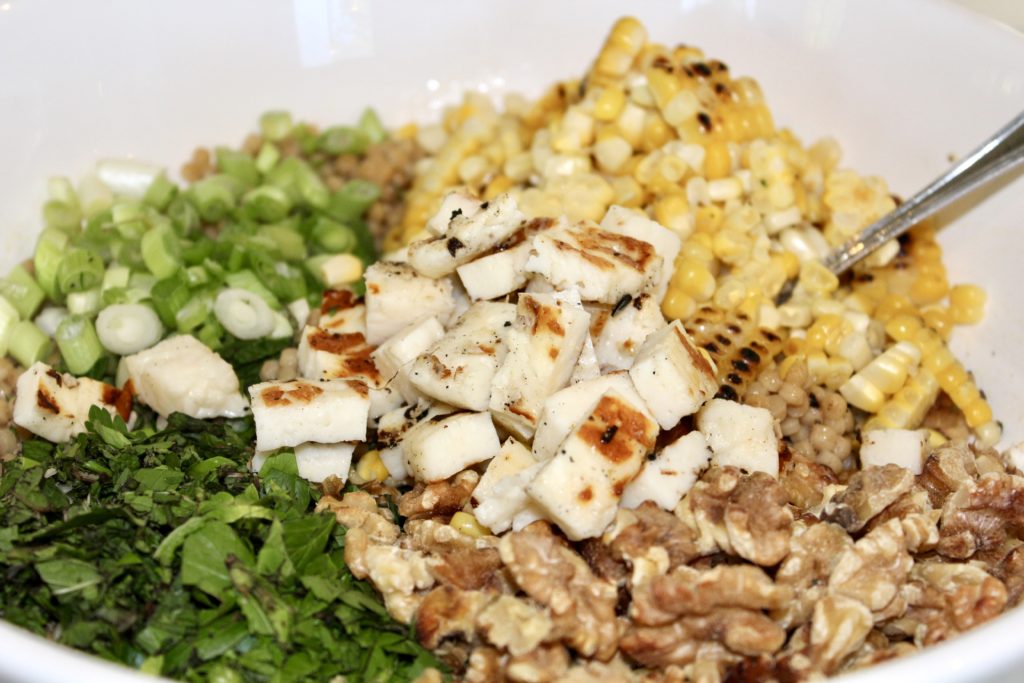
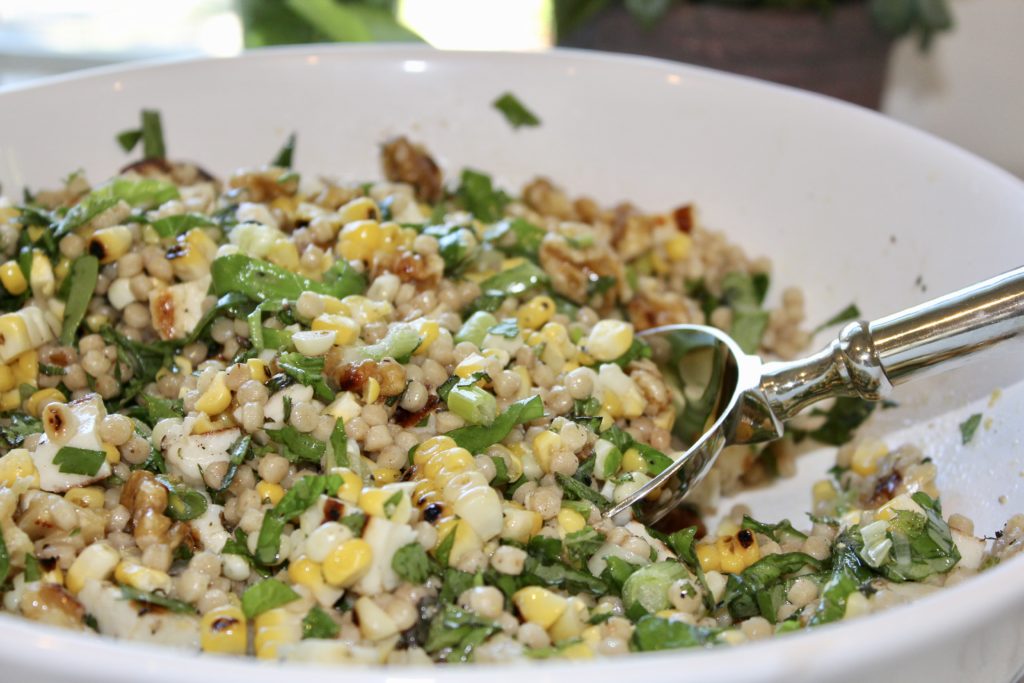
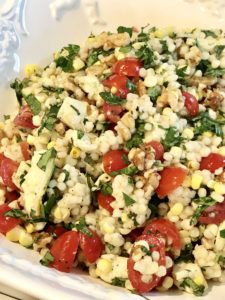
Cut the kernels off the cob and transfer them the couscous. Next, add the scallions, parsley, basil, mint and walnuts. Cut or tear, bites size pieces of the halloumi and add them to the bowl as well. Finally, add the remaining dressing and toss well to combine, making sure everything is evenly coated. Sprinkle with a bit more chopped mint or basil before serving.
Adding tomatoes is always a nice option and it adds some nice color.
NOTES Halloumi cheese can be found in most natural food stores, Greek markets and some supermarkets. You may find a marinated version and that works well too. If you are using a marinated version, there is no need to add oil before grilling.
Additionally, I have intentionally not added much salt because the halloumi cheese is a bit salty on its own. So, I suggest preparing the whole dish and then tasting for any additional seasoning.
Also, don’t skimp on the fresh herbs, they elevate the flavors immensely. Similarly, don’t be afraid to add more lemon juice or vinegar if it seems a bit dry.
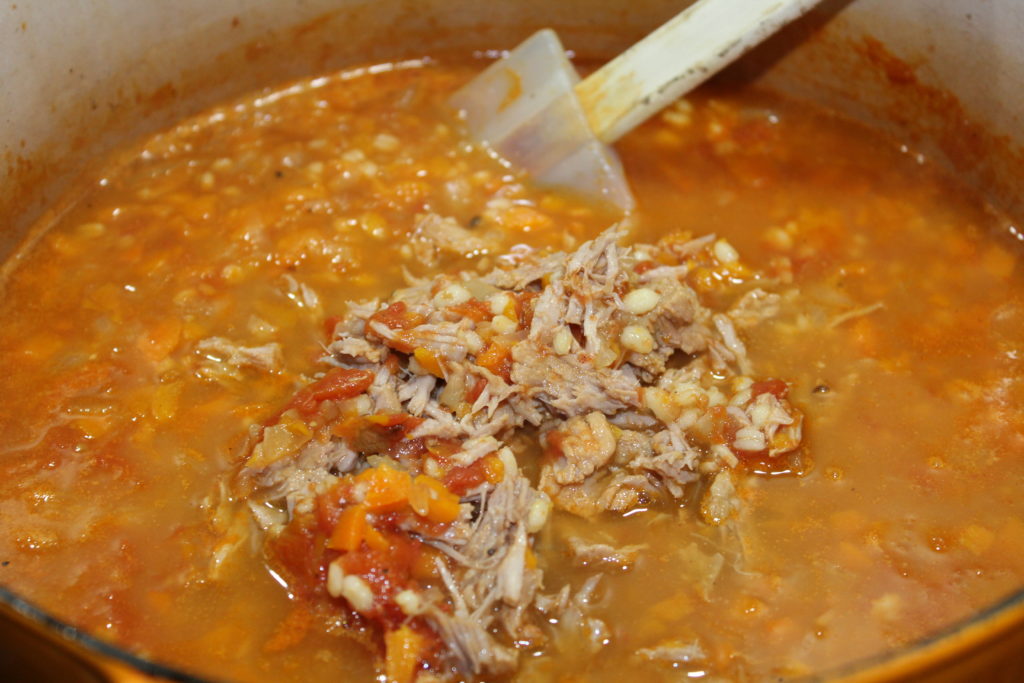
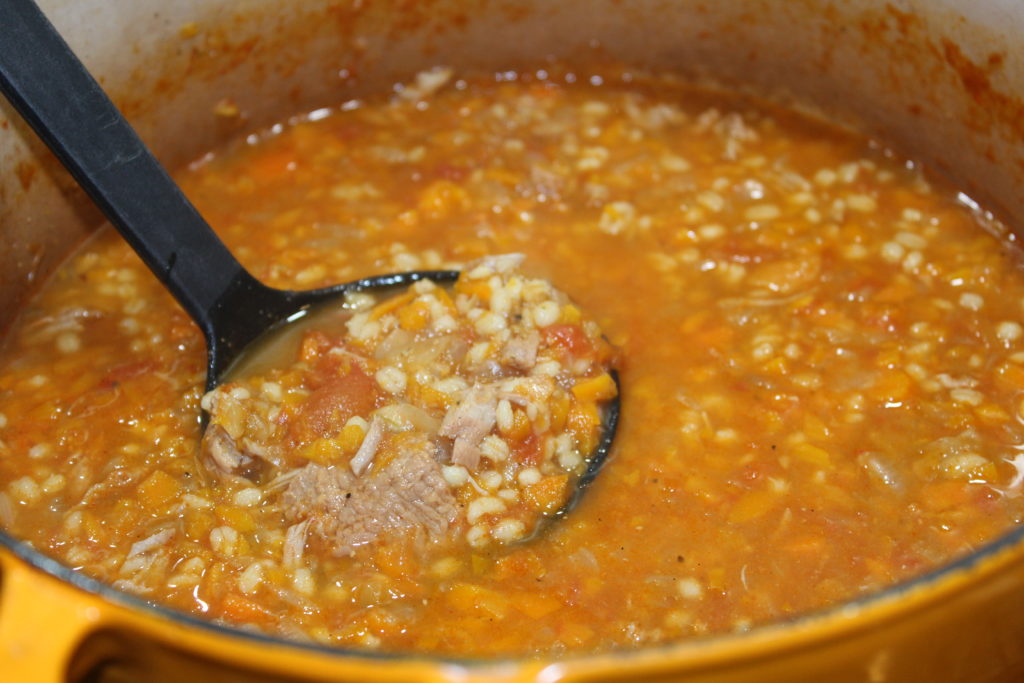
Hearty Beef Barley Soup
Another cold-weather favorite, that really hits the spot when you need a substantial, comforting lunch. I love the meatiness of this soup, both the barley and the veal have a wonderful texture and as a result, gives it great substance. You can use beef, if you prefer however, I find the texture much more pleasant with the veal. Beef tends to be more tough than chewy. Besides being hearty and healthy, it also freezes beautifully, hence this should become a regular in cooler weather and will help stock your freezer..
INGREDIENTS
1 lb. boneless veal
1 large onion, finely chopped
kosher salt and fresh ground pepper to taste
olive oil
3-4 carrots finely chopped
1 lb. can Italian tomatoes
1/4-1/2 cup barley
4-5 cups chicken stock
parmesan rind (optional)
DIRECTIONS
The amount of barley and chicken stock varies depending on how thick you like your soup.
Put barley in a microwave-proof bowl, generously cover with water, cover, and microwave for about 15 minutes or until tender. Don’t worry if it isn’t totally tender, because it will continue to cook in the pot.
Using a large dutch oven, sauté onion, carrots, salt, and pepper, in a small amount of oil until browned slightly. Add the veal and sauté briefly. While the vegetables and veal are sautéing, crush the tomatoes (I use my hands or an immersion blender, right in the can), add to the pot, and simmer for 10-15 minutes. Add the chicken broth, barley, and any excess liquid from the barley, to the soup. Reduce heat to a simmer, add parmesan rind, if using and simmer for about 2 hours.
While the soup continues to simmer, remove the veal and with two forks, shred into small pieces and return to the pot. Serve with a good crusty bread or even better, some freshly made crostini and a sprinkle of good Parmesan cheese.
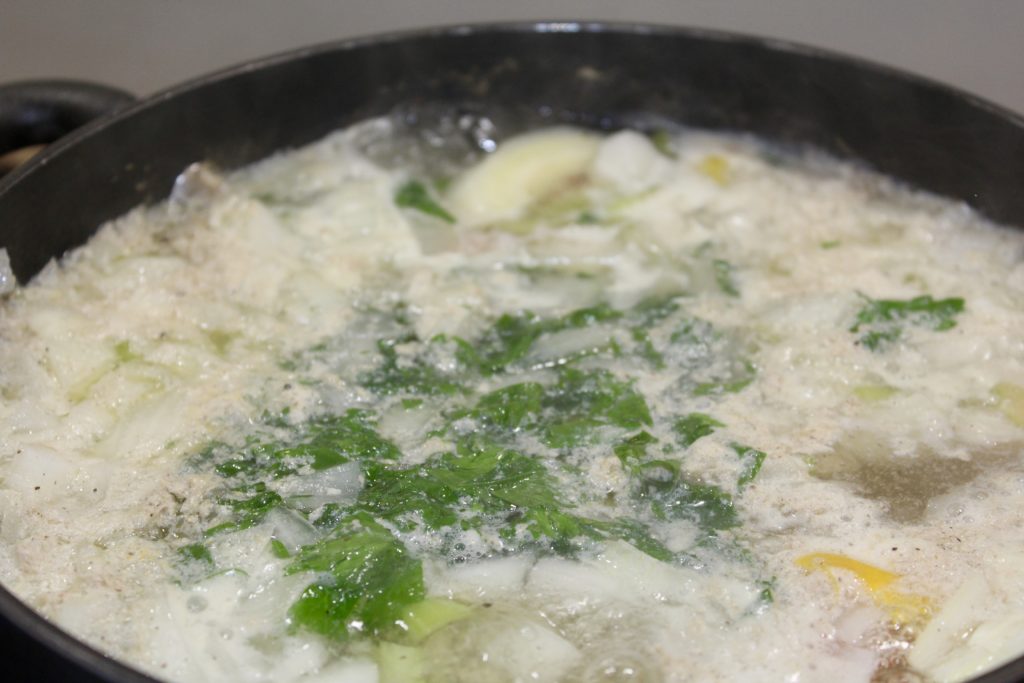
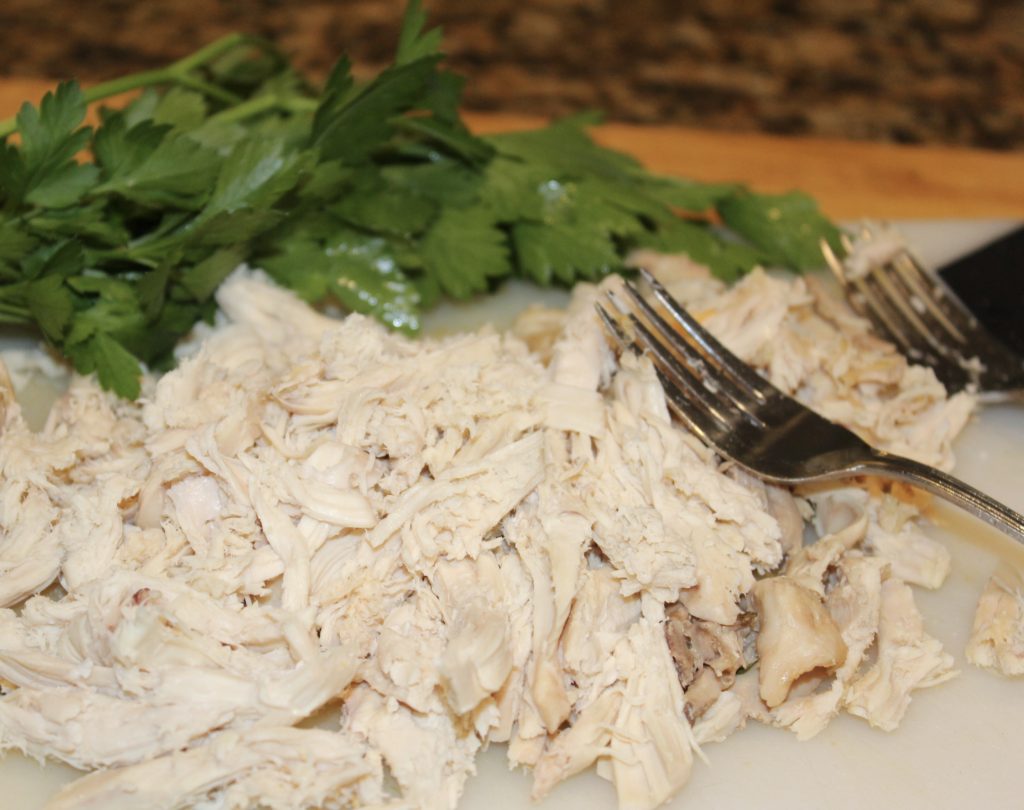
Easiest Chicken Soup Ever
Remember Gourmet magazine? Well, this is adapted from one of their recipes, way back in 1999! Even after all these years, this is still a favorite in my house.
It is hearty, delicious and pretty darn simple to make. Everything goes into the pot, with only minor chopping and you walk away, for an hour. The brown rice is essential here because its heavy, starchy texture holds up to the hourlong cooking and breaks down a bit to produce a pleasing texture, that adds great body to the soup. Additionally, it doesn’t hurt that the brown rice also has better nutritional value than white rice. Although you might be tempted to use white rice, know that the white rice would break down and become too mushy; not the greatest texture.
Since the bulk of the “work” is deboning the chicken, you could make this even easier by just using chicken breasts. However, I think, if you have the time/patience, the whole chicken imparts much more flavor.
INGREDIENTS
1 large onion, roughly chopped
4 large celery sticks, cut into 1/4″ slices
3-4 medium carrots, cut into 1/4″ slices
1 whole chicken, 3 1/2 -4 lbs.
1 cup long grain brown rice
1/3 to 1/2 cup flat leaf parsley, roughly chopped
1 Tbs. kosher salt
fresh ground pepper, to taste
3-4 quarts of water
DIRECTIONS
First, combine all ingredients in a 6 quart pot. Then, add the water to the pot, bring to a boil. Occasionally skim off any fat or scum, as it comes to the top. Then, reduce the heat, cover and simmer for an hour.
Remove the chicken from the pot. When it’s cool enough to handle, remove the meat, discard the skin and bones. Then, shred the chicken with two forks and return it to the soup. I think the shredding gives the soup a more pleasing texture than just solid chunks of chicken.
Then, check for seasoning, add more salt and pepper, if needed, add a sprinkling of chopped flat-leaf parsley and serve. This makes quite a bit of soup and worth noting then, that it’s great to stock the freezer with. It then comes in handy when you need a quick lunch, have a sick day or just on a cold day, when a warm bowl of soup soothes the soul.
Quinoa Tabbouleh
This is a wonderful, high protein, vegetarian salad. It works great as a stand-alone lunch or as a tasty and healthy side dish. No worries if it doesn’t all disappear at first serving, because it tastes even better the next day!
INGREDIENTS
1 cup quinoa
zest of 1 lemon
juice of 2 lemons (about 14 cup)
4-5 scallions, thinly sliced, using both white and green parts
fresh mint, chopped, about a cup
flat leaf parsley, chopped, about a cup
1 english cucumber, seeded, quartered and diced
1 pint cherry tomatoes, halved or quartered, depending on their size
1/4 cup extra virgin olive oil
kosher salt and fresh ground pepper
6-8 oz. good feta, diced or crumbled
DIRECTIONS
Pour generous 2 cups of water into a medium saucepan and bring to a boil. Add the quinoa and a teaspoon of salt, cover, lower the heat and simmer for 15 minutes, until the grains are tender. Drain, place in a bowl and immediately add the lemon juice and let cool.
In a large bowl, combine the scallions, mint, parsley, cucumber, tomatoes, olive oil, salt and pepper, to taste. Add the quinoa and mix well. Carefully fold in the feta and taste for seasonings. Serve at room temperature or refrigerate and serve cold.
Kale Salad with Quinoa, Feta, Apple & Dried Cranberries
This is a huge hit every time it’s served. Can easily be done the day before and won’t wilt.
SALAD INGREDIENTS 1/3 cup white quinoa
1/2 cup water
6 cups kale, stems removed, finely sliced, see Notes below
1 large apple, finely sliced (Braeburn, Pink Lady, Fuji)
1/4 cup dried cranberries
1/4 cup walnuts, toasted, coarsely chopped
1/4 cup feta, crumbled
DRESSING INGREDIENTS
3 Tbs. cider vinegar
3 Tbs. extra virgin olive oil
1 clove garlic, minced
1 Tbs maple syrup
2 tsp dijon mustard
1/2 tsp curry powder
salt & pepper to taste
DIRECTIONS Rinse and drain the quinoa, add the water, bring to a boil, cover, reduce the heat, simmer for about 15 minutes until the water is absorbed. Turn the heat off and let sit, covered, for 5 minutes.
Meanwhile, toast the walnuts at 350º for 6-8 minutes, set aside to cool.
Combine the sliced apple, kale, quinoa, dried cranberries, walnuts and feta together.
Next, mix the vinegar, oil, garlic, maple syrup, dijon, curry, salt and pepper. Finally, whisk well to combine and pour over salad to taste. Let sit for a few minutes to let the flavors meld. This is also great the next day!
NOTES
An alternative to slicing the kale, you can pulse it, in batches, in a food processor to make smaller pieces. Also, once you have sliced/chopped the kale, massage it with your hands. This helps to tenderize and break down the kale which can be rather “chewy”.
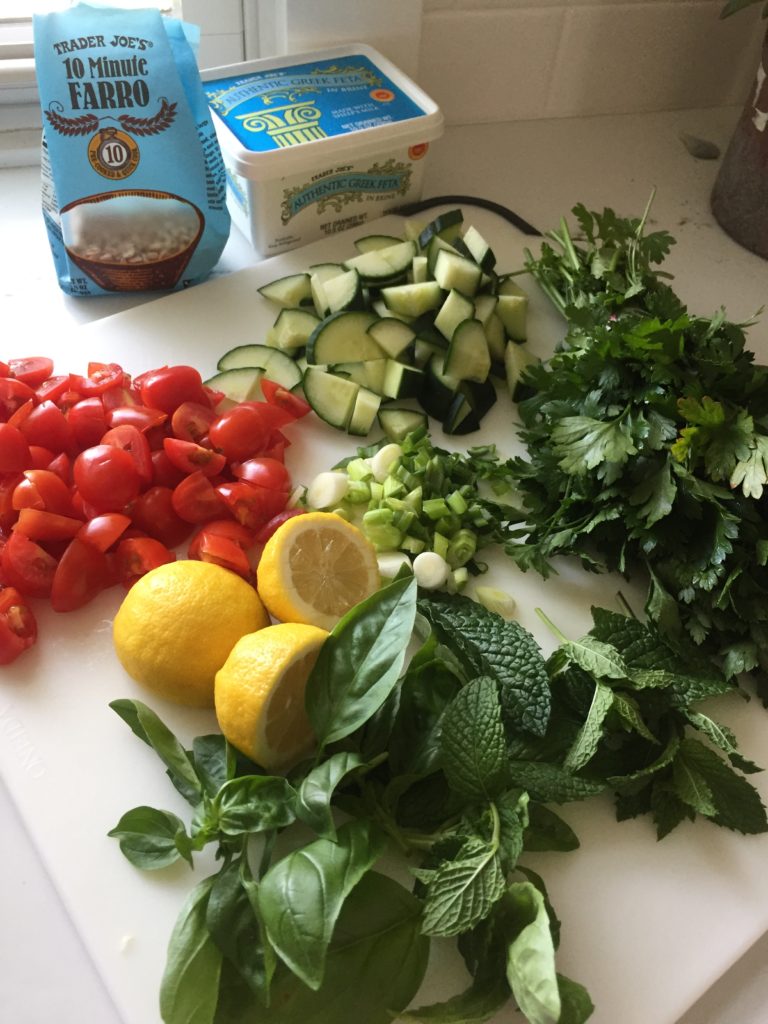
Herbed Farro Salad
Quick, delicious and very healthy. The ingredient amounts can vary depending on your preferences or what you have on hand.
INGREDIENTS 1/3 cup farro, cooked juice & zest of a lemon 1 bunch flat leaf parsley, chopped 1/4 cup fresh mint, chopped handful fresh basil, chopped 1 cup of chopped tomatoes 4-5 scallions, chopped 1/3 english cucumber, quartered then chopped 5 oz. feta, preferably in brine kosher salt & fresh ground pepper, to taste 1/4 cup (or less) extra virgin olive oil 1 cup arugula, or more to extend servings
DIRECTIONS First, cook the farro, according to the package directions. When cooked and tender, transfer to a large bowl. Then, immediately pour the lemon juice over the farro while it’s still warm. Let the mixture sit until somewhat cooled or a bit longer, this allows the farro to absorb the lemon. Add the next 7 ingredients to the bowl, mix well and then add salt & pepper to taste. Refrigerate for an hour or two to fully marinate. When about ready to serve, add the olive oil, toss well, taste and adjust seasonings. It should taste very lemony, if it doesn’t add more lemon juice. Make a bed of the arugula and spread the marinated salad over it, serve immediately. This looks terrific in a long oval or oblong serving dish, as shown in my photo.
This is great as a hearty lunch or a wonderful side dish. Especially good for a crowd at your next barbecue.
NOTES The ingredient amounts can vary depending on your preferences or what you have on hand. Toasted walnuts are also a nice addition.