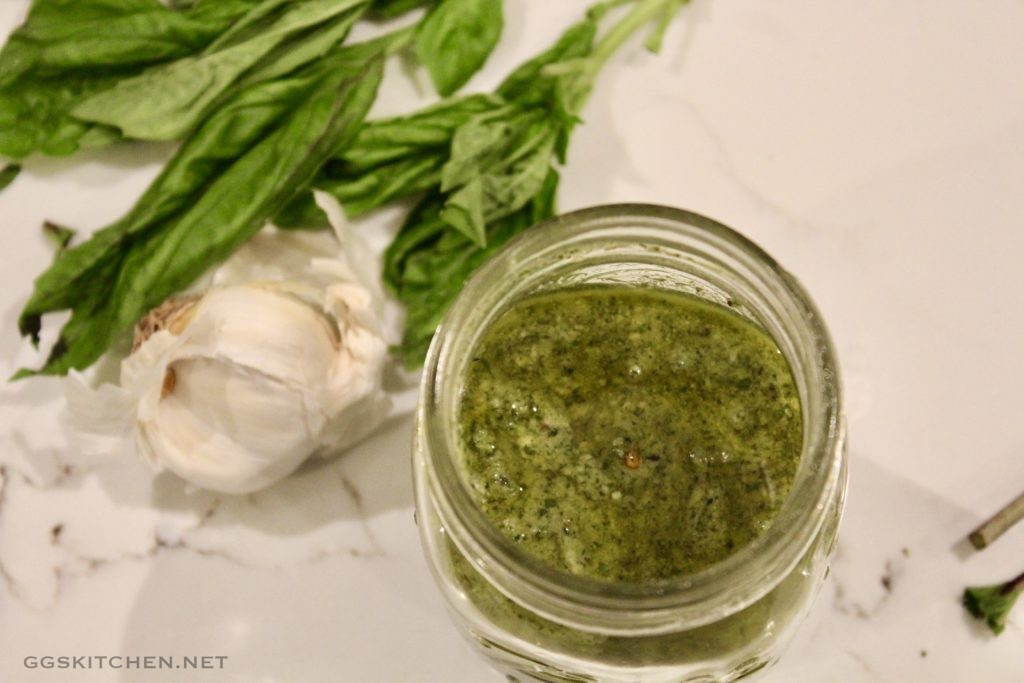
Come mid-summer, when you have an overabundance of fresh basil, dive into this simple and delicious recipe. Pesto is yummy on just about anything, from pasta, to sandwiches, salads and of course, pizza.
INGREDIENTS 1/3 cup walnuts or pine nuts 2 large garlic cloves, roughly chopped 2 cups gently packed fresh basil leaves 1/2 tsp. salt 1/4 tsp. ground black pepper 2/3 cup extra virgin olive oil 1/2 cup freshly grated Parmigiano-Reggiano
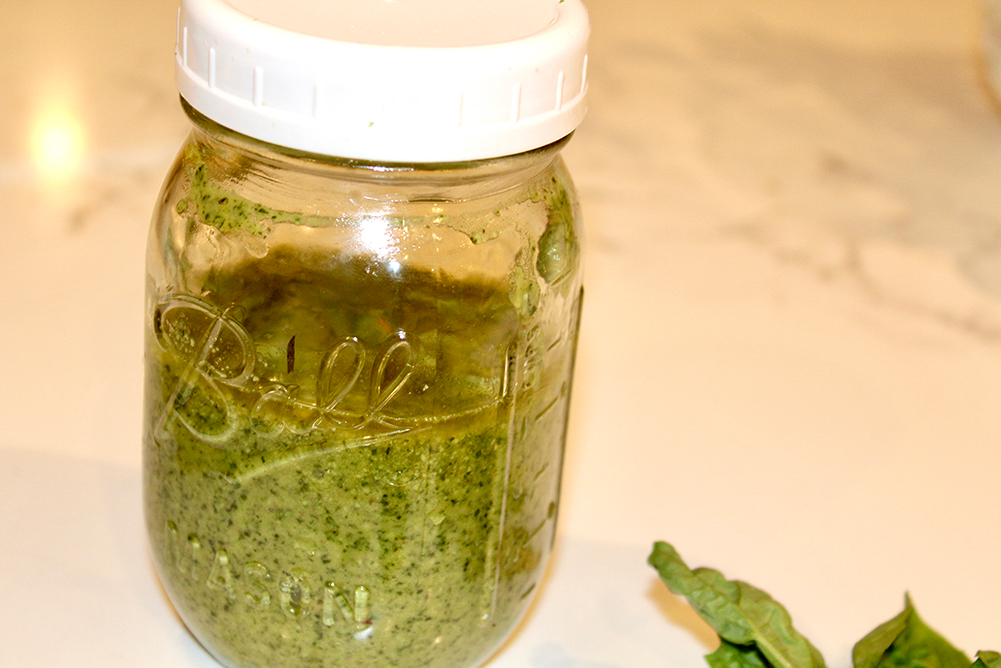
INSTRUCTIONS Place the walnuts and garlic in the bowl of a food processor fitted with a steel blade. Process until coarsely chopped, about 10 seconds. Add the basil leaves, salt, and pepper and process until mixture resembles a paste, about 1 minute. With the processor running, slowly pour the olive oil through the feed tube and process until the pesto is thoroughly blended. Add the Parmesan and process a minute more. Use pesto immediately or store in a tightly sealed jar or air-tight plastic container, covered with a thin layer of olive oil (this seals out the air and prevents the pesto from oxidizing, which would turn it an ugly brown color). It will keep in the refrigerator for about a week.
NOTES Pesto can also be frozen, in an airtight container, for up to 6 months. Try pouring the pesto into an ice cube tray and freeze. Once it’s frozen, remove the pesto cubes from the tray and put them in a resealable plastic bag or airtight container. You can add the frozen or defrosted cubes to soups, pasta dishes, sandwiches, potatoes and more.
Spring Pea Salad
Looking for a wonderful salad/vegetable to kick off spring? Well, you’ve just found it and this is as beautiful as it is tasty. This is a mildly tweaked version of a Cook’s Country recipe, from 2020. I think it’s a wonderful cross between a salad and a vegetable. The two of the three vegetables are quickly blanched to enhance the green and still maintain their crunch. Add in some sliced radishes, fresh mint and a light, refreshing dressing and you have a match made in heaven! Try pairing this beauty with almost any grilled meat, however my personal preference is grilled lamb chops. Not only do the veggies go well with lamb, but the mint does as well. It really is a wonderfully refreshing combination that is a true crowd pleaser. An added bonus, it can be made well ahead and still maintain its wonderful crunch. Just don’t fully dress it until ready to serve.
INGREDIENTS Dressing 1 garlic clove, minced 2 Tbs. lemon juice 1/4 cup extra-virgin olive oil 1⁄4 cup plain Greek yogurt 2 tsp. Dijon mustard 1⁄4 tsp. pepper
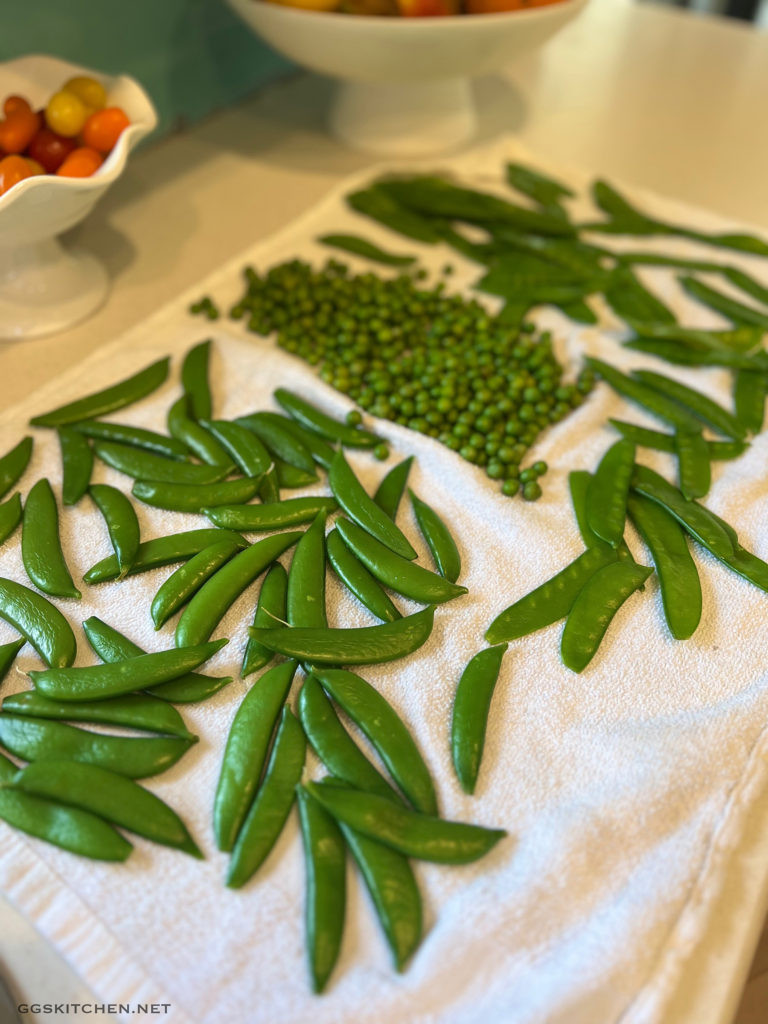
Veggies 4 oz. sugar snap peas, strings removed 6-9 oz. English peas (about 3⁄4 cup) 4 oz. snow peas, strings removed 1 Tbs. extra virgin olive oil 1 tsp. lemon juice pinch kosher salt 2 oz. baby arugula (about 2 cups) 5-6 radishes, sliced into thin half moons 1/2 cup fresh mint, roughly chopped
DIRECTIONS First, in a small bowl, whisk the garlic and lemon juice, set aside to mellow for about 15 minutes. Then, add the remaining dressing ingredients to the garlic, lemon mixture, whisk to combine and set aside.
Meanwhile, in a medium saucepan, bring 1 quart of water to a boil. Then, make an ice bath, for the blanched veggies, by filling a large bowl with ice and water, then place a colander in that bowl.
Once the water starts to boil, add 1 tablespoon of salt to the water. Then add the snap peas and cook just until bright green, but still crisp, no more than a minute. Using a skimmer or a slotted spoon, transfer snap peas to colander set in the ice bath. Swish them around for about a minute, until fully cooled and place on a clean kitchen towel to dry. Next add the English peas to the boiling water and do the same. Transfer to the colander, then to the towel for drying. Repeat this with the snow peas as well, however leave those in only long enough to brighten the color, about 10-12 seconds. If they stay in too long, they will not stay crisp. The sugar snap peas should be cut on the bias, into 1/2″ pieces. The snow peas should also be sliced on the bias, but very thinly. Don’t fuss over cutting them exactly, they will still be delicious even if they’re not perfect.
When all the peas are blanched, cooled, and dry, transfer to a large bowl and add the radishes and arugula. Finally, when ready to serve, add a teaspoon of lemon juice, a pinch of salt, the 1 tablespoon of extra virgin olive oil and toss to combine. Then, spread a portion of the dressing over the bottom of a large shallow bowl or serving platter. I like my salad lightly dressed, so I don’t use all of the dressing at once. You can always add more, but you can’t take it away! Then, place the arugula mixture on top of the dressing. Serve immediately, and make sure to scoop up some of the dressing when you do. Plating the salad this way, tossed with the lemon juice and olive oil, on top of the creamy dressing maintains the vibrant colors.
Plating the salad—tossed first with lemon juice and olive oil—on top of the creamy dressing ensures that it stays vibrant.
NOTES If you can’t find fresh English peas, you can definitely substitute 3⁄4 cup of thawed frozen peas and there is no need to blanch those. Definitely don’t use canned, they would be too soft. Also, if your local market happens to carry Pero Family Farms vegetables, you’re in luck. They have each of the three fresh peas in small bags, they’re the perfect size needed for this recipe.
Additionally, you can obviously increase or decrease the amount of each vegetable, depending on your tastes or availability in your area. Although I do strongly recommend a combination, since it just makes it a more interesting salad.
Roasted Red Pepper Spread
You have just stumbled upon your next new favorite recipe and it couldn’t be easier. All you need is about 10-15 minutes and you’re ready to go with this one. Honestly, it is addictively tasty and is also pretty darn healthy. Although this is delicious with crackers, crostini or crudité, it also works as an incredibly flavorful condiment. I’ve used it in quesadillas, as a flavor booster in sandwiches and I’ve even been known to just swipe a spoonful, it’s that yummy. A definite bonus with this recipe is that all ingredients are pretty much pantry staples, making for a great last-minute appetizer.
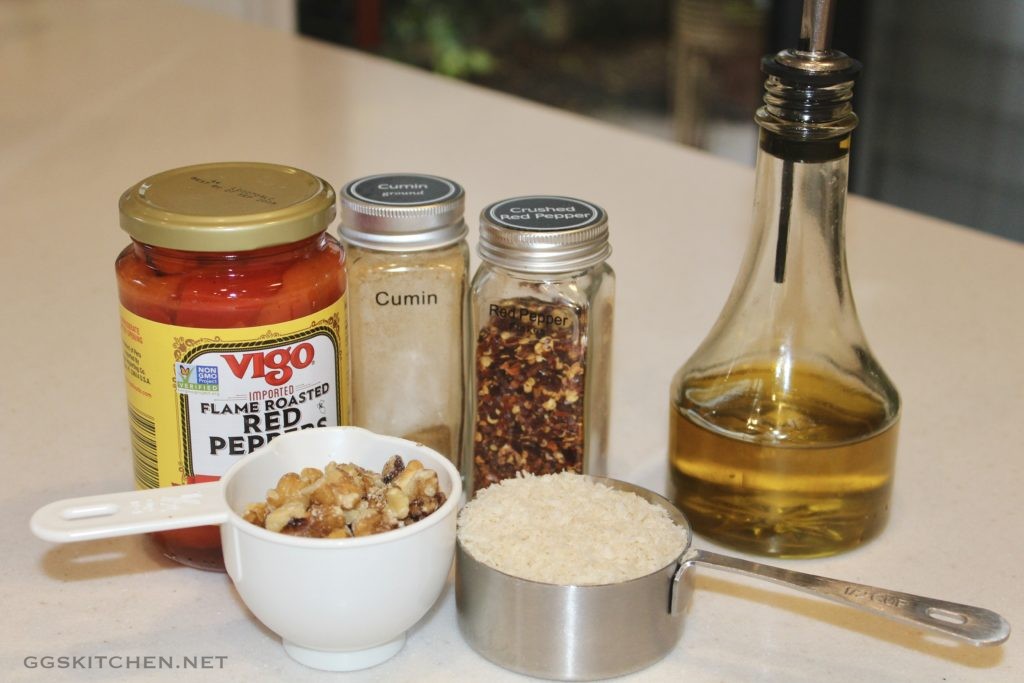
pretty much all you need…oops, garlic & lemon juice too!
INGREDIENTS 3 Tbs. olive oil 1/2 cup walnuts 1/2 panko bread crumbs 1 garlic clove, minced or grated 12 oz. jar roasted red peppers 1 Tbs. lemon juice 1/2 tsp. kosher salt 1/2 tsp. ground cumin 1/4 tsp. fresh ground black pepper 1/4 tsp. red pepper flakes
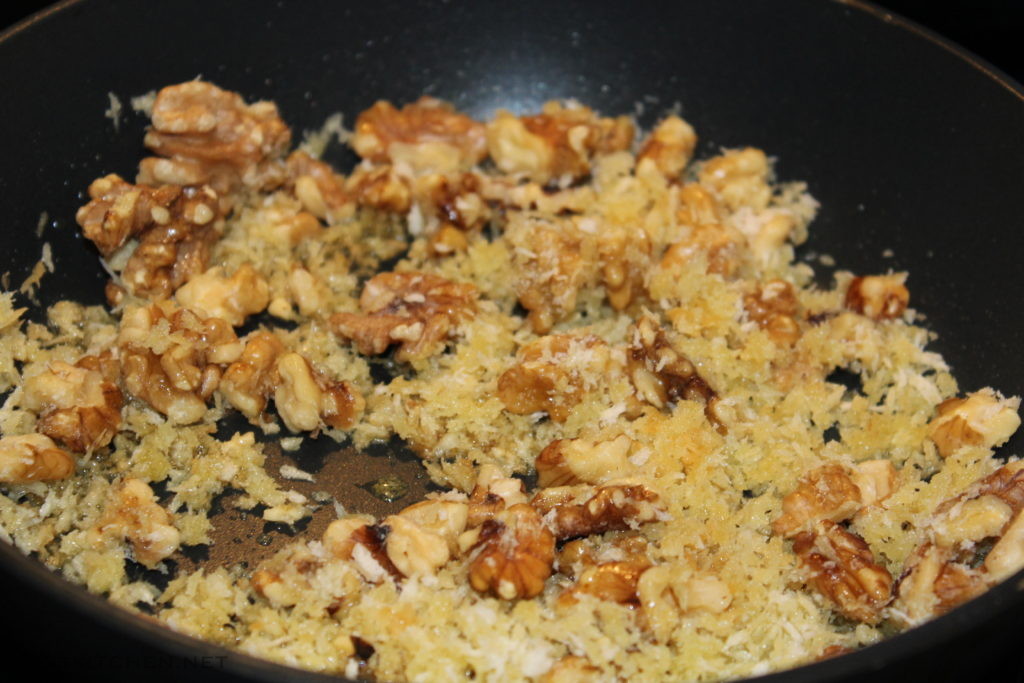
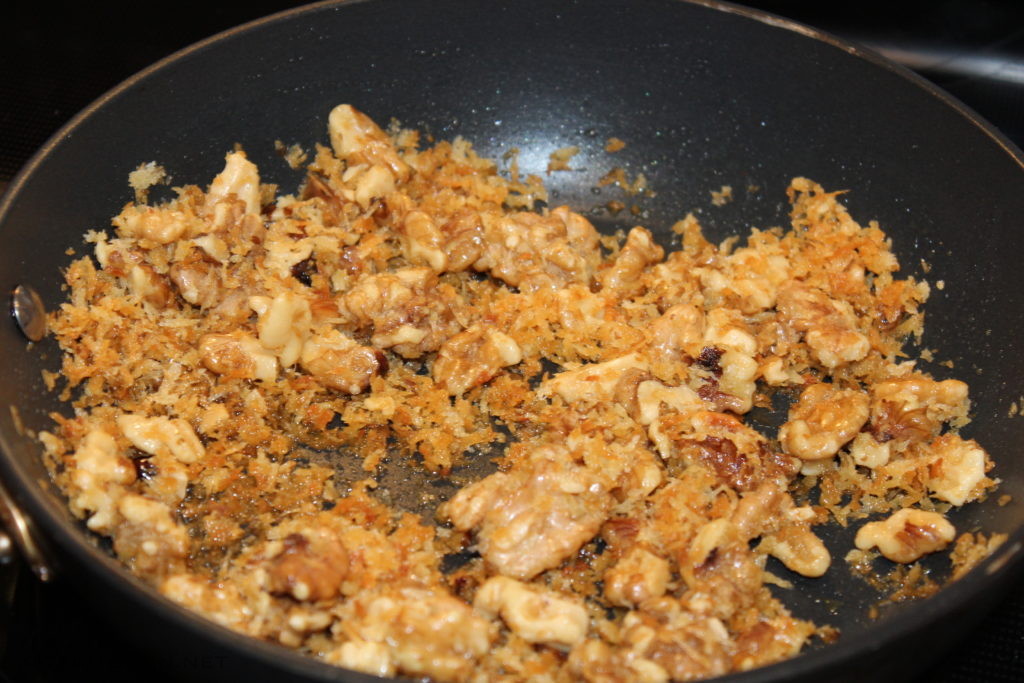
DIRECTIONS In a small skillet, over medium-low heat, add the first 3 ingredients and toast until the panko is a nice golden brown. Then, take off the heat and immediately add the garlic to the warm ingredients. Stir to combine and set aside to briefly cool.
before toastingafter toasting
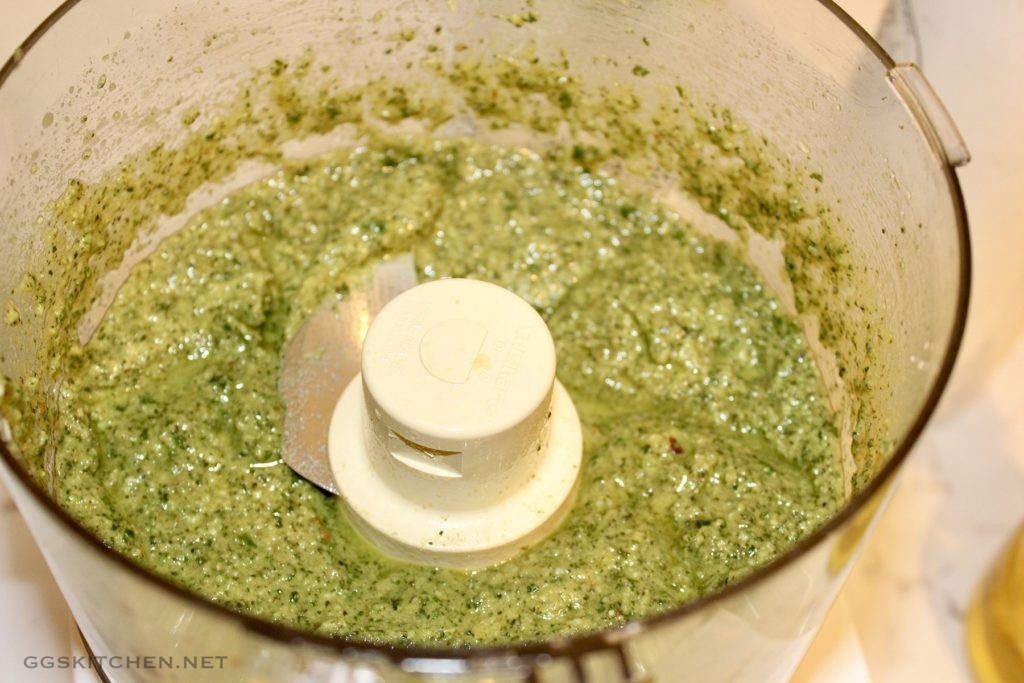
Next, drain the peppers and add to a food processor. Add the remaining ingredients, including the cooled walnut panko mixture. Finally, pulse the mixture, to your liking. I prefer a little texture with mine, but you may like it smoother. The decision is yours, go with the texture you prefer.
my preferred consistency…pulse longer if you prefer it smoother
serve with crackers, crostini or crudités
Farmer’s Market Vegetable Salad
This is a tasty use of your farmer’s market produce. I had a little of this, a little of that, left over from my weekly farmer’s market trip and was trying to figure out how to use them. Then, I decided to put them all together, I added a simple dijon vinaigrette, a few herbs and voilá, an instant, beautiful and healthy side dish!
INGREDIENTS
2 ears of corn, blanched, cut off the cob
a handful of green beans, blanched and cut in 2″ pieces
4 small new potatoes, cooked and quartered
about a half pint of cherry tomatoes, halved
1⁄4 cup lemon juice
1 Tbs. Dijon mustard
1 cup extra-virgin olive oil
kosher salt and fresh ground pepper, to taste
handful of parsley, chopped
handful of basil, chopped
DIRECTIONS
First, combine the first four ingredients in a bowl and set them aside. Next, combine the next four ingredients in a small jar, shake well until completely emulsified. Then, pour a portion over the vegetable mixture and toss well to combine. I tend to have a good amount of dressing left over, because I prefer my salads on the dry side. Although I like it drier, use your best judgement when deciding how much dressing to add. Additionally, if you dress it earlier in the day, you may need to add a little more to moisten things up, just before serving.
Finally, add the chopped herbs, toss well to combine and serve. This tastes equally good whether served cold or at room temperature, therefore making it a great choice for a picnic or big gathering.
NOTES
I have given you the recipe as I made it, you can adapt it and vary it, depending on your “leftovers”.
All things considered, this is a great dish for a crowd. You can just increase the quantities of vegetables and herbs (dill is a nice addition as well). Also, no worries if you have leftovers because each of these vegetables holds up well and is equally good the next day.
Roasted Butternut Squash and Kale Salad
Don’t say it, I understand, you don’t really like kale. Honestly, I get that. I was not a big fan either, I was just trying to be a bit more healthy and give it a fair shake. Additionally, my husband, definitely was not a kale fan. When he recently said “I really liked that kale thing, you should make it again”, I was shocked.
So, this is for all of you that want to click away and say “no thanks”. Please, just give it a try, you too might be surprised. It’s healthy, it’s hearty, it’s delicious and pretty darned easy to pull together. Another big plus, this stands up well for a couple of days and actually tastes better as it “ages” and the flavors have a chance to meld.
INGREDIENTS 1 small butternut squash, peeled, seeded, and diced into 1/2-inch cubes 2 Tbs. olive oil kosher salt and fresh ground pepper 1 cup dry Israeli (pearl) couscous, cooked 2 cups, thinly sliced kale leaves 1/3 cup dried cranberries 1/3 cup chopped walnuts, lightly toasted 2 oz. goat cheese, crumbled
VINAIGRETTE 3 Tbs. cider vinegar 3 Tbs. extra virgin olive oil 1 small clove garlic, grated 1 Tbs. maple syrup 2 scant tsp. dijon mustard salt & pepper to taste
DIRECTIONS Preheat oven to 425°F First, place the cubed butternut squash on a rimmed baking sheet, sprinkle with the olive oil, kosher salt, fresh ground pepper and toss to combine. Then, bake for 25-35 minutes, tossing occasionally, until tender and slightly browned. Next, remove the squash from the oven and set aside to cool for a bit.
Meanwhile, combine the vinaigrette ingredients and either whisk to combine in a small bowl or use a covered glass jar and shake to combine well. Preferably, make this a little bit ahead to let the flavors mingle.
Next, place the sliced kale into a bowl, drizzle with a little olive oil (maybe a teaspoon) and a half teaspoon of salt. Then, dig in (with clean hands of course!) and massage the kale for a few minutes. I know this sounds strange, but it actually softens the kale a bit, which gives it a better texture and it does make a big difference.
Now add the, couscous, cranberries, and walnuts to the kale and toss well to combine. Then, when the squash has cooled a bit, add that to the bowl and add most of the vinaigrette (because I prefer a dryer salad, I always hold some out to add later, if needed), toss well to coat the kale. Next, add the crumbled goat cheese and toss lightly to combine, trying not to break up the goat cheese. Finally, don’t forget to give it a taste, check the flavors and add more salt, pepper or dressing as needed.
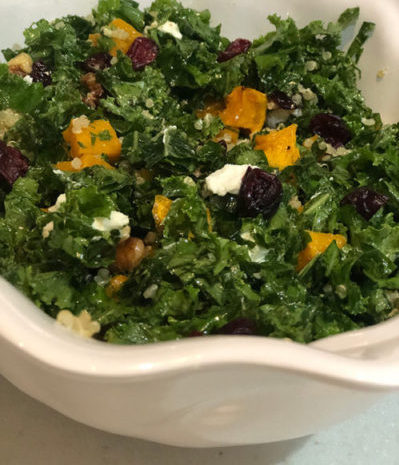
NOTES Additionally, you can switch up the grains, as you wish, depending on what you have on hand. I have tried this with quinoa (see below) and with barley, instead of the couscous and honestly, all three are delicious. Since the quinoa has a good amount of protein, it makes a nice vegetarian choice.
One other note, some people actually put the kale in a food processor and pulse it to break down the leaves into smaller pieces. This has a similar result to the massaging and either technique is fine. However, if you do choose the food processor option, be very careful, you can quickly go from small pieces, to mush if you process it too much.
Lastly, a great swap-out to the dried cranberries is dried cherries. This is a delicious alternative, Trader Joe’s has them and they are right next to the cranberries. They do tend to be larger than the cranberries, so I would chop them a little before using. I first tried them when they were out of the cranberries and I was quite surprised how tasty they were.
kale salad with quinoa
Heirloom Tomato Salad Variations: Enhancing Flavor and Presentation
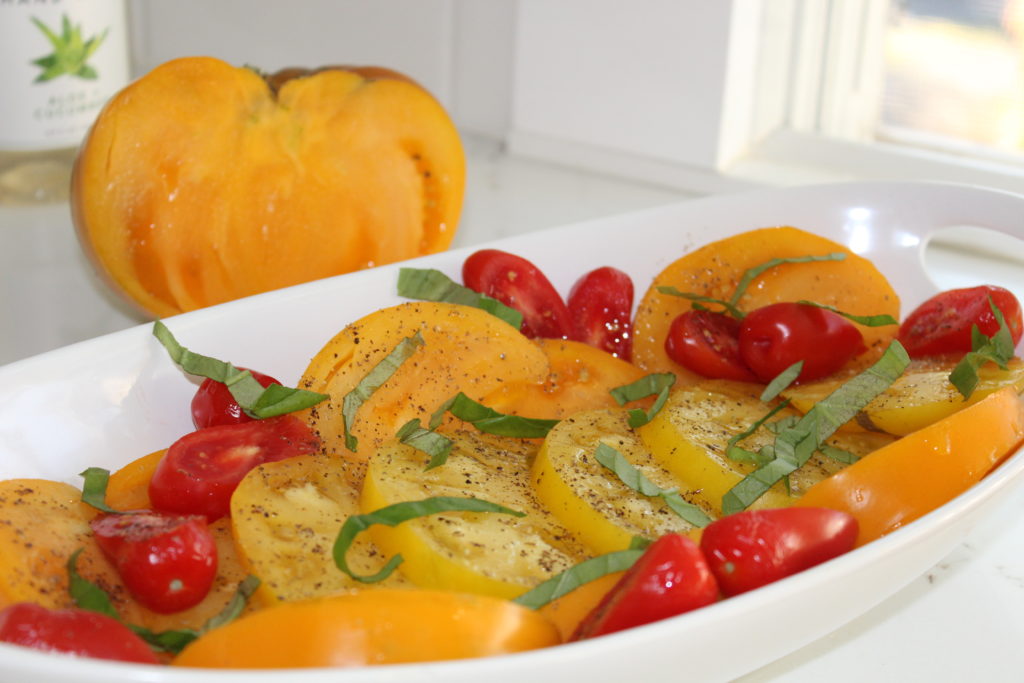
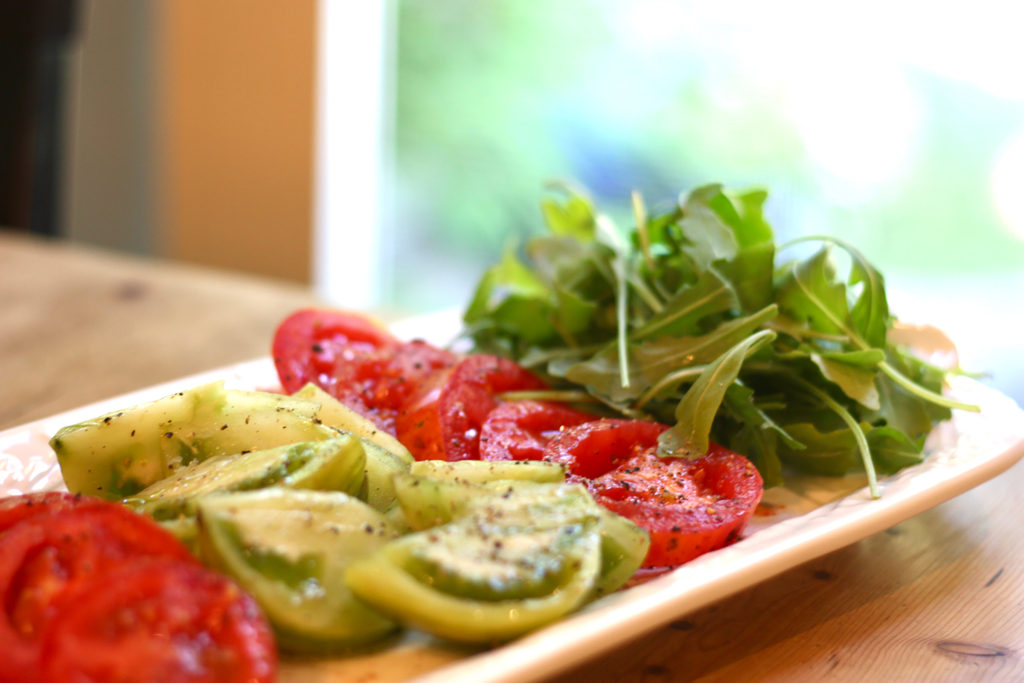
Heirloom tomatoes should always be the star and simple is always better. You can slice or quarter them. Drizzle with good olive oil. Sprinkle with flaky salt, fresh ground pepper, and a sprinkling of juliennéd basil. That’s the basic formula and trust me, everyone would be quite happy at just that. However, a few additions can elevate it to a new level. They make a significant difference in both flavor and presentation.
Here are a few of my favorites.
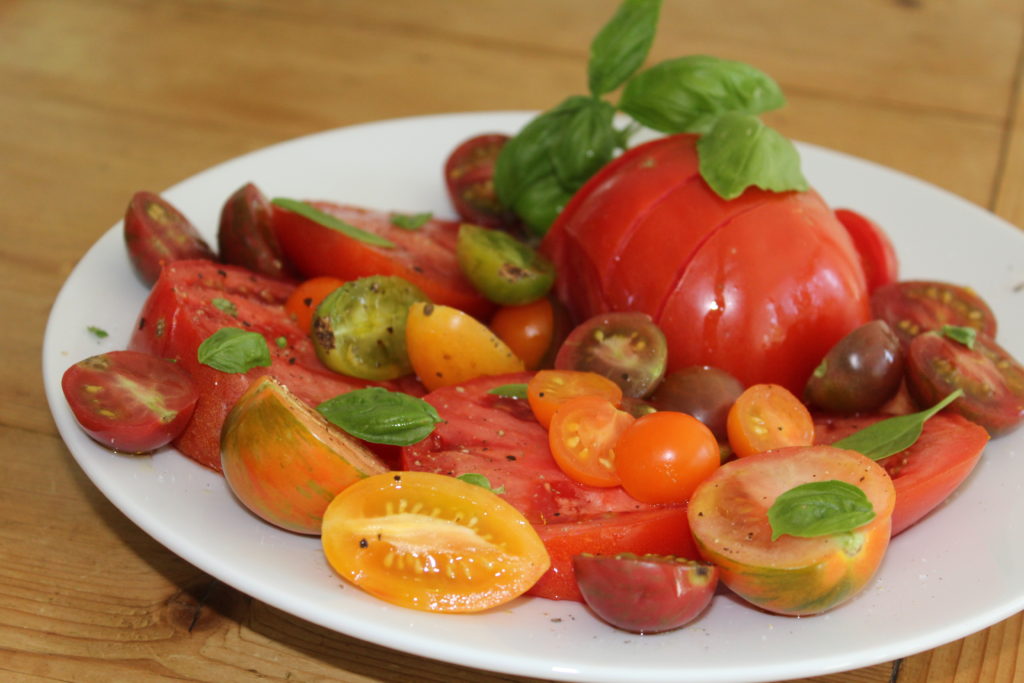
Basic, but still yummy!
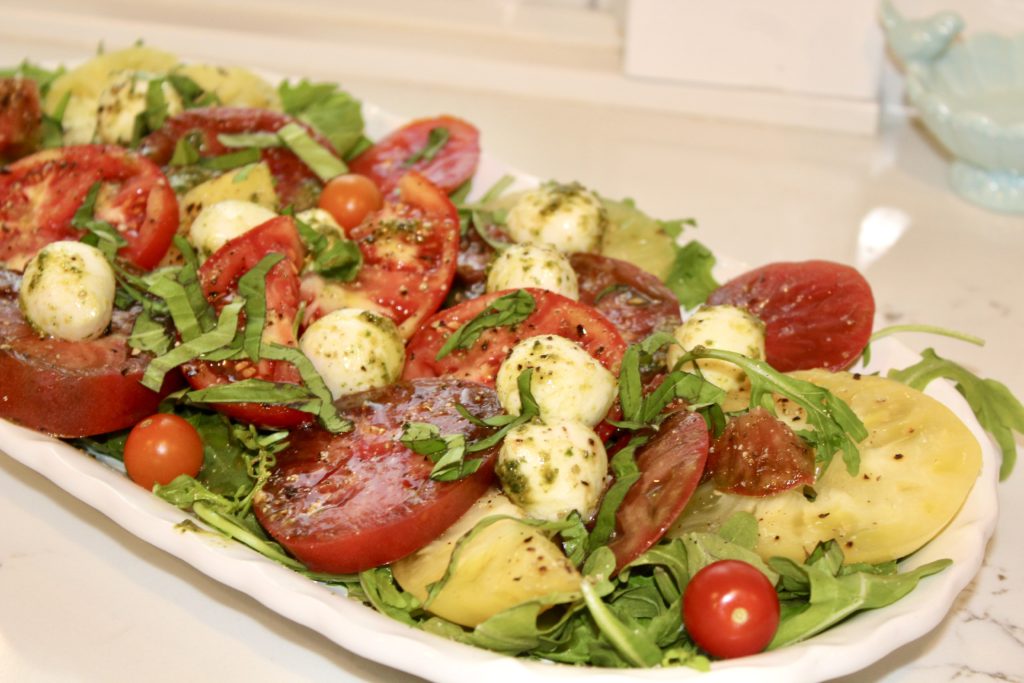
So, you have a collection of gorgeous heirlooms, different colors, different sizes. First, slice and quarter them, mixing the colors and shapes. Then, add fresh mozzarella, burrata, or some crumbled gorgonzola would work well too. Just tear or slice the cheese and sprinkle it over the tomatoes. Next, if you have some pine nuts or walnuts, toast them in a dry skillet. Just heat them on low until they’re fragrant. Then sprinkle those on as well. Additionally, a drizzle of pesto or some basil oil would be a wonderful option.
Here, heirlooms sharing space with lemon poached chicken and avocado.Another simple presentation.
Always include fresh basil. Use good olive oil, fresh ground pepper, and a pinch of good flaky salt. Be careful not to overdo the additions; less is more, keep it simple, and let the tomatoes shine.
Here I used mozzarella balls, tossed with pesto and served over some arugula.As simple as it gets.
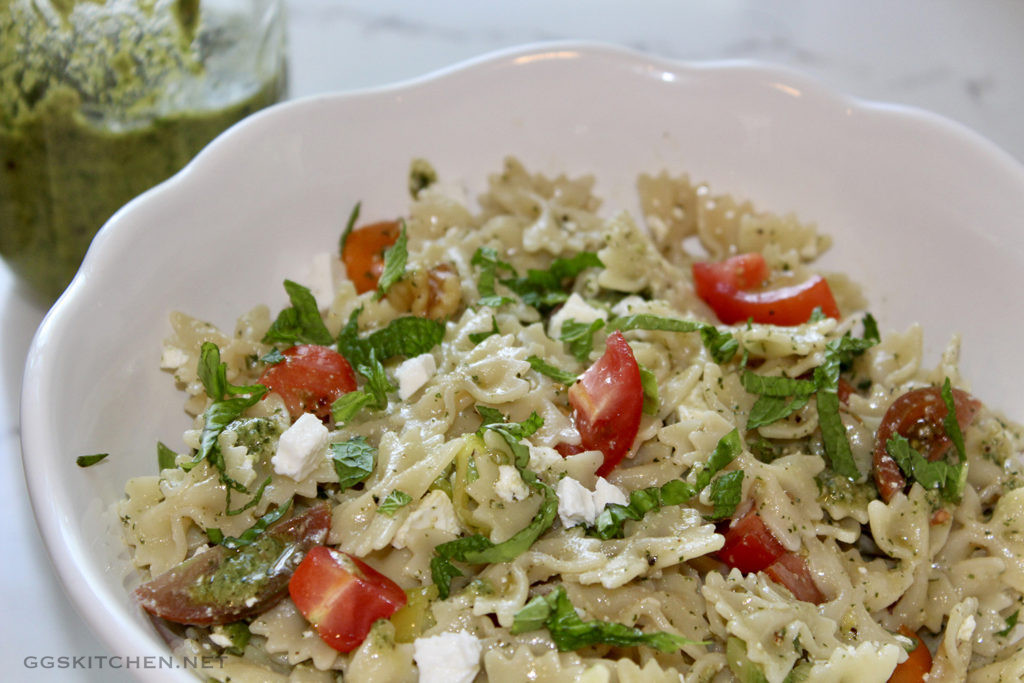
Basil Mint Pesto
Just in time for your next barbecue. Although this is not a traditional pesto, it is simple, delicious, and versatile. That’s a great combination, it’s a snap to make and a great reason to always have it on hand. Given it’s versatility, it can help you put a meal together in no time. Think grilled cheese, think pizza, think flavor booster for a good soup or a wonderful pasta salad (shown below). You can definitely freeze this, but I dare say that you won’t need to.
INGREDIENTS 1/2 cup walnuts 1/2 cup fresh basil, 1/2 cup fresh mint 1/2 cup freshly grated Parmesan, plus more for garnish 1 tablespoon red wine vinegar small garlic clove, grated Pinch of crushed red pepper 1/2 cup extra virgin olive oil kosher salt and fresh ground pepper
DIRECTIONS First, lightly toast the walnuts in a dry skillet for a few minutes, until fragrant and let cool slightly. Next, put the walnuts, basil, mint, parmesan, vinegar and crushed red pepper into your food processor. Pulse until the ingredients are combined but still chunky. Then add in the olive oil and pulse briefly to combine. Finally, taste and season as needed, with kosher salt and fresh ground pepper. The parmesan is a bit salty on its own, so be careful with how much salt you add. That’s it, your done!
NOTES The options for using this are too numerous to list. Although the most obvious one is as a sauce over pasta, don’t stop there. Try it over grilled fish, drizzled over a tomato salad or as a spread on a sandwich or grilled cheese. Store in an airtight container. Also, take note, that this doesn’t make a huge quantity, so double it if you wish. Personally, `I find this a more manageable quantity.
Vegetable Cream Cheese
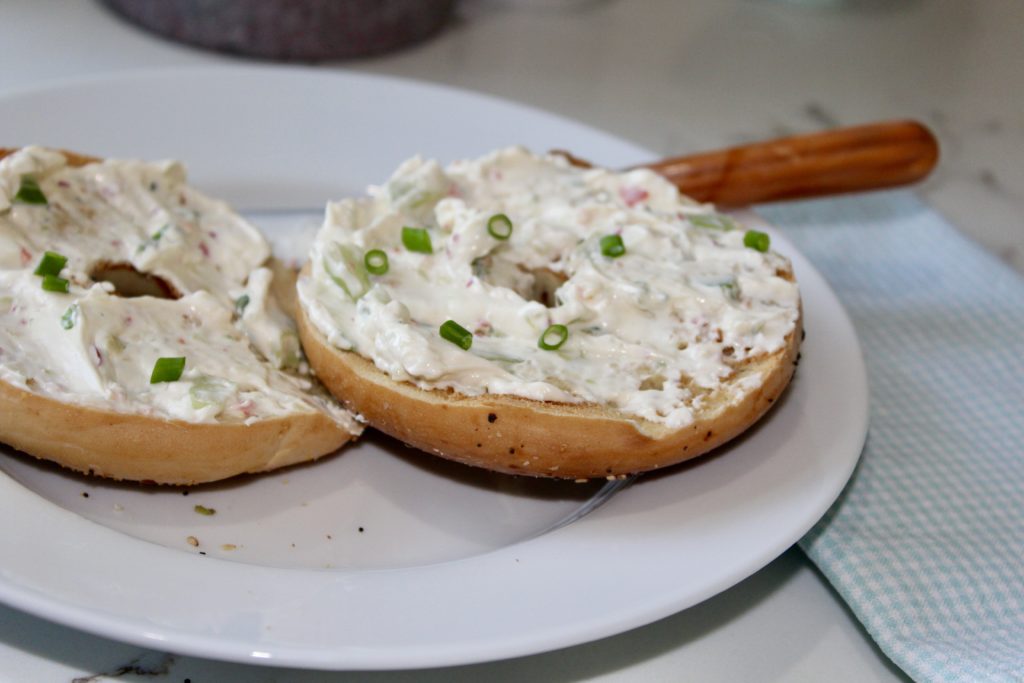
Looking for an easy, basic and tasty appetizer? Look no further! This recipe is a snap to put together and quite versatile as well. Use it as a spread for crackers, as a dip with crudité and if you have any leftover, try it on your bagels in the morning. The choice is yours, you can’t go wrong and it is delicious for all three.
INGREDIENTS 4-5 radishes, halved 4-6 scallions, reserve a few for garnish 1 stick celery 1/2 bell pepper, seeded (I prefer red, hence the pink tint) 1/4 hothouse cucumber, seeded 8 oz. cream cheese, room temperature, cubed pinch kosher salt and fresh ground pepper, to taste 2 Tbs. sour cream or greek yogurt, if needed to thin mixture
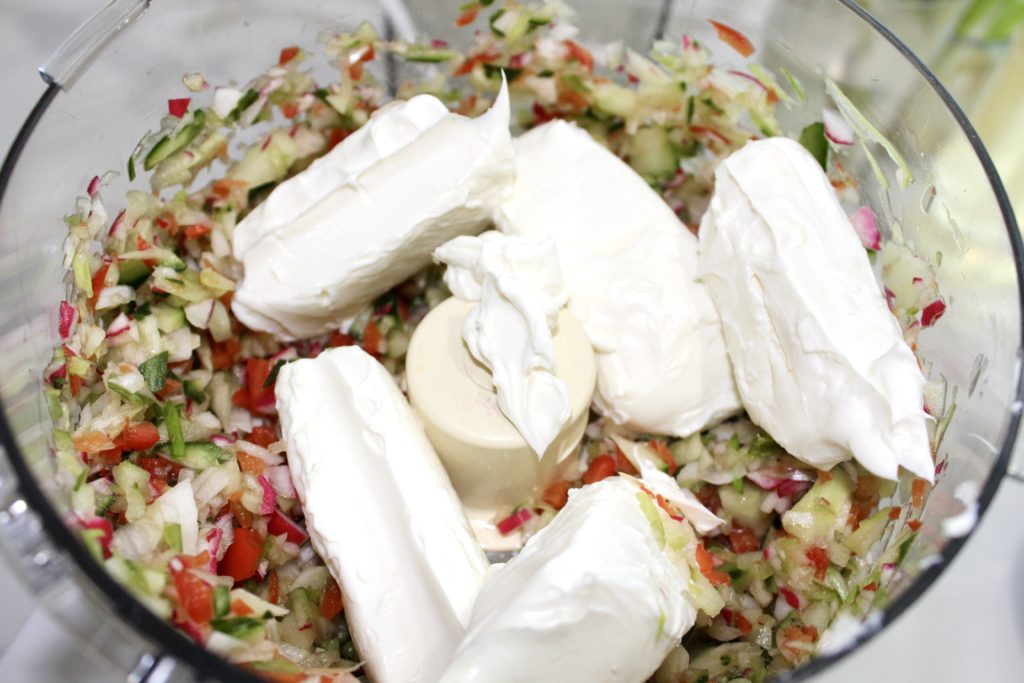
DIRECTIONS First, roughly chop each of the first five ingredients. This is merely to get them ready for the food processor, because it’s easier to pulse them when they are in smaller pieces.
With the metal blade in place, add all the vegetables to the bowl of a food processor. Pulse until roughly chopped. Don’t overdo the pulsing, unless of course you like a smoother texture. Personally, I prefer a bit more texture; you do what works for you.
Next, add the cream cheese and pulse until combined, but not too smooth. Alternatively, you do the final mixing by hand, as long as the cream cheese is soft enough. That will maintain the thick texture a bit better. Do make sure that the cream cheese is room temperature, it makes the mixing so much easier. If it seems too thick for you, add the yogurt and/or sour cream.
Season with kosher salt and fresh ground pepper, to taste. Finally, just cover and refrigerate to allow the ingredients to meld. Serve with crudité, crackers, and/or some breadsticks.
NOTES This tends to be a bit thick, so if you prefer a thinner consistency to use as a crudité dip, then add the yogurt and/or sour cream. Alternatively, instead of adding yogurt, you could just add a little more cucumber, which is quite liquidy and would loosen it up to dip consistency. Be creative, there is no wrong way and don’t be afraid to swap out a few things if you don’t have them or don’t like them. That being said, I have made this oodles of times, as written and it is a delicious winner.
Summer Salads
Summer is in full swing and I thought I would share some of my favorite, go to, salads. These are usually done in the morning, so you can enjoy the day. And, I actually prefer making it early because the flavors improve with a few hours of marinating. Whether you serve these as a stand alone lunch or as a side for a barbecue, it matters not…either way, they will be a hit.
Also, feel free to be creative and flexible with the vegetables. A little more of this or less of that, is not going to matter. My only caution is, do not go lightly on the herbs, they make a huge difference in the final dish. Additionally, a final squeeze of lemon or lime juice (whichever is used in the recipe) is always a welcome addition.
Sweet Potato Oven Fries
Looking for a quick, healthy side dish? This just might do the trick. I love the simplicity of this, the preparation is about as minimal as could be and the tasty reward is significant. Try this as a yummy side with any grilled meat or poultry. However, my favorite is alongside a nice juicy grilled steak.
INGREDIENTS 2-3 sweet potatoes olive oil kosher salt fresh ground black pepper cayenne pepper, to taste 1-2 Tbs. pure maple syrup
DIRECTIONS Preheat oven to 425º First, wash and scrub the potatoes. Next, cut the potatoes in half, lengthwise and then cut each half into three or four lengthwise wedges. Place the wedges on a rimmed baking sheet, sprinkle lightly with the olive oil. Then add the salt, black pepper, cayenne pepper, maple syrup and toss to coat thoroughly.
Place into the preheated oven and roast for about 20-30 minutes, turning once or twice to ensure even browning. Because all ovens are different, check for doneness with a fork, it should be easily inserted. If it feels too firm, leave them in a bit longer. That’s it…serve immediately.
NOTES Although this is my favorite, feel free to be more adventurous and use different spices or fresh herbs. You could replace the maple syrup with a tablespoon or two of brown sugar. I have tried this with both fresh rosemary and fresh thyme and loved it.