Pasta and Bean Soup

In the Italian world, this is better know as Pasta e Fagioli. Regardless of what you call this, it is a wonderful, hearty soup, that takes very little time to put together and tastes like you have spent hours making it. Needless to say, this is recipe that I always want to have in my repertoire. Tasty and not time consuming…how do you not love that? Ultimately, this is an excellent recipe and is authentic, quick and quite delicious. Please give it a try and let me know how you like it.
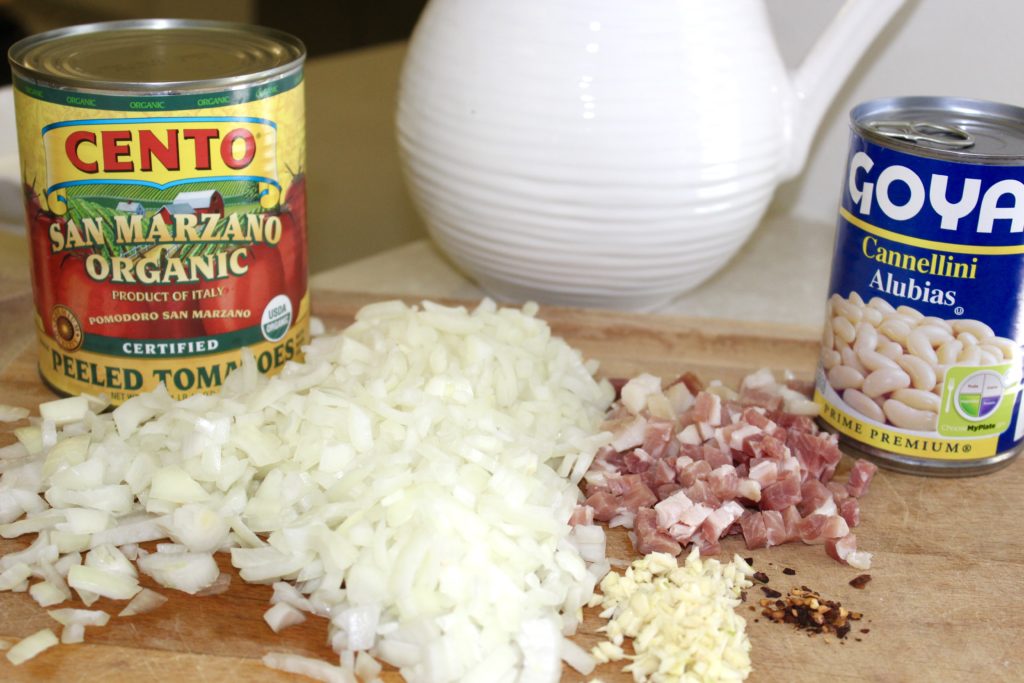
INGREDIENTS
1 cup canned white kidney beans (small white northern beans, navy beans, all work here…your choice)
2 Tbs. extra virgin olive oil
2 oz. pancetta, minced
1 yellow onion, finely chopped
2 clove garlic, minced
2 1/2 cups San Marzano whole tomatoes, hand crushed
pinch of red pepper flakes or more, if you like a good kick!
kosher salt and fresh ground pepper, to taste
4-6 cups chicken stock
2/3 cup (7 oz.) orecchiette, ditalini or other small dried pasta
freshly grated pecorino or Parmesan cheese
parmesan rind, if you have one in the freezer

pasta fagioli

DIRECTIONS
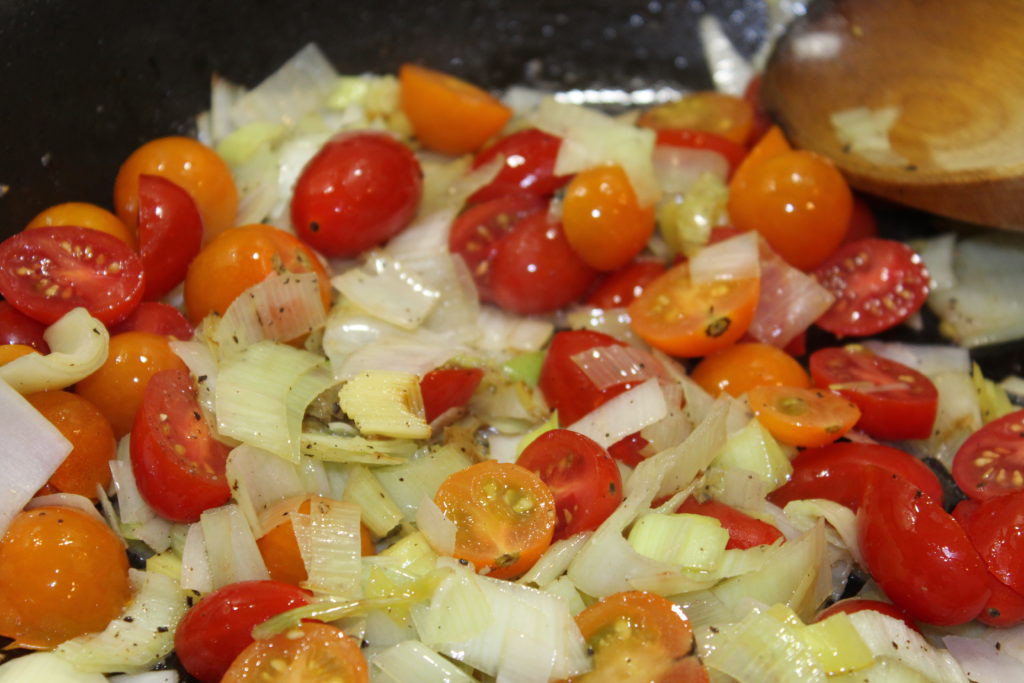
First, in a dutch oven over medium-low heat, warm the olive oil. Then, add the pancetta, onion and garlic to the pan and sauté slowly, stirring until the onions are translucent, about 10-12 minutes. Next, add the tomatoes, red pepper flakes, and salt & pepper to taste.

Then, simmer for about 20 minutes. Do take the time to do this 20 minute simmer, as a result, it really concentrates the flavors, gives the soup depth and that is what you want for a tasty, end product.

Next, add the beans and stock (add more stock if you prefer a soupier consistency) and then, simmer for another 30 minutes. Above all, do take the time for the simmering, it definitely makes a big difference in the final flavor.

Then, add the pasta to the soup and simmer until the pasta is done, about 10-12 minutes. At the same time, add the parmesan rind, if you are using it. he timing here depends on the pasta shape and make sure you check the directions on the pasta that you choose.

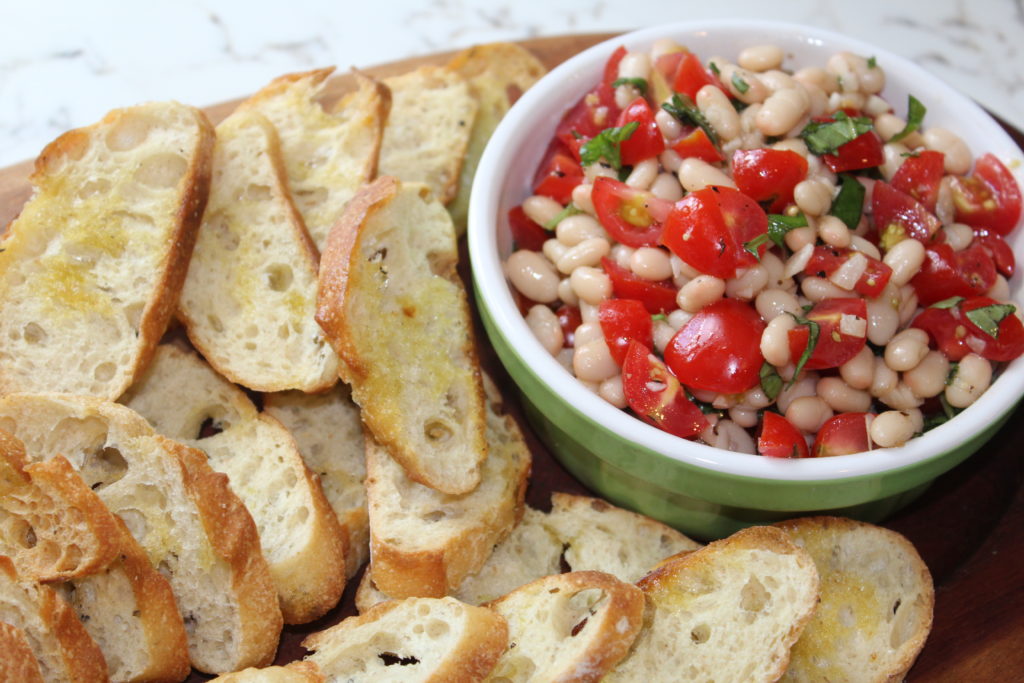
Finally, when ready to serve, ladle the soup into a bowl, sprinkle with freshly grated cheese, and serve with a crusty bread or some homemade crostini and a simple salad.


Focaccia aka Tuscan Pizza

Focaccia is really just a scaled down version of pizza. Although I would define this more as a flavored flatbread, you can call it what you wish. However, please, do yourself a favor and just try this! The toppings on a focaccia are not the main focus, though they do impart wonderful and essential flavorings. The highlight here is on the simplicity of the bread itself. And isn’t that what we all love about authentic Italian food? Using the best ingredients you can find, use very few of them and then produce an insanely tasty product. Well, my friends, this recipe hits that spot. I think you will fall in love, with your first bite.

To keep things really simple, you could go to a good pizza spot and buy their dough. Alternatively, you can use my  pizza dough recipe, which is super quick, easy and reliable. Please note, that this is not a big, fluffy, piece of bread. Therefore, there are many options when serving. For example, it is wonderful as a stand-alone snack or served alongside a meal. Additionally, and my personal favorite, I prefer it sliced thinly and served as an appetizer, with cocktails.

focaccia ingredients

INGREDIENTS
1 round of dough
4-5 small shallots, thinly sliced
8-10 kalamata olives, pitted and halved
3-4 sprigs fresh rosemary, stripped from stems
1/2 tsp. each, kosher salt and fresh ground pepper
pinch of crushed red pepper
5 Tbs. extra virgin olive oil
1/2 tsp. Maldon salt

DIRECTIONS
Preheat oven to 425º
In a small bowl, combine the shallots, rosemary, 3 1/2 tablespoons of the oil, salt and pepper. Mix well, breaking up the shallot rings and set aside. Meanwhile, preheat a 12″ cast iron skillet (or any heavy, ovenproof skillet) either on top of the stove or in the preheating oven. Next, roll out the pizza dough to approximately a 10″ round.

focaccia

Then, when the skillet is hot, remove from the heat and add the remaining 1-1/2 tablespoons of oil. When the oil is shimmering, carefully lay the rolled-out dough in the pan. Finally, using your fingertips, make multiple indentations in the dough and spread the shallot mixture on top. Bake in the upper third of the oven for about 20-25 minutes or until browned on top. Finally, remove from the oven, immediately add a sprinkling of the Maldon salt and let cool for about ten minutes, before slicing.

focaccia


Roasted Acorn Squash

With heartwarming flavor and ease in preparation, acorn squash is a great fall favorite. Maybe part of the draw in becoming a fall favorite, is the fact that there is no peeling required and therefore, this makes it a terrific choice for a quick, weeknight veggie.

Besides acorn and delicata, you can use any type of winter squash in this recipe. However, while the flavors are all wonderful, remember that the other squashes will need peeling and therefore will take a bit more prep  time.

INGREDIENTS
1 acorn squash, seeded and sliced (no need to peel it)
1-2 Tbs. olive oil
1 Tbs. maple syrup (the real stuff please…it does make a difference!)
several sprigs of fresh thyme, save a little for garnish
kosher salt & fresh ground pepper, to taste

DIRECTIONS
Preheat oven to 400°
Besides being delicious,  winter squashes can be tricky (and dangerous!) to cut. Using a good, sharp knife, cut the squash in half and scoop out the seeds. Then, put the flat side down on the cutting surface, slice the squash into about 1/2″ pieces. Drizzle with the olive oil, maple syrup, sprinkle the thyme sprigs, salt and pepper. Finally, toss to coat and spread out in an even layer. Make sure there is room between the pieces, because you want them to roast and not steam.

Roast in the oven for about 20-40 minutes (depending on the size of your chunks), checking frequently and yes, do flip to ensure even browning. Check for doneness by pricking the squash with a fork or small knife and if it’s tender and falls off easily, then it’s ready.

Serve with the remaining sprigs of thyme as a garnish. In addition to the thyme, I often use rosemary as well and I’m never disappointed. It just adds another depth of flavor.

Additionally, if you like fall vegetables, you might want to try Roasted Root Vegetables.


Sautéed Cherry Tomatoes

Have an overabundance of cherry tomatoes and need a quick, tasty vegetable? Then you will love this recipe. I hope it will become a staple in your “get it on the table quickly” lineup. Even if some of your tomatoes have started to shrivel, don’t despair, they will still taste delicious! Although it is a quick weeknight veggie, it is also a great choice for company meals and goes well with almost any meat or fish dish.

INGREDIENTS
assortment of heirloom cherries or what you have on hand (half them if they are on the large size)
small drizzle of extra virgin olive oil
kosher salt
fresh ground pepper
fresh flat leaf parsley, chopped
fresh basil, julienned

DIRECTIONS
Preheat skillet on medium heat, add the oil, tomatoes, salt and pepper. Sauté for 2-3 minutes or until tomatoes are blistered. Then, take off the heat and add the herbs, toss to coat, check for seasonings and serve.

That’s it…easy, tasty and healthy. Give it a try and let me know how you like it.

VARIATIONS
Although I prefer the simplicity of the recipe as is, you could certainly add some extras if you wish. Some of the add-ins that I have tried are toasted pine nuts, sliced shallots, a minced garlic clove and/or crumbled cheese. All with great results. However, you don’t have to stop there, get creative and let me know your favorites.


Sautéed Salmon with Leeks and Tomatoes

Lately I have been trying to focus a bit more on healthy meals. Ironically, in the mail last week, was a recipe from a very good friend, who also happens to be an incredibly good cook. She sent me this to try and promised it was not only delicious, but a snap to make and of course quite healthy.

Now, it’s not that I don’t trust her, but I have not been the biggest fan of salmon. Although I do try to have it occasionally because I know it is so good for you. So for you Marty, I made it tonight and you were spot on, I loved it and I highly recommend it. Sometimes you just have to go on good faith and trust that good friends won’t disappoint!

PS, a little update since I first posted it back in 2018, this has definitely become one of my all-time favorite quick, healthy meals.

INGREDIENTS
4 boneless salmon fillets
kosher salt & fresh ground pepper, to taste
1 leek, well trimmed, white part only
1 pint cherry tomatoes
3 Tbs. olive oil
2 Tbs. lemon juice
2-3 Tbs. julienned fresh basil or flat leaf parsley

DIRECTIONS
The salmon should be at room temperature, check for bones (remove with tweezers if you find any) and sprinkle with salt and pepper. After trimming the leek, slice down the middle, submerge in a bowl of water and swish around to rinse away any sand particles. Then, remove from water, pat dry with a towel, slice into thin strips and finely chop. You should have at least 1/3 cup. Slice the cherry tomatoes in half. I prefer to slice them on the diagonal, no particular reason, other than I think they look better on the diagonal.

leeks and tomatoes

Heat 2 Tbs. of the oil in a nonstick skillet over moderate heat and add the salmon, skin side up. Cook for 2-3 minutes before turning. Cook on the second side for 2-3 more minutes (depending on how well done you prefer) and then transfer to a warm platter. Add the remaining oil to the skillet, then add the tomatoes, leeks, salt, pepper and lemon juice. Cook for 2-3 minutes, pour the mixture over the salmon, sprinkle with the basil and serve.

This is so quick, easy and tasty. Please give it a try and let me know how you like it.


Tomato, Basil and White Bean Salad

Super quick, incredibly tasty, versatile (use as an appetizer with crostini or a side dish) and eye catching as well. Definitely a winning combination, that never disappoints!

INGREDIENTS
1 can navy beans or other small beans, drained, rinsed
1/2 lb. plum or cherry tomatoes, cut into small dice
1/2 tsp. kosher salt
freshly ground pepper
1/4 cup extra virgin olive oil
2 small cloves garlic, minced
generous portion of basil, julienned

DIRECTIONS
First, combine the beans and the tomatoes in a bowl. Then, season them with kosher salt, fresh ground pepper and set aside.

Next, heat the oil in a skillet, over medium heat. Add the garlic and stir until fragrant, but not browned, for about 1-2 minutes. You are just looking to infuse the oil with the garlic flavor.

Pour the warm garlic oil over the bean, tomato mixture and let stand for about 30 minutes. This will allow the flavors to meld. Finally, add the basil, toss to combine and serve with homemade crostini or crackers and serve as an appetizer. However, this can be served as a yummy side dish. It pairs quite well with any grilled meat or poultry dish. In addition, this can be kept at room temperature for several hours.

At first glance, this seems too simple to be so good. However, trust me, this really is amazingly tasty and it will soon become a favorite.


Greek Chicken Orzo Soup

Fabulous, light soup that is incredibly quick to make and good for any time of year. Wonderful and comforting, when feeling sick or recovering from a bug, it’s light on the stomach, yet filled with flavor.

INGREDIENTS
8 cups chicken stock
3/4 cup orzo
1 boneless, skinless chicken breast
2 eggs
1/4 cup fresh lemon juice
1 Tbs. lemon zest
salt & white pepper to taste
fresh parsley, chopped for garnish

DIRECTIONS
In a large saucepan, bring the stock to a boil. Reduce heat to medium-low, add the orzo and cook uncovered for about 10 minutes. Add the chicken after about five minutes and poach for about 5-7 minutes, until done. Remove chicken breasts, shred with two forks and return to pot.

Place the eggs in a mixing bowl. Whisk continuously while adding the lemon juice. Stir in the zest. Whisking continuously, slowly pour a ladleful of the hot stock into the eggs, this tempers the mixture so you don’t end up with scrambled eggs in your soup!

Turn the heat off and while whisking the soup in the pan, slowly pour in the egg mixture. The soup will thicken slightly. Don’t worry if the mixture separates, it still tastes delicious. I do find if I take the soup off the heat and let it sit for 5 minutes or so, that it is much less likely to separate.

Season to taste with salt and white pepper. Remove from the heat, ladle into bowls and garnish with the chopped parsley.